Quick Answer
If Premiere Pro noise reduction is not working, the problem is usually one of five things: you are looking in the wrong place, the clip is not tagged as Dialogue, the tool is being pushed too hard, the noise type is beyond what Premiere handles well, or a track-level effect is behaving inconsistently.
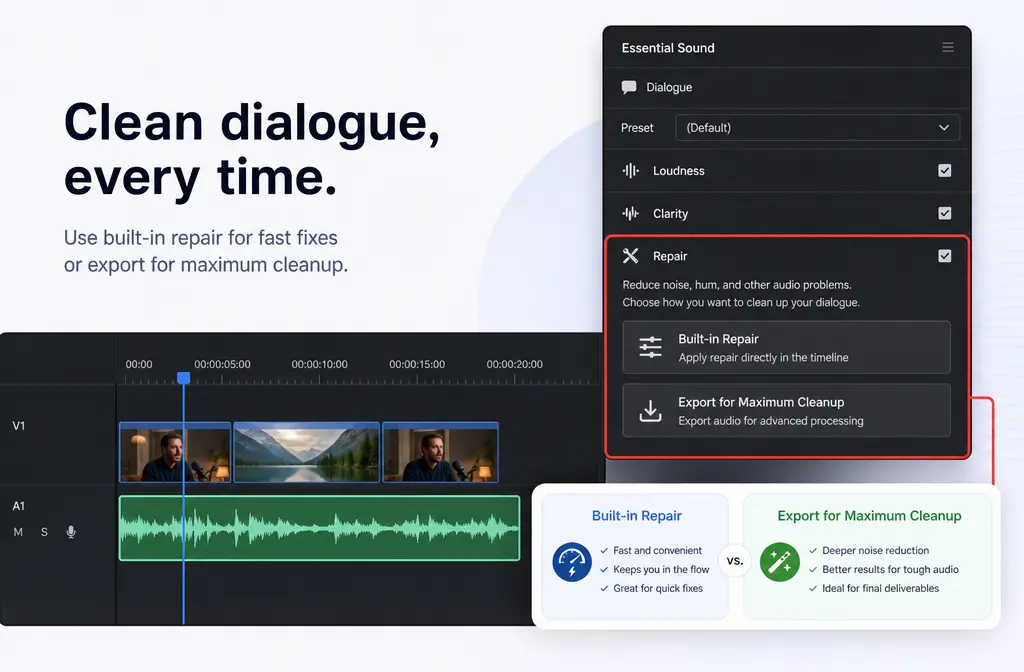
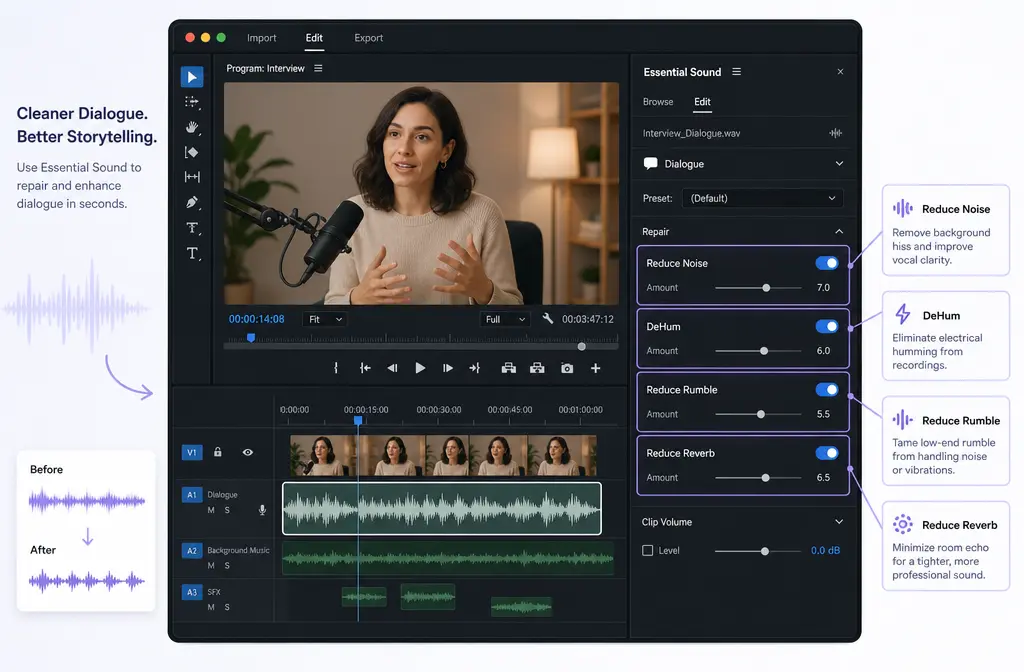
In current Premiere Pro versions, dialogue cleanup mainly lives in Essential Sound > Dialogue > Repair, with controls such as Reduce Noise, Reduce Rumble, DeHum, DeEss, and Reduce Reverb, plus Enhance Speech for AI-based voice cleanup. Adobe’s help pages confirm that this workflow depends on assigning the clip type correctly before the right controls appear.
- Reduce Noise missing? Open Essential Sound and tag the clip as Dialogue.
- Enhance Speech not available? Make sure you are working with dialogue and looking in the current speech-repair workflow, not older effect bins.
- No audible change? Solo the clip, compare before/after, and remove competing effects while testing.
- Robotic or metallic voice? Lower Reduce Noise or Enhance Speech amounts and fix hum or rumble separately.
- Track denoise stops working? Test the same repair at clip level, render audio, and check workspace, preferences, and audio hardware.
- Wind or heavy echo? Premiere is better at moderate, steady dialogue noise than severe outdoor wind, overlapping voices, or heavy room reverb.
If you already have an exported file and Premiere keeps sounding artificial, clean exported dialogue with SimpleClean instead of endlessly re-tweaking sliders inside the timeline.
Quick diagnosis: what “not working” usually means
| Symptom | Most likely cause | Best first fix |
|---|---|---|
| Reduce Noise missing | Clip not tagged as Dialogue, wrong panel, or looking for older effects | Open Essential Sound, select clip, assign Dialogue |
| Enhance Speech not available | Wrong workflow or unsupported expectation about where the tool lives | Use the current dialogue repair workflow and check the clip selection |
| Noise reduction does nothing | Noise is too inconsistent, effect is subtle, or other effects are masking it | Solo the clip, bypass other effects, test small changes |
| Voice sounds robotic | Too much Reduce Noise or Enhance Speech, or stacked aggressive repair | Back off the amount and treat hum, rumble, and reverb separately |
| Denoise stops working on a track | Track-level inconsistency, playback/render issue, or project-specific behavior | Try clip-level repair, render audio, reset workspace or preferences |
| Export sounds wrong | Playback vs render inconsistency or overprocessed settings | Compare export to source and simplify the chain |
| Wind or echo remains | Noise type exceeds Premiere’s natural repair range | Use a lighter repair pass or switch to dedicated exported-file cleanup |
What users usually mean by “noise reduction” in Premiere Pro
A lot of searches for this issue mix up two different problems:
- Audio noise reduction: cleaning hiss, HVAC, hum, rumble, or light room reverb from spoken dialogue.
- Video noise reduction: reducing visual grain or image noise.
That confusion is old and persistent. Adobe community threads show users searching the Effects panel for a missing “Reduce Noise” item or looking in obsolete bins, even though their real issue is dialogue cleanup, not video grain reduction. If your problem is voice noise, you should think in terms of Essential Sound dialogue repair, not a generic denoise effect hidden somewhere in the Effects list.
Where Premiere Pro’s current speech-cleanup tools actually live
According to Adobe’s documentation, the main built-in workflow is:
- Select the audio clip.
- Open Essential Sound.
- Assign the clip type as Dialogue.
- Use Repair controls such as Reduce Noise, Reduce Rumble, DeHum, DeEss, and Reduce Reverb.
- Use Enhance Speech when you want AI-based speech enhancement rather than only basic repair sliders.
This is the first place to look if you expected an old “Denoise” workflow and cannot find it. Adobe’s current help pages emphasize clip classification and dialogue repair inside Essential Sound, not a legacy hunt through effect folders.
Why Reduce Noise or Repair controls may be missing
1. The clip is not tagged as Dialogue
This is the most common reason. Adobe’s Essential Sound workflow depends on classifying the selected audio. If the clip is not marked as Dialogue, the dialogue-specific repair controls may not show up the way you expect.
2. You are in the wrong panel
Users often search in the Effects panel, old tutorials, or outdated forum answers. For current speech cleanup, start in Essential Sound, not by assuming the control must exist as a separate legacy effect.
3. You are expecting an older or obsolete effect
Community posts show that “Where did Denoise go?” is often really “I expected an older effect name or location.” The practical fix is to stop chasing obsolete labels and use the current dialogue repair workflow.
4. You are confusing audio denoise with video noise tools
If you are in a Noise and Grain area or visual effects list, you may be solving the wrong problem entirely.
How to fix “noise reduction does nothing”
If Premiere lets you apply repair but you hear almost no difference, do this in order:
- Solo the problem clip. Tiny changes are hard to hear against music, room tone, or other speakers.
- Compare before and after. Toggle the repair on and off while listening on headphones.
- Bypass competing effects. Heavy EQ, compression, or other cleanup tools can hide what Reduce Noise is doing.
- Work in small amounts. Third-party guides and Adobe docs both imply moderation matters. If you jump straight to extreme settings, you may miss the useful middle ground.
- Check the type of noise. Premiere works best when the unwanted sound is fairly steady, like low HVAC hiss or mild hum.
Good candidates for built-in Premiere repair usually include:
- Light background hiss
- Steady HVAC noise
- Mild electrical hum
- Low-end rumble
- Light sibilance
- Moderate room reverb
Hard cases include:
- Strong wind bursts
- Heavy echo
- Multiple overlapping voices
- A voice recorded too far from the mic
- Noise that changes constantly
If the audio is already exported and you need a quick rescue instead of a long repair session, remove background noise from the finished file with SimpleClean and compare the result to Premiere’s built-in tools.
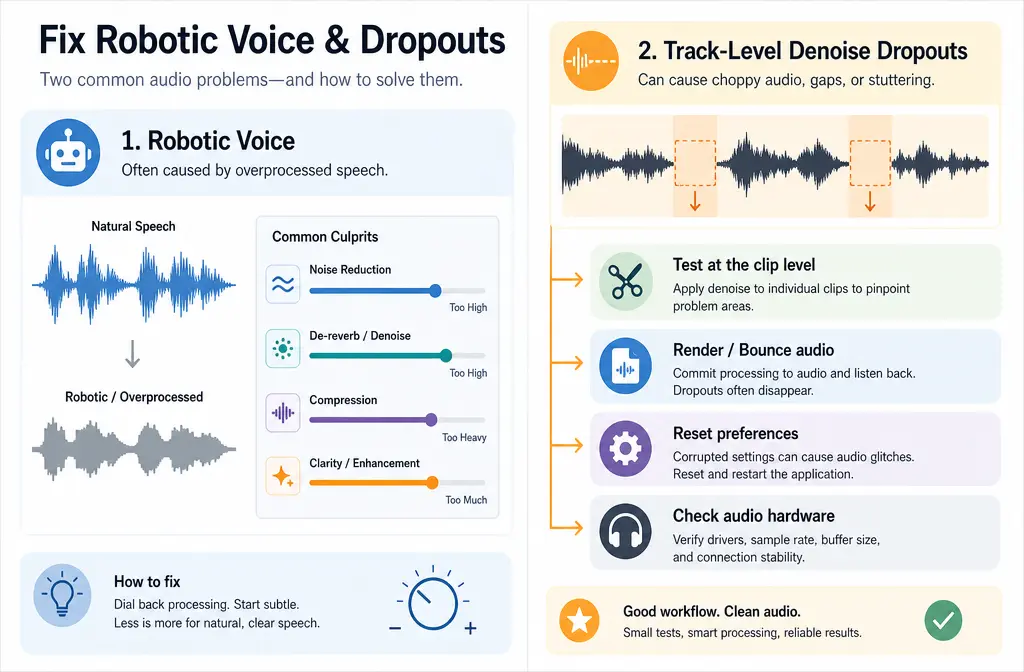
How to fix robotic or metallic voice
If Premiere is technically reducing noise but the result sounds fake, metallic, watery, or robotic, the issue is usually too much processing, not too little.
Try this safer order:
- Use Reduce Rumble for low-end problems first.
- Use DeHum for power or electrical hum.
- Add only a moderate amount of Reduce Noise.
- Use Reduce Reverb only if room reflections are clearly part of the problem.
- If using Enhance Speech, keep the mix or amount conservative and compare against the original.
This matters because stacking aggressive repair tools can create the exact “robotic voice” complaint that sends people searching for a fix. Hollyland and Music Radio Creative both frame cleanup as a balance: enough repair to improve intelligibility, but not so much that the speaker stops sounding natural.
Best-for guidance:
- Use Reduce Noise for steady background noise behind otherwise usable dialogue.
- Use Enhance Speech when the voice needs broader speech-focused cleanup and clarity help.
- Do not max both together first. That is a common path to metallic artifacts.
How to fix track denoise stops working or drops out
Adobe community reports show that some users still run into inconsistent behavior when denoise-style processing is applied at the track level rather than directly to a clip. If the effect works for a while and then seems to vanish, use a troubleshooting-first approach instead of assuming the source audio changed.
- Test the same repair on the clip itself. If clip-level repair works reliably, keep the cleanup there for the affected audio.
- Render audio. This can help separate playback issues from actual processing failure.
- Reset the workspace or preferences. Adobe community experts specifically mention this as a useful troubleshooting step.
- Check Audio Hardware settings. Intermittent monitoring or playback issues can look like the denoise stopped working when the deeper issue is elsewhere.
- Try a project-specific sanity check. Duplicate the sequence or test a fresh project with one problematic clip.
If the issue only appears on an audio track effect chain, one practical workaround is to keep the repair at the clip level and finish the rest of your mix afterward.
Enhance Speech vs Reduce Noise: what is the difference?
| Tool | Best for | Main risk |
|---|---|---|
| Reduce Noise | Steady background hiss or room noise behind dialogue | Can dull or artifact the voice if pushed too far |
| Enhance Speech | Broader speech-focused cleanup and polish | Can sound artificial if overused |
| Reduce Rumble | Low-frequency vibration or handling noise | Can thin out the voice if overapplied |
| DeHum | Electrical hum | May not solve non-hum noise |
| Reduce Reverb | Light to moderate room reflections | Can create unnatural texture on heavily reverberant audio |
Short version: Reduce Noise targets background noise more directly, while Enhance Speech is a more overall AI speech-improvement tool. If one sounds unnatural, do not assume more is better.
Better workflow order for speech in Premiere
One reason users think Premiere noise reduction is broken is that they try to solve every audio problem with a single slider. A cleaner workflow is:
- Classify the clip as Dialogue.
- Apply Repair tools first.
- Then do EQ and dynamics.
- Finish with loudness adjustments.
This order matches the logic used in Adobe’s Essential Sound system and the stronger competitor tutorials: repair the recording first, then shape the tone and level. If you compress or brighten a noisy recording before repair, you may make the noise more obvious.
What Premiere can handle well vs poorly
Usually worth fixing inside Premiere
- Mild hiss
- HVAC noise
- Light hum
- Light rumble
- Light reverb
Often a poor fit for natural-sounding results
- Severe wind noise
- Heavy room echo
- Multiple speakers talking over each other
- Very damaged or distant dialogue
If your recording falls into the second list, the problem is probably not that Premiere is malfunctioning. It is that the recording asks more of the tool than it was likely meant to do naturally.
When to leave Premiere and use a fallback
If you already exported the clip, are working fast, or keep getting artificial voice texture, a separate cleanup pass may be the better workflow. SimpleClean makes sense when:
- You have a finished file and do not want to re-open a complex timeline
- Premiere repair is technically working but sounds unnatural
- You need a quick speech rescue for a podcast, lesson, talking-head video, or social clip
After cleanup, you can also add subtitles with Best AI Captions, create multilingual versions with Translate Dub, and distribute the finished content across social channels with Mallary.ai if your team is repurposing cleaned video into clips, posts, and scheduled campaigns.
Best-for recommendations
- Best for editors who want to stay fully inside Premiere: Essential Sound dialogue repair with conservative settings.
- Best for mild hiss, hum, and HVAC: Reduce Noise, DeHum, and Reduce Rumble in small amounts.
- Best for broader AI dialogue polish: Enhance Speech, used carefully.
- Best for severe wind or ugly exports: an exported-file cleanup workflow such as remove wind noise with SimpleClean.
Step-by-step: the fastest fix workflow
- Select the problem audio clip.
- Open Essential Sound.
- Assign the clip as Dialogue.
- Open Repair.
- Start with the most specific fix first: rumble, hum, noise, or reverb.
- Use small adjustments and compare before/after.
- If using Enhance Speech, keep the amount moderate.
- Bypass other audio effects while testing.
- If track effects are unstable, move the repair to clip level and render audio.
- If the result still sounds artificial, export and clean the file separately.
For related troubleshooting, you may also want to read Adobe Podcast Enhance Speech not working, how to remove background noise in Streamlabs Desktop, and OBS noise suppression not working.
Final takeaway
Most “Premiere Pro noise reduction not working” cases are not true failures. They are usually missing Dialogue classification, wrong-panel confusion, overly aggressive settings, track-level inconsistency, or unrealistic expectations about wind and echo repair. Premiere can do a solid job on moderate, steady dialogue noise, but it is not a miracle fixer for every bad recording.
If you want the shortest path: check Essential Sound, tag the clip as Dialogue, use Repair tools conservatively, test clip-level instead of track-level if behavior is inconsistent, and switch to clean speech audio with SimpleClean when the exported file needs a faster, more natural rescue.
Sources and further reading
- Adobe Help — Repair dialogue in Premiere - Primary source for current Essential Sound Repair controls and what each slider is meant to fix.
- Adobe Help — Edit audio with Essential Sound panel in Premiere - Primary source for current clip classification flow and why Dialogue tagging matters.
- Adobe Help — Enhance speech in Premiere - Primary source for current AI speech enhancement workflow and Mix Amount control.
- Adobe Community — Reduce noise effect not available in Noise and Grain folder - Evidence of persistent user confusion between missing legacy or obsolete items and current tools.
- Adobe Community — Denoise filter applied to a track stops working - Source for track-level inconsistency complaints and Adobe-expert troubleshooting ideas such as clip-level testing, preferences reset, and rendering audio.
- Music Radio Creative — How to Remove Background Noise in Premiere Pro - Third-party benchmark for practical denoise and de-reverb workflow, including quality tradeoffs.
- Hollyland — How to Clean Up Audio in Premiere Pro - Third-party benchmark for workflow order, repair framing, and common artifact warnings.