Quick Answer
If Audacity noise reduction is not working, the cause is usually one of five things: you did not follow the two-step profile workflow, your noise-only sample was poor, you forgot to reselect the audio you want to clean, the top Noise Reduction (dB) amount is too low or even at 0, or the sound you are trying to remove is not the kind of steady background noise Audacity handles well.
Audacity’s Noise Reduction effect works best on constant noise like hiss, fan noise, HVAC, hum, and buzz. It usually struggles with changing noise like traffic, keyboard clicks, crowd noise, background speech, music bleed, and strong room echo. If the voice turns watery or robotic, the settings are probably too aggressive.
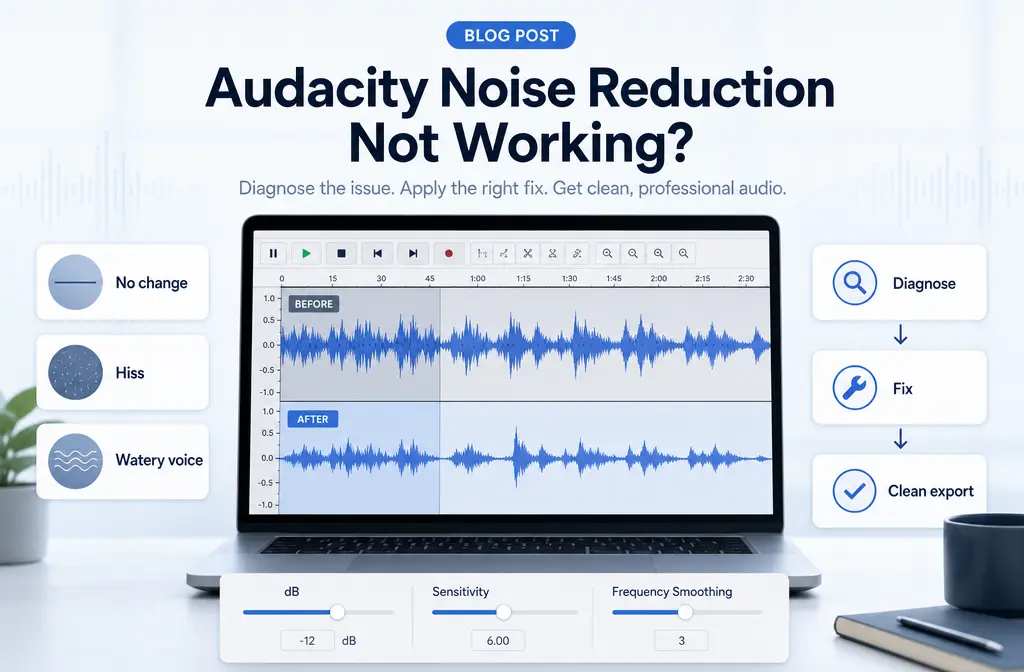
For spoken voice, a safe starting point is the commonly suggested Audacity baseline of Noise Reduction 12 dB, Sensitivity 6, Frequency Smoothing 3, then backing off if artifacts appear. If the problem is mains hum, use Notch Filter first. If noise is mostly audible only in pauses, use a gentler Noise Reduction pass and add Noise Gate after instead of pushing denoise harder.
| Symptom | Most likely cause | What to do |
|---|---|---|
| No audible change | Skipped the 2-step workflow, wrong selection, or dB amount too low/0 | Get Noise Profile from a noise-only sample, reselect the target audio, then apply Noise Reduction with a meaningful dB value |
| Too little change | Weak or unrepresentative profile | Capture a longer, cleaner noise-only sample from the same recording |
| Watery/robotic voice | Too much reduction or sensitivity | Lower Noise Reduction and/or Sensitivity, then preview again |
| Speech getting damaged | Trying to remove non-steady noise or overprocessing | Use gentler settings, or stop and switch tools if the noise overlaps the voice |
| Hiss still there | Settings too gentle or noise profile too short | Retake profile, increase reduction slightly, avoid overdoing it |
| Hum still there | Wrong tool for mains hum | Use Notch Filter first on 50/60 Hz and harmonics, then Noise Reduction |
If Audacity keeps ruining the voice while leaving the noise, it is often faster to export the file and clean podcast audio with SimpleClean instead of forcing one more destructive pass inside the timeline.
Why Audacity noise reduction seems broken
Audacity’s effect is not a one-click remover. According to the Audacity support docs and manual, it is a two-step process:
- Select a section that contains only the unwanted noise and click Get Noise Profile.
- Select the audio you actually want to clean, reopen the effect, and apply the reduction.
If either step is missed, Audacity can appear to do nothing. The Audacity forum also shows a real-world example where the effect seemed nonfunctional because the main Noise Reduction (dB) amount had effectively been set to 0.
Just as important, the manual explains that stronger settings increase the risk of artifacts. So sometimes users interpret “not working” in two opposite ways:
- Nothing changed at all.
- The noise changed, but the voice became worse.
This guide handles both.
30-second diagnosis: what your symptom usually means
1. Audacity noise reduction does nothing
Check these first:
- You selected a noise-only section before clicking Get Noise Profile.
- You then reselected the actual clip or region you want to process.
- The top Noise Reduction (dB) control is not at 0 or near-zero.
- You are previewing the processed audio, not the original.
2. Audacity noise removal barely helps
Your noise profile may be too short, too mixed with speech, or not representative of the actual background noise across the recording. The manual indicates a longer representative noise-only sample is better.
3. The voice sounds underwater, metallic, or robotic
This usually means the denoise is too aggressive. The Audacity manual specifically warns that higher settings can create distortion and artifacts. Back off the reduction and sensitivity before doing anything else.
4. Audacity removes hiss but damages speech
That usually means the noise overlaps too much with the voice, or the profile is contaminated with speech. It can also mean you are trying to clean a type of sound the effect is not meant to remove well, such as nearby voices or traffic.
5. The hiss is still there
Try a better profile first, not just stronger settings. If you jump straight to heavier reduction, you may trade a little hiss for a much worse voice.
6. The hum is still there
For mains hum or whistle, Audacity’s own guidance is to use Notch Filter before Noise Reduction. That is usually more effective than pushing denoise harder against a 50 Hz or 60 Hz problem.

How Audacity Noise Reduction actually works
The effect learns the frequency pattern of the background noise from the sample you provide. It then tries to reduce similar content in the selected audio. That is why a clean, representative profile matters so much.
It also explains why Audacity works better on steady, repeating noise than on changing events.
What Audacity usually removes well
- Steady hiss
- Fan noise
- HVAC/air conditioner noise
- Electrical hum
- Buzz
What Audacity usually does not remove well
- Traffic that changes over time
- Keyboard clicks
- Overlapping voices
- Music bleed
- Crowd noise
- Strong room echo or reverb
- Wind bursts
If your problem lives in that second list, the issue may not be that Audacity is broken. The issue may be that the noise source is a poor match for this particular tool.
The most common mistakes that make Audacity noise reduction not working
No clean noise-only sample
If your profile includes voice, Audacity may treat parts of the voice as noise and damage it later. Find a section with only the background sound.
Forgetting to reselect the target audio
This is one of the most common workflow errors. Get the profile from the noise-only section, then select the audio you actually want to clean.
Top dB amount too low or set to 0
This is a known reason the effect can appear to do nothing. If the Noise Reduction amount is effectively zero, you will hear no meaningful change.
Using an unrepresentative profile
If the room tone changed, the mic moved, or the background noise is different in later sections, one profile may not fit the whole file well.
Trying to remove changing noise
Audacity’s docs and manual are clear on the basic limit: constant noise is easier; irregular, moving, or overlapping sound is much harder.
Expecting settings to persist across launches
The manual notes that you need a new noise profile each new launch. So if you reopen Audacity later, do not assume the earlier learned profile is still available.
Starter settings for spoken voice
The Audacity feature page provides a practical starting point for spoken audio:
- Noise Reduction: 12 dB
- Sensitivity: 6
- Frequency Smoothing: 3
Use those as a baseline, not a rule.
If there is no audible change
- Confirm the two-step workflow
- Retake the noise profile
- Check that Noise Reduction is not near 0
- Make sure you selected the right audio before applying
If the result is watery
- Lower Noise Reduction first
- Then lower Sensitivity if needed
- Preview repeatedly instead of committing to a big jump
If hiss remains but the voice still sounds natural
That can be a better tradeoff than chasing a perfectly silent background. Spoken-word cleanup often sounds more professional with a trace of room tone than with heavy digital artifacts.
When to use Notch Filter first
If the problem is a mains hum, Audacity’s documentation recommends using Notch Filter before Noise Reduction. This matters for 50 Hz or 60 Hz hum and related harmonics. In plain English: take out the narrow hum first, then let Noise Reduction handle the broader steady noise that remains.
This is one of the biggest reasons users think Audacity noise reduction is not working on hum. They are using the right app but the wrong first tool.
When to add Noise Gate after Noise Reduction
If the background noise is mostly noticeable between phrases, the support docs suggest a different approach: apply a gentler Noise Reduction pass, then use Noise Gate so the noise drops away during pauses.
That is often better than cranking Noise Reduction until the voice gets watery.
Best for:
- Podcast speech with low-level room noise
- Voice tracks where pauses sound noisy
- Cases where the talking itself is mostly okay
Not ideal for:
- Noise that is loud under the voice the entire time
- Recordings with background voices or traffic

Best effect order for spoken-word cleanup in Audacity
Based on the Audacity manual and support guidance, this is the safest order for many voice recordings:
- Remove obvious tonal problems first, such as Notch Filter for hum or whistle
- Handle clicks if needed
- Apply Noise Reduction
- Use compression after noise reduction, not before
- Add Noise Gate after if pauses are still noisy
This order matters because compression before denoising can raise the background noise and make the cleanup job harder.
When Audacity is the wrong tool
Be honest with the recording. Audacity Noise Reduction is not a miracle fixer for every bad environment.
Usually worth trying in Audacity
- Steady laptop fan
- Low hiss
- Consistent AC noise
- Light electrical buzz
Usually a bad fit for this effect
- Street noise changing every second
- People talking in the background
- TV or music bleeding into the mic
- Boomy room echo
- Wind blasts on the mic
If you already exported the recording to WAV, MP3, M4A, or MP4 and Audacity keeps trading noise for artifacts, it is often faster to remove background noise from voice recordings with SimpleClean after export instead of repeatedly destructing the same track.
Best fallback by situation
| Situation | Best next move | Why |
|---|---|---|
| Steady hiss or fan | Stay in Audacity | That is what Noise Reduction handles best |
| 50/60 Hz hum | Notch Filter first, then Noise Reduction | Hum is more targeted with a notch |
| Noise only in pauses | Gentle Noise Reduction plus Noise Gate | Preserves the voice better |
| Background voices, traffic, music bleed | Switch to file-level cleanup | Those are weak fits for Audacity’s standard NR workflow |
| Need a fast cleaned export for publishing | Use a dedicated cleanup workflow, then publish | Less trial and error than manual effect passes |
Once your audio is clean, you can add subtitles with Best AI Captions, create multilingual versions with Translate Dub, and distribute clips or episode promos across multiple networks with Mallary.ai if your next step is publishing and promotion.
How to fix Audacity noise reduction not working step by step
- Find a noise-only section. Select a part of the recording that contains only the unwanted background noise.
- Get the profile. Open Noise Reduction and click Get Noise Profile.
- Reselect the target audio. Highlight the full clip or the region you want to clean.
- Start with spoken-word baseline settings. Try 12 dB, Sensitivity 6, Frequency Smoothing 3.
- Preview before applying. If the voice sounds metallic, back off the settings.
- Use Notch first if it is hum. For 50/60 Hz-type mains hum, do that before denoising.
- Add Gate only if pauses are the problem. Do not use Gate as a replacement for constant-noise cleanup.
- Compress after denoising. That follows the manual’s recommended order.
- Stop if the voice gets worse faster than the noise gets better. Export and use a file-level cleanup workflow instead.
Best for recommendations
Best for staying inside Audacity
Creators with steady hiss, fan, HVAC, or hum who can grab a good noise profile and do a few careful previews.
Best for switching away sooner
Podcasters, students, and video editors dealing with traffic, nearby voices, echo, or ugly artifacts after one or two passes. In those cases, SimpleClean is the practical fallback when you need cleaner exported speech without more timeline experimentation.
Best for a publish-ready workflow
Clean the file first, then add captions, translations, and distribution. That is where Best AI Captions, Translate Dub, and Mallary.ai fit naturally after the audio cleanup stage.
Related guides
- How to Fix OBS Noise Suppression Not Working
- How to Fix Premiere Pro Noise Reduction Not Working
- How to Remove Background Noise From Video Online
FAQ
Why is Audacity noise reduction not doing anything?
Usually because the two-step workflow was not completed, the wrong audio was selected when applying the effect, or the main Noise Reduction amount is too low or set to 0.
How do I get a proper noise profile in Audacity?
Select a longer, representative section that contains only the unwanted background noise and no speech. Then click Get Noise Profile before reselecting the audio you want to process.
What settings should I use for Audacity noise reduction on voice?
Audacity’s feature page suggests a practical starting point of 12 dB Noise Reduction, Sensitivity 6, and Frequency Smoothing 3 for spoken voice. Adjust downward if artifacts appear.
Why does Audacity make my voice sound underwater?
That is a classic sign of overprocessing. Lower the Noise Reduction amount and possibly Sensitivity, and avoid using the effect aggressively on changing noises or overlapping sounds.
Can Audacity remove traffic or background talking?
Usually not well with standard Noise Reduction. Audacity works best on steady background noise, not irregular sounds like traffic, crowd noise, or nearby voices.
Should I use Noise Gate or Noise Reduction in Audacity?
Use Noise Reduction for steady background noise. Use Noise Gate after gentler noise reduction when the noise is mainly noticeable in pauses between speech.
How do I remove 60 Hz hum in Audacity?
Use Notch Filter first for the hum and its harmonics, then apply Noise Reduction if broader steady noise remains.
What should I do if Audacity ruins the voice but leaves the noise?
Stop increasing the settings. That usually means the noise is a poor fit for Audacity’s effect or the profile is bad. Export the file and use a separate cleanup workflow instead.
Sources and further reading
- Audacity Support: Noise reduction & removal - Primary support guidance for the two-step workflow, Residue preview, Noise Gate, and Notch Filter.
- Audacity feature page: Remove Background Noise from Audio - Source for simplified steps, starter settings, and supported noise types.
- Audacity Manual: Noise Reduction - Authoritative reference for parameter behavior, artifacts, representative profiles, new profile requirement, and effect order notes.
- Audacity Manual: Alternative Noise Reduction Techniques - Supports switching to Gate, Notch Filter, and other approaches when standard Noise Reduction is the wrong tool.
- Audacity Forum: noise reduction not working [SOLVED] - Real troubleshooting case confirming that the top Noise Reduction dB control can make the effect seem broken when set too low or to 0.
- Audacity Forum: Noise Reduction just does not work - Shows ongoing user confusion around the exact 'not working' symptoms this article targets.