Let's be honest—distracting background noise can completely torpedo an otherwise great video. Thankfully, the quickest fix is to remove noise from video online free using a modern AI tool, which usually only takes a few clicks. Audiences are far more likely to forgive subpar video quality than they are to put up with bad audio, making this a critical step in any creator's workflow.
Why Clear Audio Is Your Video's Secret Weapon
Picture a travel vlogger trying to narrate a scene while battling relentless wind noise. Or an online instructor whose every word is undermined by a humming air conditioner. Maybe it's a crucial remote meeting where city traffic drowns out every other sentence. These aren't rare scenarios; they're everyday problems that kill engagement and make your content feel amateurish.
No matter how brilliant your message is, it gets lost in the static. I've seen it time and time again: viewers will click away from bad audio much faster than they will from slightly grainy visuals. This is where easy-to-use, browser-based tools come in, giving you the power to get professional-sounding results without needing expensive software or a degree in audio engineering.
The Growing Demand For Clean Audio
The need for crisp, clear audio isn't just a hunch; it’s a massive technological trend. The global background noise reduction software market was valued at USD 2.31 billion in 2025 and is projected to surge to an incredible USD 45.02 billion by 2034. This explosive growth just goes to show how vital clean audio has become for creators, businesses, and educators.
This shift isn't surprising. As more of our communication and content creation moves online, the bar for audio quality has been raised significantly. What might have been acceptable a few years ago is now an immediate distraction.
Identifying Your Audio Saboteurs
Before you can fix the problem, you need to know what you're actually up against. Different noises require different approaches, and being able to identify them is the first step toward cleaner sound.
Here’s a breakdown of the most common culprits that can sabotage your video’s audio quality.
Common Types Of Background Noise And Their Impact
| Noise Type | Common Sources | Impact On Viewer Experience |
|---|---|---|
| Environmental Noise | Wind, traffic, sirens, birds, people talking | Makes dialogue hard to follow and distracts from the main content. Can make outdoor scenes feel chaotic rather than immersive. |
| Appliance Hum | Refrigerators, air conditioners, fans, computer hum | Creates a low, constant drone that can cause ear fatigue and make the audio feel muddy and unprofessional. |
| Digital Artifacts | Clicks, pops, electronic static, buzzing from cables | These sharp, jarring sounds can be incredibly distracting and immediately signal low production quality to the viewer. |
| Reverb & Echo | Hard surfaces in an empty room, poor microphone placement | Makes the speaker sound distant and hollow, which can create a disconnect with the audience and make the audio difficult to understand. |
Recognizing these specific issues in your own recordings is key. Once you know you're dealing with a persistent AC hum versus unpredictable traffic noise, you can better judge how well a noise reduction tool is performing.
Key Takeaway: A critical part of achieving clear audio is ensuring your initial recording is as strong as possible. Even the best AI tool can struggle to rescue audio that's too quiet or distorted from the start.
Sometimes, the core issue isn't just the background noise but a weak microphone signal. If your audio is recorded at a very low level, the noise removal process might have a hard time distinguishing your voice from the noise floor. It's often a good idea to first learn how to increase mic volume before you apply any filters. This gives the AI a much cleaner, stronger signal to analyze and work with.
A Practical Workflow for Cleaning Up Your Video's Audio
Forget overly technical manuals. Getting clean audio from a noisy video file is less about following a rigid set of rules and more about a simple, common-sense workflow. I'm going to walk you through the exact process I use to get great results fast, without getting bogged down in menus and settings.
First, a Quick File Health Check
Honestly, most of the headaches I see people run into happen before they even upload anything. A quick two-minute check on your video file can save you a ton of frustration.
Most online tools, including SimpleClean, are pretty flexible, but it pays to stick to the basics. Make sure your video is in a standard format like MP4, MOV, or AVI. While some platforms might accept more obscure formats, these are the universal standards and will almost always work without a hitch.
Next, glance at the file size and video length. Free tools almost always have limits—maybe a 1 GB file size or a 10-minute duration cap. Knowing this upfront prevents you from going through the whole upload process only to get an error message.
Getting Your File Uploaded
Once you know your file is good to go, the upload itself is usually dead simple. The best tools have a clean drag-and-drop interface. You literally just drag the video from a folder on your computer and drop it into your browser window.
This is exactly what you see on SimpleClean's homepage. It's clean and focused on one thing: getting your file in.
There are no distracting menus or a dozen options to choose from. When you just need to fix your audio, that's exactly the kind of streamlined design you want.
After you drop the file, the site takes over, securely uploading it for processing. This is your cue to step away for a minute. The heavy lifting is about to happen behind the scenes.
How the AI Actually Cleans Your Audio
This is where the magic happens. You don't have to be an audio engineer trying to pinpoint the exact frequency of an air conditioner hum or the annoying buzz from a refrigerator. The AI handles all of that for you.
So, what's really going on in the background? The algorithm has been trained on thousands of hours of audio, learning to tell the difference between the sound of a human voice and all the junk we want to get rid of.
It's a multi-step process:
- First, it analyzes the audio's waveform, identifying the sonic signatures of common background noises.
- Next, it intelligently separates the audio into layers, pulling the dialogue out from things like wind, traffic, or that persistent electronic hiss.
- Finally, it suppresses the noise layer while working hard to keep the primary voice sounding natural and clear.
This is so much more sophisticated than a basic noise gate or filter that just muffles everything. It's an intelligent process that surgically removes the bad stuff, which is why the results are so impressive compared to older, manual methods. The whole point is to make the voice sound like it was recorded in a quiet room, not like it's been digitally scrubbed.
A Quick Tip from Experience: AI does its best work when it has a decent signal to start with. If you can, always try to record with the mic as close to the speaker as possible. A clean original recording gives the AI a much better foundation to build on.
The Final Review and Export
Once the processing is done, you'll get to preview the cleaned-up video. This is the single most important step, and one you should never, ever skip. My number one rule here is to always listen with headphones.
Seriously. Your laptop speakers are terrible at revealing the subtle digital artifacts or "watery" sounds that can sometimes sneak in, especially if the original noise was really bad. Headphones will let you hear exactly what's going on and catch any issues immediately.
When you're happy with the result, you’ll usually have a couple of choices for exporting:
- Download a new MP4 file. This is the easiest option. The tool automatically marries your cleaned-up audio track back to the original video, perfectly in sync.
- Export a separate audio file (like an MP3 or WAV). This is perfect if you’re pulling the audio for a podcast or want to do more advanced editing in a different program.
For most people posting to YouTube or social media, the new MP4 is the ideal one-and-done solution. This whole workflow means you can go from a recording plagued with background noise to a polished, professional-sounding video in just a few minutes.
Finding the Best Free Online Noise Removal Tool for You
When you need to remove noise from a video online for free, sifting through all the options can be a real headache. But honestly, for most of us, it comes down to a few simple things: a generous free plan, quick turnaround, and great results without needing an audio engineering degree. You want a tool that just works, letting you get back to creating.
First thing I always look at? The fine print on the free tier. Some tools give you a tiny amount of time, maybe just a few minutes, while others cap your total usage for the month. Speed is another deal-breaker. If it takes a half-hour to clean up a five-minute clip, that’s just not practical for a busy workflow.
What Makes a Free Tool Genuinely Useful?
From my experience, the truly great free services nail three key things. If you keep these in mind, you can quickly spot which tools are worth your time.
- A Realistic Free Tier: Look for a service that gives you enough runway to actually get work done. For example, SimpleClean offers a full 60 minutes of processing time. That’s enough to handle a bunch of social media clips or even a longer video without bumping into a paywall.
- No-Fuss Workflow: The best tools are all about simplicity. You just want to upload your file, let the AI work its magic, and download the clean version. No confusing menus, no endless sliders to tweak.
- Solid Privacy: This one’s huge. You need to know what happens to your files. A clear policy, like SimpleClean's promise to permanently delete all files after seven days, gives you confidence, especially if you’re working on client projects or sensitive material.
This is the kind of simple, clean workflow you should be looking for. It really is that straightforward.
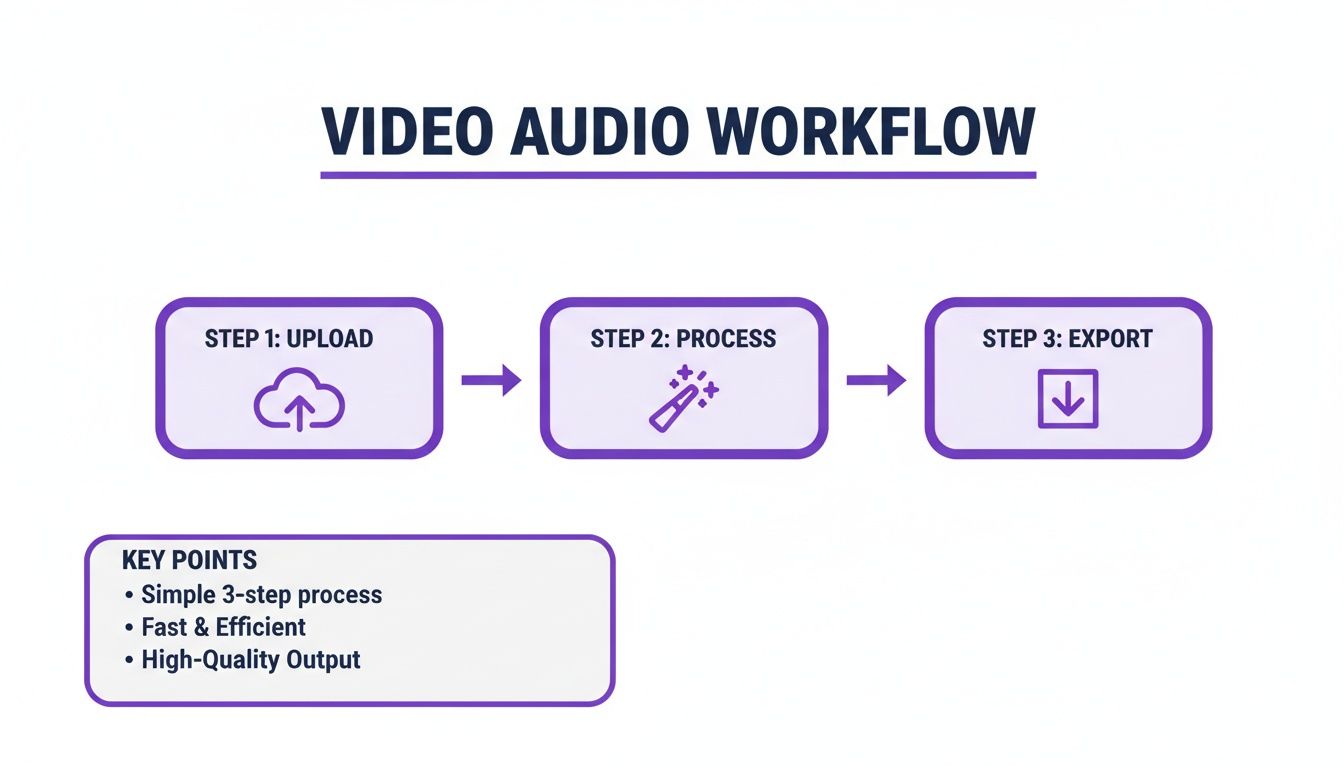
As you can see, the ideal process is just three simple moves: Upload, Process, and Export. Anything more complicated just slows you down.
Feature Comparison Of Free Online Noise Removal Tools
To help you see the differences at a glance, I've put together a quick comparison. It’s important to remember that a dedicated tool like SimpleClean, which is built only for audio enhancement, often delivers a more polished result for dialogue than an all-in-one editor where noise reduction is just an afterthought. For a broader look at different platforms, you might want to check out our guide on the https://simpleclean.app/blog/best-online-audio-editor options out there.
| Feature | SimpleClean | Competitor A | Competitor B |
|---|---|---|---|
| Free Tier Limit | 60 minutes/month | 10 minutes/month | 3 uploads/month (max 5 min) |
| File Deletion Policy | 7 days (Automatic) | Varies (User must delete) | 30 days (Automatic) |
| Primary Function | Audio Enhancement & Repair | General Video Editing | Transcription & Editing |
| Ease of Use | Very High (Upload & Go) | Moderate (Multiple menus) | High (Focused on text) |
This table makes it pretty clear—the limits and core purpose of a tool can dramatically change how useful it is for your specific needs.
The demand for these tools is exploding. The market for online audio noise reduction was already at USD 563 million in 2024 and is projected to climb to USD 961 million by 2032. This boom is all about content creators and remote workers needing high-quality audio without the hassle.
My Two Cents: Don't just read the feature list. The absolute best way to know if a tool works for you is to test it. Grab a short clip with that annoying air conditioner hum or background chatter and run it through your top two or three choices. Your own ears will tell you which one does the best job.
In the end, you’re looking for a reliable partner in your creative process. While some of the best AI video editing software tools include some form of noise reduction, a dedicated tool is almost always faster and more effective for a quick, high-quality audio fix. Find one with clear limits and a strong privacy policy, and you're good to go.
Pro Tips for Nailing Studio-Quality Audio
While using a tool to remove noise from video online free can feel like magic, the absolute best results come from a slight change in thinking. Instead of just cleaning up messes after the fact, you can take a few small steps during recording to give the AI a much cleaner track to start with. I like to call it "pre-cleaning" your audio.
The old saying "garbage in, garbage out" is especially true for audio. AI is incredibly powerful, but it's not a miracle worker. It's going to have a hard time salvaging audio that’s been severely distorted—like when a mic gets overloaded (a nasty sound known as clipping) or if the speaker's voice is muffled and distant from the get-go.
You don't need a pro studio to avoid this. Just focus on creating the best recording environment you can. It can be as simple as picking the quietest room in your house, shutting the windows to block street noise, and killing any humming fans or air conditioners before you hit record.
Optimize Your Recording Setup
A little bit of prep work makes a huge difference. Before you even start thinking about noise removal software, try these simple but incredibly effective adjustments.
Mind Your Mic Placement: Get your microphone as close to your mouth as you can without it sounding boomy or picking up harsh "popping" sounds. For most mics, 6-8 inches is the sweet spot. This simple trick makes your voice much louder than any background hum, giving the AI a clean, strong signal to isolate.
Grab a Pop Filter: This is a cheap, simple screen that you place in front of your mic, and it works wonders. It softens the harsh air blasts from "P" and "B" sounds (plosives), which adds an instant layer of professional polish to your recordings.
Soften the Room: Bare walls, hardwood floors, and big windows are your enemy. They create echo and reverb. You can easily absorb those sound reflections by recording in a room with a rug, curtains, or even just by temporarily hanging a few blankets on the walls.
These proactive steps are everything. Beyond any post-production fix, good audio starts with good recording habits. It’s worth taking the time to learn how to record presentations with professional-quality audio to build a solid foundation from the start.
Streamline Your Post-Production Workflow
If you're working on a project with a bunch of files—say, an online course or a podcast series—cleaning them up one by one is a recipe for a headache. This is where a smart workflow can save you hours. Look for tools that offer batch processing or have a simple, repeatable system.
When you're using a tool like SimpleClean, you can upload a whole folder of files at once and just get an email when they're done. It's a "set it and forget it" approach that lets you get on with your day while the AI does all the heavy lifting in the background.
The entire market for audio and video enhancers is blowing up right now, mostly thanks to huge leaps in machine learning. This growth tells us that clean, professional-sounding audio is no longer a nice-to-have; it's a basic requirement for creators. Discover more insights about the growing audio tech market. By adopting an efficient workflow, you can take full advantage of these incredible tools without letting them slow you down.
Working Around Common Pitfalls and Tool Limitations

When you discover you can remove noise from video online free, it’s easy to get carried away. But hitting a wall of unexpected limits can be frustrating. I've been there. The key is to go in with your eyes open, understanding that every free service has its boundaries. Knowing these up front saves a lot of headaches later.
Most free plans have some pretty standard constraints, which are in place to manage server costs and keep the lights on. You'll almost always run into caps on things like:
- File Size: A lot of tools draw the line at around 1 GB per upload. That’s perfectly fine for most short HD clips, but if you’re shooting in 4K or have a longer video, you might hit that ceiling quickly.
- Video Length: A cap of 10 to 30 minutes is also typical. If you have an hour-long podcast interview, for instance, you'll need to plan on splitting it into a few smaller segments before uploading.
- Monthly Usage: Some platforms give you a certain number of minutes per month. This is great for occasional use, but if you're a content creator cranking out daily videos, you'll likely need to upgrade.
Don't Overlook Privacy and Security
Handing your files over to a random website should always give you pause, especially if the content is confidential or not yet public. This is a huge consideration, and honestly, a tool's privacy policy should be one of the first things you check.
I always look for services that are transparent about data handling. For example, a platform like SimpleClean automatically and permanently deletes all files—both your original upload and the cleaned version—after seven days. That gives me real peace of mind. I know my content isn't just sitting on some server forever, which is critical for protecting my work.
A clear, automatic deletion policy isn't a "nice-to-have" feature. For me, it's a non-negotiable sign that a service respects my privacy and intellectual property.
Setting Realistic Expectations for AI
AI is amazing, but it isn't magic. It's really important to have a realistic grasp of what it can actually pull off. AI models are fantastic at identifying and removing consistent, predictable noises—think of that annoying air conditioner hum, a whirring fan, or the steady drone of distant traffic.
But where does it struggle? More chaotic environments. Imagine recording in a busy coffee shop with multiple conversations happening at once, plates clattering, and music playing. In that scenario, the AI might have a tough time isolating just your voice without affecting its quality. Sometimes the output can sound a little processed or have faint "watery" artifacts. This is a common challenge, and you can dive deeper into the nuances of AI audio noise reduction to see why that happens.
Another thing to watch for is a slight change in vocal tone. The process of stripping away unwanted frequencies can occasionally impact the natural warmth of a voice. Knowing these potential outcomes isn't about being negative; it's about being prepared so you can make informed decisions and judge the final result fairly.
Common Questions About Cleaning Up Video Audio Online
Even when the process seems straightforward, it's natural to have a few questions before you start uploading your videos. I get these all the time, so let's clear up some of the most common points of confusion.
Can These Online Tools Actually Get Rid of Wind Noise?
Yes, and honestly, this is where modern AI tools really shine. Wind is a notoriously difficult sound to fix because it's not a consistent hum or hiss. It’s a chaotic mess of low-frequency rumbles and sharp, high-frequency gusts. Traditional noise filters often struggled with this, usually taking a chunk of your voice out along with the wind, leaving everything sounding muffled.
The game-changer is that today's AI algorithms have been trained on thousands of hours of speech. They can actually identify and isolate the unique patterns of a human voice. This allows them to surgically remove the chaotic wind noise without wrecking the vocal clarity. It’s pretty amazing, and it can salvage outdoor footage you might have otherwise written off as a total loss.
Will Using a Free Tool Mess Up My Video Quality?
That’s a great question and a totally valid concern. Thankfully, the answer is no. When you use one of these tools, you're only performing an operation on the audio track. The video stream itself—all the pixels, colors, and motion—is never touched.
Here’s a simple breakdown of what happens behind the scenes:
- The service temporarily separates the audio and video tracks.
- The AI works its magic exclusively on the sound.
- Then, it reassembles the file, syncing the new, clean audio with your original, untouched video.
The file you download will look identical to the one you uploaded, but it will sound worlds better.
Pro Tip: Think of it as an audio-only edit. The visual quality of your video isn't compressed, altered, or degraded in any way. Your resolution stays exactly as it was.
Is It Really Safe to Upload My Videos to a Random Website?
Security should always be top of mind. The trick is to stick with reputable services that are transparent about their privacy policies. Good platforms know your content is yours, and they build their systems to protect it.
Before you upload, look for a clear statement about how they handle your files. A trustworthy tool will explicitly state that your uploaded videos and the cleaned versions are permanently wiped from their servers after a specific, short period of time—say, seven days. This kind of auto-deletion policy is your best assurance that sensitive content isn't just sitting on a server somewhere forever. If you can't find a privacy policy, or if it's vague, it's best to steer clear.
What's the Real Difference: Noise Reduction vs. Noise Removal?
People often use these terms interchangeably, but there's a small but significant difference.
Noise reduction generally means lowering the volume of background noise. It makes the distraction quieter, but you can often still hear it lingering in the background.
Noise removal, which is what most modern AI tools aim for, tries to completely erase the unwanted sound. The goal is to leave nothing behind but the clean, primary audio, like a person speaking.
Ready to hear what true AI noise removal can do? SimpleClean delivers that crystal-clear, studio-quality sound in just a couple of clicks. Give the free version a try and see how much better your videos can sound. Learn more at https://simpleclean.app.