Bad audio will kill great content, every single time. It makes your message hard to hear, and frankly, it can make you seem less credible. For any creator, learning how to remove background noise audio isn't just a techy skill—it’s essential for keeping your audience tuned in and focused on what you actually have to say.
The Real Cost of Distracting Background Noise

Let's be real: noisy audio is a project killer. That subtle hum from your air conditioner or the distant rumble of traffic can be the one thing that makes a listener hit "subscribe" or just skip to the next thing. No matter how brilliant your content is, bad audio instantly signals a lack of polish.
For podcasters, this is a direct threat to your show's growth. When your audience has to strain to hear you over a barking dog or clanking dishes, they’re not having a good time. In fact, some industry surveys show that poor audio quality can slash listener retention by up to 40%. That’s a massive hit to your download numbers, sponsorship potential, and your ability to build a dedicated community.
Why Engagement Plummets with Poor Audio
The same thing happens to video creators. You might have beautiful cinematography and a powerful script, but if it’s all buried under wind noise or background chatter, your watch time will tank. Viewers just don't have the patience to decipher garbled audio; they'll click away without a second thought.
This problem is even bigger for educators and marketers, where clarity is everything. Muffled or noisy audio immediately undermines your authority. If your students or potential customers can't clearly hear what you're saying, the message is lost, and so is your credibility.
You can see this playing out in market trends. The global online audio noise reduction market was valued at USD 563 million in a single year and is projected to rocket to USD 961 million by 2032. This boom is fueled by the over 70% of businesses now relying on crystal-clear remote communication. You can discover more insights about these market trends to see just how big this is.
Key Takeaway: Mastering audio cleanup isn't about chasing technical perfection. It’s about respecting your audience’s time and making sure your hard work actually gets the attention it deserves.
When it comes down to it, clean audio is the bedrock of successful content. It makes sure your message lands exactly as you intended, without forcing your audience to fight through a wall of distracting noise.
Winning the Battle Before You Hit Record
Here’s the honest truth: the absolute best way to remove background noise audio is to stop it from getting into your recording in the first place. Post-production tools have gotten incredibly powerful, but they aren't magic. Starting with a clean recording saves a massive amount of time and helps you avoid that robotic, over-processed sound that can ruin an otherwise great track.
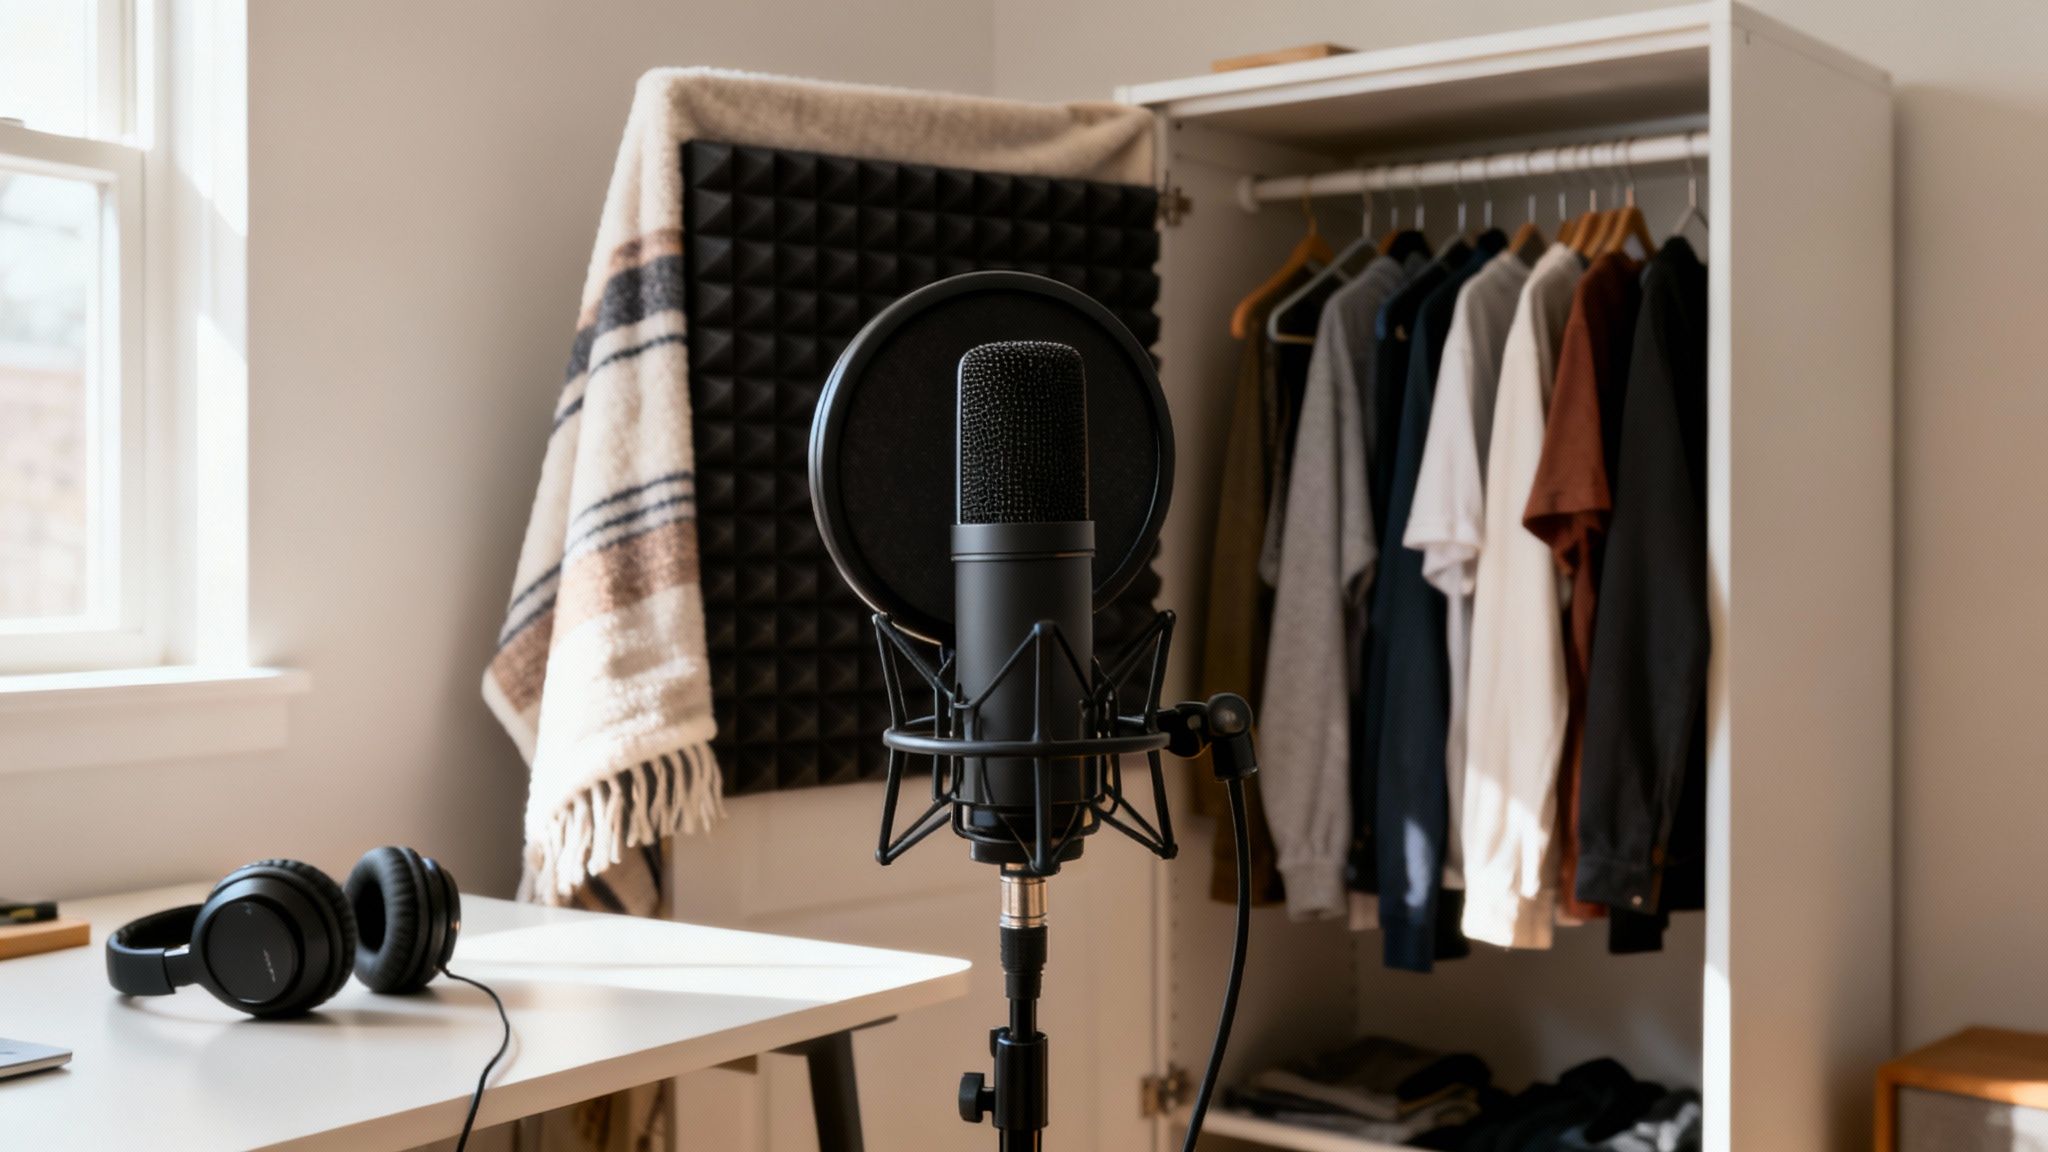
Think of your recording space as your first line of defense. You don't need a pro-level studio, but you do need to find the "deadest" room you can. I'm talking about a space with lots of soft surfaces that soak up sound instead of bouncing it around.
There's a reason a walk-in closet packed with clothes is a classic guerrilla recording booth. All that fabric acts as free acoustic treatment, killing the echoes and reverb that make a room sound hollow. No closet? No problem. A room with a thick rug, heavy curtains, and a soft couch works wonders compared to an empty room with tile or hardwood floors.
Optimize Your Recording Environment
Before you even plug in a mic, take a few minutes to get your surroundings in order. Running through this quick checklist can knock out 80% of the most common noise issues before they even start.
- Silence the obvious culprits. Unplug the mini-fridge, turn off any loud computer fans, and silence notifications on all your devices.
- Find your "room tone." Seriously, just close your eyes for a minute and listen. Do you hear the faint hum of a light fixture? The rattle of an HVAC vent? Track those sounds down now.
- Soften hard surfaces. If you’re not in a closet, hang some heavy blankets on the walls near where you're recording. It might look a little strange, but it's an incredibly effective way to absorb sound reflections.
Getting this right from the start is fundamental. For many creators, a key part of this is knowing how to screen record with sound cleanly, ensuring the core audio is pristine from the get-go.
Pro Tip: Never underestimate a simple pop filter. It’s a cheap mesh screen that goes in front of your mic, but it does an amazing job of stopping those harsh "p" and "b" sounds—known as plosives—which are a real pain to edit out later.
Master Your Microphone Technique
The mic you choose and how you use it are just as important as the room you're in. The two most common types you'll encounter are dynamic and condenser mics, and they behave very differently.
A dynamic microphone is your best friend in a less-than-perfect room. They are generally less sensitive and are built to reject sound from the sides and back. This means they focus almost exclusively on what's right in front of them: you.
On the flip side, a condenser microphone is designed to capture every little detail with incredible clarity. This is fantastic in a quiet, treated studio, but it can be a nightmare in a typical home office, as it will pick up the air conditioner, the dog walking down the hall, and everything in between. If you're using one, you'll want to learn more about how to reduce background noise in microphone recordings specifically.
Mic placement is everything. As a rule of thumb, try speaking about 4-6 inches away from the microphone. Get too close, and your voice will sound boomy and bass-heavy (this is called the proximity effect). Too far away, and your voice will sound thin while you capture more of the room's noise. Spend a few minutes finding that sweet spot where your voice is full and clear, and the room just disappears.
Choosing Your Weapon: AI vs. Traditional Audio Tools
When you need to remove background noise audio, you're basically standing at a fork in the road. One path is paved with modern, AI-powered tools that get the job done fast. The other is the classic route of Digital Audio Workstations (DAWs), where you have surgical precision and complete manual control.
What’s right for you? It really comes down to your project, your deadline, and how comfortable you are getting your hands dirty with audio settings.
The Power of Simplicity vs. Surgical Control
AI audio cleaners are designed to do one thing and do it incredibly well: find and kill unwanted noise with almost no fuss. Think of them as smart, automated filters. You just feed them your file, and a sophisticated algorithm—trained on a massive library of sounds—figures out what's a human voice and what's distracting background junk. Wind, traffic, that persistent air conditioner hum? Gone in a few clicks.
This is a massive time-saver for anyone creating content regularly. If you're a podcaster on a tight weekly schedule or a YouTuber cleaning up an interview you recorded on the go, AI tools are a lifesaver. You don't need a degree in audio engineering or a deep understanding of EQs and noise gates; you just need a clean result, and you need it now.
On the flip side, you have the traditional powerhouses like Audacity or Adobe Audition. These are the Swiss Army knives of the audio world, packed with plugins and controls for just about everything. Here, noise removal is a much more hands-on process. A common technique is "noise printing," where you find a small, isolated sample of the background noise you want to remove, teach the software what it "sounds" like, and then tell it to subtract that sound from the entire track.
This manual method gives you an incredible amount of control. An audio engineer restoring a critical piece of audio can fine-tune every little setting—thresholds, attack, release—to make sure the original performance stays perfectly intact. But all that power comes with a pretty steep learning curve. For a beginner, a DAW can look intimidating, and there’s no denying the workflow takes more time.
To help you decide, here’s a quick breakdown of how these two approaches stack up.
AI Audio Cleaners vs. Traditional DAW Plugins
| Feature | AI Audio Cleaner (e.g., SimpleClean) | Traditional DAW Plugin (e.g., Audacity, Izotope RX) |
|---|---|---|
| Speed | Extremely fast; often a one-click process that takes minutes. | Slower and more methodical; requires manual setup and adjustments. |
| Ease of Use | Very beginner-friendly with minimal controls to learn. | Steep learning curve; requires understanding audio concepts. |
| Control | Limited; you trust the algorithm to make the best decisions. | Granular control over every parameter (threshold, reduction, etc.). |
| Best For | Consistent background noise (hum, hiss, fans) and fast turnarounds. | Complex, variable noises and projects requiring surgical precision. |
| Typical User | Podcasters, YouTubers, educators, content creators on a deadline. | Audio engineers, sound designers, filmmakers, archivists. |
Ultimately, both have their place. An AI cleaner is like a high-end automatic car—it gets you where you need to go efficiently and easily. A DAW is like a manual sports car—it takes skill to drive well, but you have total control over its performance.
Making the Right Choice for Your Project
So, how do you pick? Let’s walk through a couple of real-world situations.
- The Deadline-Driven Podcaster: You just wrapped up a fantastic interview, but your guest’s air conditioner was humming loudly the entire time. The episode needs to go live tomorrow. This is a no-brainer—an AI tool will give you a clean, professional-sounding track in minutes.
- The Audio Perfectionist: You're editing a documentary and have a piece of archival tape where a key quote is muffled by a strange, fluctuating crackle. A DAW is your only real option here. You'll need to get in there and surgically carve out that specific sound without damaging the irreplaceable dialogue.
While AI tools offer incredible convenience, many creators still swear by dedicated audio software. You can explore some of the best editing software for podcasts to get a feel for the different options out there.
The Bottom Line: AI is your go-to for speed and efficiency with common background noises. Traditional tools are for when you need absolute control over complex audio problems and have the time and expertise to do it right.
In the end, it’s not about which tool is "better," but which is the right tool for the job at hand. If you want to peek under the hood at how this stuff actually works, our guide on software noise cancellation gets into the technical nitty-gritty. As AI keeps getting smarter, the line between these two worlds will continue to blur, but for now, knowing their strengths is the key to getting that perfect, crystal-clear audio.
Your AI Workflow for Flawless Audio
One of the biggest reliefs for creators today is that you no longer need to navigate the steep learning curve of traditional audio software. Modern AI tools are built for speed and simplicity, letting you remove background noise from your audio without ever touching a complex dial. The whole point is to get you from a noisy recording to a polished track in just a few minutes.
The process is refreshingly straightforward. It usually starts with just uploading your file to a web-based platform. Whether you're working with a podcast recorded in MP3, a high-quality voiceover in WAV, or even a full video file like an MP4 or MOV, these systems are designed to handle it all. No software to install, no complicated setup.
Once your file is uploaded, the AI takes over. It scans the entire audio waveform, quickly learning to tell the difference between the primary vocal frequencies and all the junk you want to get rid of. This is where the real work happens—the AI intelligently isolates and strips out common problems like air conditioner hum, traffic rumble, electronic hiss, and even light wind noise.
This infographic breaks down the core difference between the AI approach and old-school manual editing.

As you can see, AI is all about getting a great result, fast. It's the perfect solution for creators who need to publish content consistently without getting lost in the weeds of technical editing.
Preview and Finalize Your Clean Audio
After the AI has worked its magic, you’ll get a chance to hear a before-and-after comparison. This is a critical step, so don't skip it. Listen to a bit of the original audio with all its distracting noise, then toggle over to the cleaned-up version. The difference is often night and day; your voice should sound clear, present, and far more professional.
If you like what you hear, all that’s left is to download the file. Most services give you a few export options, so you can grab a clean MP3 for your podcast or a high-fidelity WAV file to drop back into your video editing timeline.
The Power of AI: The market for background noise reduction software is on a wild trajectory, expected to jump from USD 2.31 billion to a massive USD 45.02 billion by 2034. This explosion is almost entirely driven by AI's ability to clean up audio effortlessly, putting professional-grade sound within everyone's reach. You can dig into the research driving this market shift to see just how big this trend is.
This kind of rapid growth sends a clear message: creators are ditching clunky desktop software for faster, more efficient cloud-based solutions.
A Pro Tip for Busy Creators
If you’re juggling multiple audio files at once—say, a podcast with separate tracks for a host and two guests, or a dozen video lessons for an online course—batch processing is an absolute lifesaver. Instead of cleaning files one by one, you can just upload them all in one go.
- Upload Your Batch: Drag and drop all your files into the processor at the same time.
- Let the AI Work: The system will automatically process each file in the queue.
- Get Notified: Many platforms will even email you a link to download your clean files once everything is done.
This kind of workflow turns what used to be a tedious, multi-hour chore into a simple, hands-off process. It frees you up to focus on what you do best—creating content—instead of getting bogged down in the technical side of audio engineering. Adopting an AI-first approach lets you reclaim a huge amount of time while ensuring your final product sounds polished and professional, every single time.
Polishing Your Audio for a Professional Finish
Getting your track through a noise reduction tool is a huge step, but the job isn't quite done. That last **10%** of effort is what really separates clean audio from truly professional sound. This is all about making smart choices with your final files to make sure they're polished and ready for your audience.One of the most critical decisions you'll make at this stage is picking the right file format for exporting. This choice is a balancing act between sound quality and file size, and getting it right is crucial.
Choosing the Right Export Format
Think of file formats as different kinds of containers for your audio, each built for a specific purpose. For most creators, the choice boils down to two main options: WAV and MP3.
WAV (Waveform Audio File Format): This is your high-fidelity, archival-quality format. WAVs are lossless and uncompressed, meaning they contain 100% of the original audio data. You'll want to use WAV when your audio is just one piece of a larger puzzle, like a video project where it needs to be mixed with other sounds. It’s the best source material you can have.
MP3 (MPEG-1 Audio Layer 3): This is the workhorse of audio distribution. MP3s are compressed, meaning they cleverly discard sound information that most human ears can't perceive. The result is a much smaller file, which is perfect for uploading a podcast or sharing a file online.
So, which one should you use? For a podcast episode ready for listeners, a high-quality MP3 (think 192 kbps or higher) is the gold standard. But if you're sending that cleaned audio over to a video editor, give them a WAV. They'll thank you for it.
The Hidden Danger of Over-Processing
When you first discover a tool that can remove background noise audio, it's incredibly tempting to push the settings all the way to 100%. This is a classic rookie mistake. Pushing the cleanup too far can suck the life right out of your voice, leaving it sounding thin, metallic, or like you’re talking from the bottom of a swimming pool.
These bizarre, unwanted sounds are called artifacts. They're the ghosts of an overzealous algorithm that started removing frequencies that were actually part of the human voice, not the background noise.
My Two Cents: Always listen for what you've lost, not just what you've removed. If your voice suddenly lacks its natural warmth and body after you've processed it, you’ve gone too far. It's often much better to leave a tiny hint of room tone than to end up with a perfectly silent track that sounds completely robotic.
The goal here is transparency—making the noise vanish without anyone ever noticing you did anything. Always A/B test your processed audio against the original. A lighter, more delicate touch almost always wins.
The Final Touch: Loudness Normalization
Alright, the very last step is to make sure your audio is at a consistent and comfortable listening level. Loudness normalization is the process that adjusts the overall volume of your track to a specific industry target. This simple step saves your listeners from having to constantly fiddle with their volume knob.
This isn’t just about turning things up; it’s about creating a consistent experience. Most major platforms have their own loudness targets, which are measured in LUFS (Loudness Units Full Scale).
- Podcasts (stereo): A common target is -16 LUFS.
- YouTube & Music Streaming: The standard here is usually -14 LUFS.
Thankfully, you don't need to be a mastering engineer to get this right. Most audio editors and AI tools have a one-click "normalize" or "match loudness" function. Applying this final polish ensures your work sounds professional from the first second to the last.
Got Questions? We've Got Answers
Even with the best tools in your arsenal, you're bound to hit a few snags when you're learning how to clean up audio. Let's tackle some of the most common questions I hear from creators.
Can I Just Clean Up the Audio in My Video File Directly?
You bet. This is one of the biggest workflow improvements we've seen in recent years. Modern AI-powered tools are built for exactly this.
Forget the old, tedious process of stripping the audio out first. You can now upload video files like MP4 or MOV directly into the software. It intelligently finds the audio track, cleans it up, and then lets you decide what to do next. You can either download the cleaned-up audio track to sync back up yourself, or you can get a brand-new video file with the pristine audio already attached. It’s a huge timesaver.
My Take: For anyone creating videos—YouTubers, marketers, educators—this is a game-changer. It shaves a ton of time off post-production, especially when you're dealing with lots of interview clips or presentation recordings.
Will These Tools Get Rid of People Talking in the Background?
This is where the magic of AI really shines compared to older methods. Traditional noise reduction tools are great at removing consistent, steady sounds—think of an air conditioner's hum or the buzz from a refrigerator. They struggle with unpredictable sounds like people talking.
AI, however, is trained to identify and isolate the main speaker's voice. It can significantly knock down background chatter, crowd murmurs, or a distant conversation. But be realistic: if someone is talking right over your main speaker, completely erasing them without impacting the primary dialogue is still incredibly tough. The goal here is minimization, not total elimination.
What's the Best Audio File Format to Use for Cleanup?
Simple. Always start with the highest quality you have. A lossless, uncompressed format like WAV or AIFF is the gold standard for any kind of audio work.
Think of it this way: these uncompressed formats give the noise reduction software the most data to work with. The more information it has, the better it can distinguish between the voice you want to keep and the noise you want to get rid of. The result is a much cleaner, more natural sound with fewer weird digital artifacts. Sure, you can clean up a compressed MP3, but you'll get dramatically better results if you start with the original WAV file.
Ready to turn your noisy recordings into polished, professional audio? SimpleClean uses powerful AI to get rid of background noise from any audio or video file, giving you studio-quality sound in just a few minutes. Try it for free and hear the difference for yourself.