Tackling background noise in your microphone audio really boils down to a three-part strategy: optimizing your hardware, taming your recording environment, and finally, using software for the final cleanup. The single most effective thing you can do? Improve your signal-to-noise ratio by getting closer to your mic and surrounding yourself with soft surfaces that absorb sound. Getting this right from the start means you'll have less to fix later.
Your Journey to Crystal-Clear Audio
Are you constantly fighting with hiss, hum, or the distracting sounds of life happening in the background of your recordings? You're in the right place. That low buzz from the air conditioner or the hollow echo of a bare room can completely derail a great podcast, video, or online course.
Clean audio isn't just a technical checkbox; it's what keeps your audience hooked. In fact, poor sound quality is one of the top reasons people tune out. This guide goes beyond the usual advice to give you a complete system for silencing that unwanted noise, from the mic to the final edit.
The Three Pillars of Clean Audio
The entire game of reducing microphone noise rests on three core areas. Each one builds on the last, creating a solid foundation for professional-sounding audio.
Hardware and Setup: This is your first line of defense. It starts with choosing the right microphone for your space (like a dynamic mic, which is great for untreated rooms) and mastering techniques like proper gain staging to capture a strong, clean signal from the get-go.
Environment Control: Think of your room as a silent (or not-so-silent) partner in every recording. This is all about treating your physical space to kill echoes and block out ambient noise. You don't need a pro studio—everyday items like blankets, pillows, and even a full bookshelf can work wonders.
Software and Post-Production: This is where you apply the final polish. After you've recorded the best possible audio, software tools can come in to surgically remove any lingering hiss or hum. This can range from simple noise gates in your recording software to powerful AI-driven tools like SimpleClean that do the heavy lifting for you.
This infographic lays out the ideal workflow, starting with your physical gear and environment before moving on to digital cleanup.

The big takeaway here is that these steps are all connected. A great mic in a well-treated room drastically cuts down on the amount of work you'll need to do in post-production, leaving you with a much more natural and professional sound.
Quick Wins for Immediate Noise Reduction
If you're looking for the fastest ways to improve your audio right now, this table breaks down some of the most effective techniques. It's all about balancing the effort you put in with the impact you get out.
| Technique | Area of Focus | Potential Noise Reduction | Effort Level |
|---|---|---|---|
| Move Closer to the Mic | Hardware & Setup | High | Low |
| Use a Dynamic Microphone | Hardware & Setup | High | Low (at purchase) |
| Hang Blankets/Duvets | Environment Control | Medium | Low |
| Turn Off Fans/AC | Environment Control | High | Low |
| Use a Noise Gate | Software & Post-Production | Medium | Medium |
| Apply AI Noise Reduction | Software & Post-Production | Very High | Low |
Focusing on the "High" potential and "Low" effort items first will give you the most significant improvement for the least amount of work. Getting closer to your mic is free and takes seconds, but can make a world of difference.
Pick the Right Microphone and Set It Up for Success
Before you even think about hitting record, the most critical decision you'll make for clean audio is your microphone. It's the very first link in your audio chain, and getting this part right will save you from a world of hurt in post-production. Think of it as the foundation for your sound—if it’s shaky, everything you build on top of it will be, too.
The wrong mic in the wrong room will fight you every step of the way, picking up every hum from the air conditioner, every click of your keyboard, and every siren wailing in the distance. This isn't about dropping a ton of cash; it's about making a smart choice for your actual recording space.
Why Dynamic Mics Are a Lifesaver in Noisy Rooms
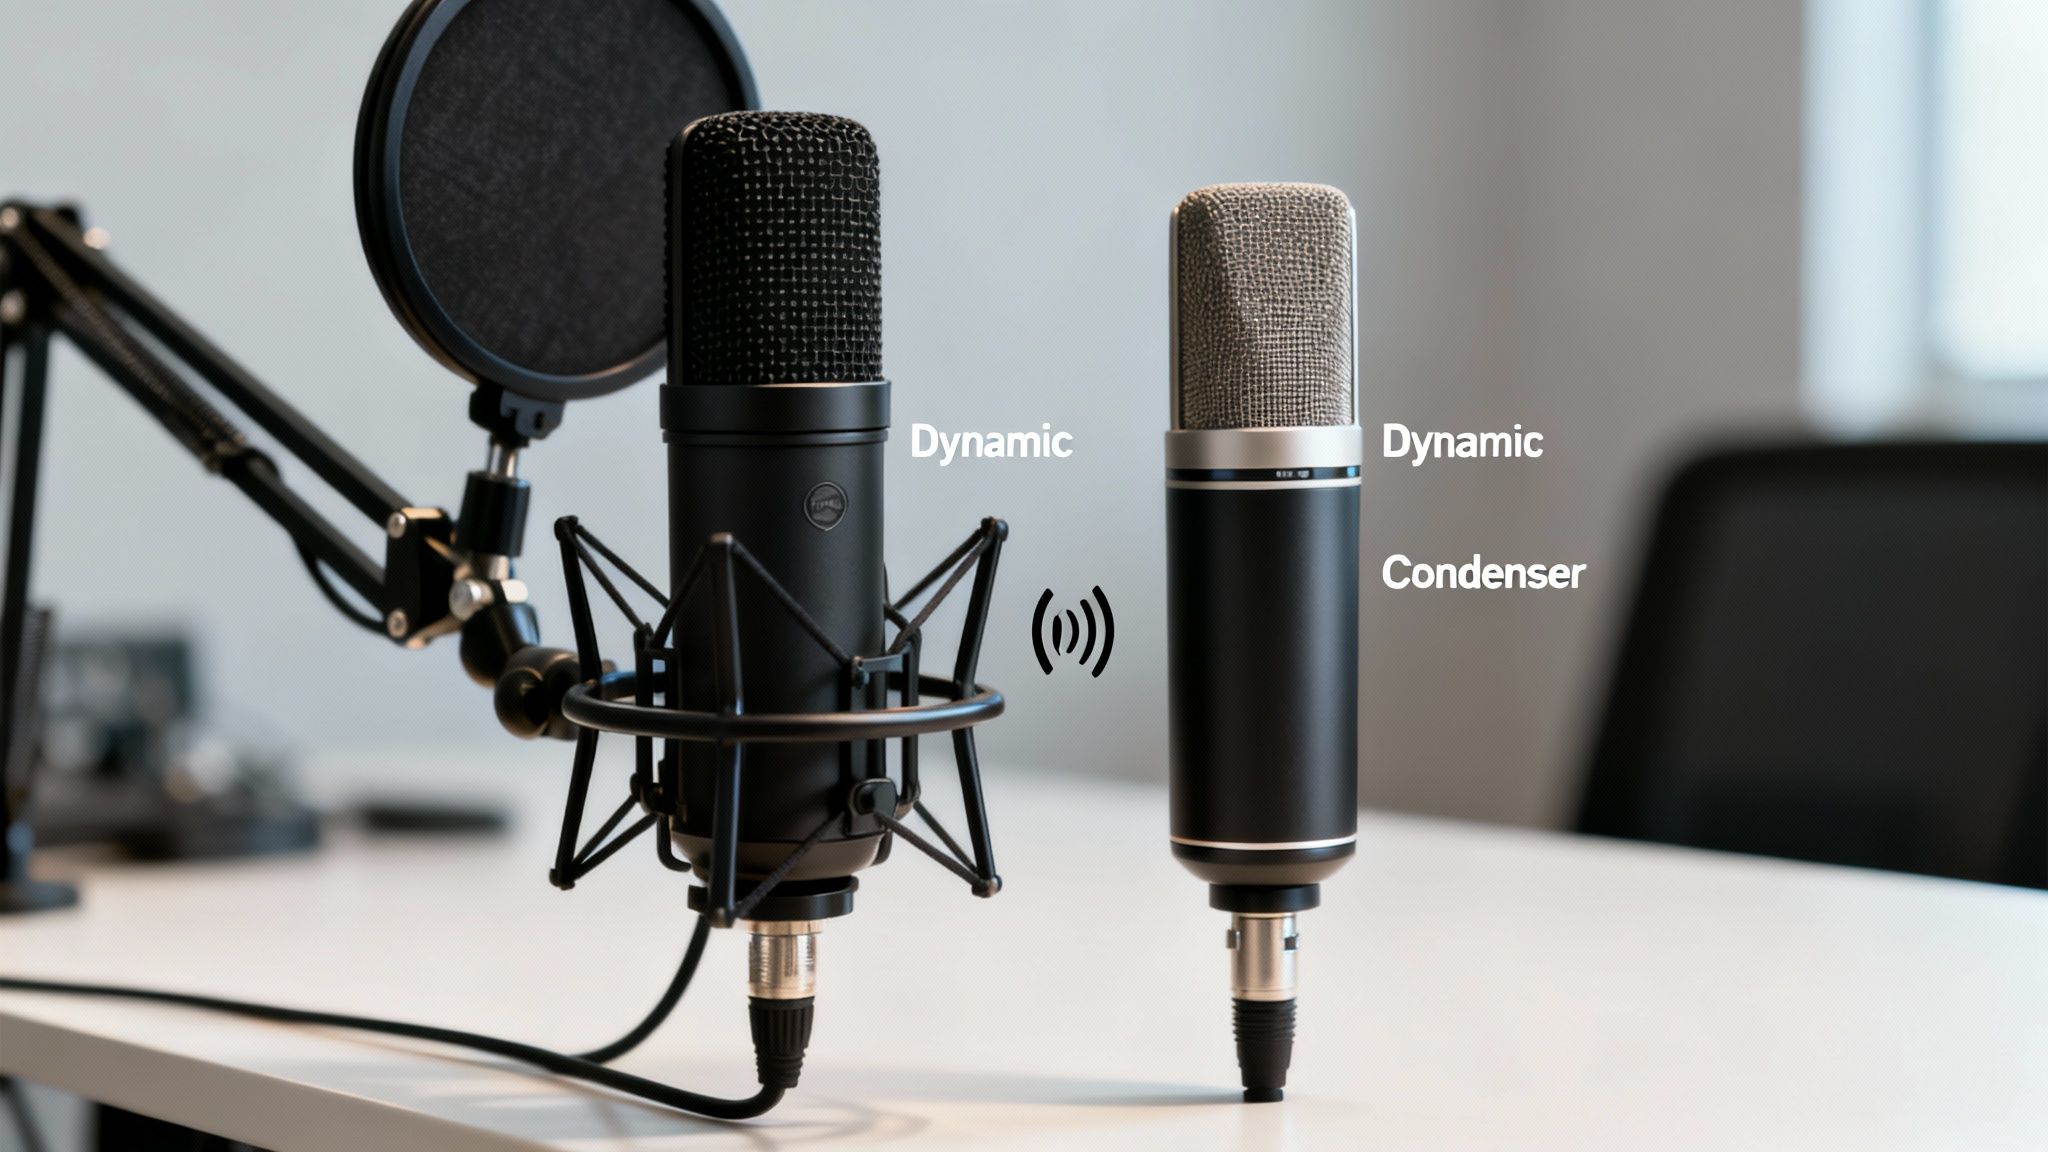
You’ll generally run into two types of microphones: condenser and dynamic. Condenser mics have a reputation for that crisp, detailed sound you hear on pro recordings, but they're often a terrible choice for a typical home or office.
Why is that? Condensers are extremely sensitive by design. They pick up everything, which is fantastic in a sound-treated studio but a total nightmare when you've got hardwood floors, a window facing the street, or a whirring computer fan.
A dynamic microphone, however, is built differently. It's naturally less sensitive and excels at capturing what's loud and up close—like your voice—while ignoring sounds farther away. This simple characteristic makes it an absolute beast for cutting down background noise right at the source.
My Two Cents: If you're recording in a regular, untreated room like a bedroom or home office, a dynamic mic will give you a cleaner, less noisy track than a sensitive condenser mic, nine times out of ten.
Use Microphone Polar Patterns to Your Advantage
Beyond just the type of mic, its polar pattern is your secret weapon. A polar pattern simply describes where the microphone "listens." For anyone recording solo, the only one you really need to worry about is the cardioid pattern.
Picture a heart shape around the mic, with the pointy end aimed right at you. A cardioid mic hears best from the front, less from the sides, and—most importantly—hardly anything from the back.
- Front: Your voice comes through loud and clear.
- Sides: Sounds like keyboard taps or mouse clicks are much quieter.
- Rear: Noise from your computer or reflections from the wall behind it get drastically reduced.
Just by aiming the "dead" spot of the mic (the back) at the loudest noise source in your room, you can instantly upgrade your sound quality before any software even touches it.
Dialing in Your Gain for a Clean Signal
Got the right mic? Great. Now you need to set your levels, a process we call gain staging. Gain isn't volume; it’s the microphone's input sensitivity. Cranking it too high is probably the most common mistake I see.
When you push the gain up, you're not just making your voice louder—you're also amplifying the noise floor. That's all the low-level hiss and hum from your gear and the room itself. The trick is to find that sweet spot where your voice is strong, but the noise floor stays way down low.
Here’s how: speak into your mic at a normal, comfortable level and watch the meters in your recording software. You want your voice to be peaking consistently between -12dB and -6dB. This gives you a healthy signal that's far from clipping (distorting) and doesn't unnecessarily boost background noise. If you feel like you're too quiet at this level, our guide on how to increase mic volume properly can walk you through the next steps.
This whole idea of tackling noise at the hardware level is becoming a huge focus in the industry. The market for noise-cancelling microphone tech is expected to explode from $2.1 billion to $6.8 billion by 2033. Manufacturers are pouring money into smarter processing and mic arrays to get cleaner audio from the get-go. You can dig into the full market analysis from MarketIntelo.com. Making a smart hardware choice now puts you right in line with where the entire audio world is heading.
Master Your Recording Environment
Your physical space is the unseen guest on every single recording. Before you even think about software or expensive gear, you have to realize this: a few simple tweaks to your room can slash background noise more effectively than almost anything else. It's all about taking control of your environment instead of letting it dictate your audio quality.
The big idea here is to make your space as acoustically "dead" as possible. That means tackling two enemies: ambient noise (the low-level hum of life) and sound reflections (pesky echo and reverb). Hard, flat surfaces are the worst offenders because they bounce sound waves all over, making your recordings sound hollow and distant.
Identify and Silence Noise Sources
First things first, you need to become an active listener. Just sit in your recording space, close your eyes, and listen for a solid minute. I guarantee you'll notice sounds you normally tune out.
Jot down everything you hear. It’s usually things like:
- HVAC Systems: That constant hum from your air conditioning or heating is a classic recording killer.
- Computer Fans: Your PC or laptop can kick up a surprising amount of noise, especially when you're running demanding software.
- Electrical Hum: A low-frequency 60 Hz hum often points to poorly shielded electronics or a ground loop issue.
- External Noise: Traffic, lawnmowers, or even just your neighbors can easily bleed through a window and into your mic.
Once you have your list, your mission is simple: eliminate as much as you can before you press record. Turn off the AC for the take. Move your computer tower as far from the mic as possible. Shut the windows and doors. These free, simple actions lay the foundation for a truly clean recording.
Absorb Sound with DIY Acoustic Treatment
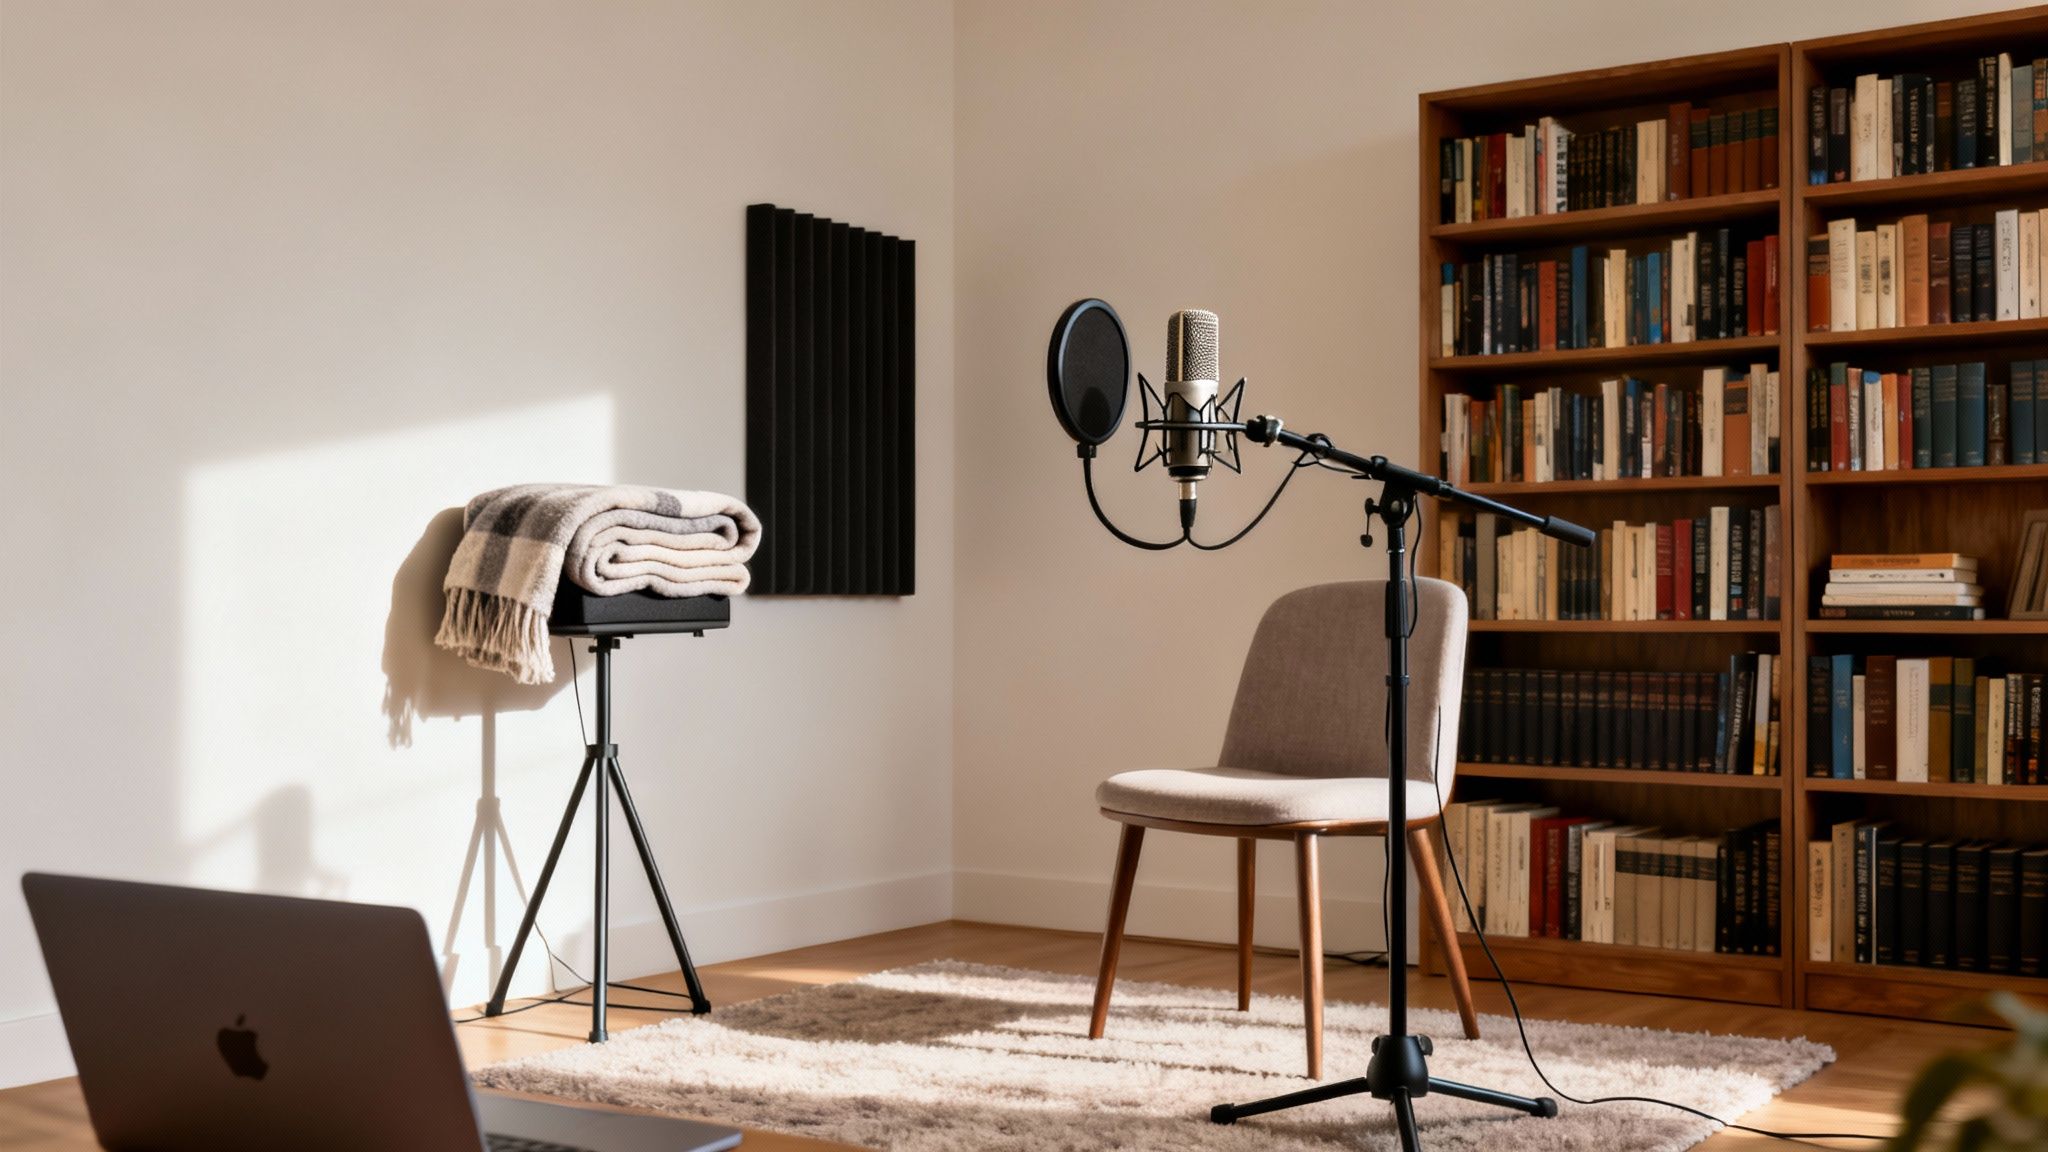
Next, let's deal with those reflections. You don't need to spend a fortune on professional foam panels to make a massive difference. The secret is just to add soft, irregular surfaces that trap sound instead of letting it bounce around.
There's a reason a walk-in closet full of clothes makes for an amazing makeshift vocal booth. But you can get fantastic results right in your room using stuff you already own.
Pro Tip: Think "soft and bulky." A room with a carpet, a plush couch, curtains, and a loaded bookshelf will always sound better than one with hardwood floors and bare walls. The more soft stuff you have, the more control you gain over your sound.
Here are a few of my favorite no-cost tricks for acoustic treatment:
- Drape thick blankets or duvets over a couple of chairs to create a small "fort" around your desk.
- Toss some pillows or couch cushions in the corners of the room. Corners are notorious for trapping and amplifying bass frequencies.
- If you have a portable clothing rack, wheel it in and hang a few heavy coats on it behind you.
These improvised solutions are shockingly effective at killing the echo and reverb that screams "amateur." For a deeper dive, check out our guide on how to remove echo from audio using both room treatment and software fixes.
The Power of Microphone Placement
After you've quieted the room and softened its surfaces, your most powerful tool is proximity. Getting closer to your microphone is a non-negotiable fundamental of clean audio.
It all comes down to a principle called the inverse-square law. In plain English, this means that as you move away from a sound source, its volume drops off exponentially. By getting close to the mic, your voice becomes dramatically louder than any background hiss a few feet away.
This simple act allows you to turn down your microphone's gain (its sensitivity), which means it will pick up less of the room's ambient noise while still capturing a strong, clear signal from you. As a rule of thumb, aim to keep the microphone about 3-6 inches—or a fist's width—from your mouth.
The impact of this one adjustment is massive. Field research from sources like Grand View Research has shown that moving a mic from just a few feet away to within 6-12 inches can improve the speech-to-noise ratio by 10–20 dB. That’s the equivalent of making background noise 90–99% less powerful in your final audio. It's a professional-level result, and it doesn't cost a thing.
Use Software to Add That Final Polish
Once you’ve nailed your microphone choice, setup, and recording space, software is where you apply the finishing touches. This is the editing stage, where you can get surgical and clean up any imperfections that slipped through the cracks. These tools work in two main ways: either in real-time as you speak or in post-production after the recording is done.
Your first brush with audio software probably happens in the apps you use every day. Platforms like Discord and Zoom, or streaming software like OBS, all have built-in features to make your voice clearer on the fly. They can be surprisingly effective for live situations, but they often need a light touch to keep you from sounding processed and unnatural.
Fine-Tuning Real-Time Noise Suppression
Real-time noise filters are all about instant cleanup, which makes them perfect for live streams, online meetings, or gaming sessions. The two most common tools you'll run into are a noise gate and a noise suppressor.
A noise gate is basically a smart mute button. It automatically silences your mic when you’re not talking, which is fantastic for killing faint background hum or the sound of your keyboard between sentences. A noise suppressor, on the other hand, actively tries to filter out consistent background sounds while you're speaking.
Here's how I typically set these up in a tool like OBS:
- Find Your Noise Gate's Sweet Spot: Start by setting the "Close Threshold" just a little higher than your background noise floor. Then, set the "Open Threshold" just below your normal speaking volume. This tells the gate to open only when you speak and stay closed for everything else.
- Apply Suppression Gently: If you're using a noise suppressor, always start at the lowest setting. Cranking it up too high is what creates that robotic, "underwater" sound. The goal is to make the noise less distracting, not to obliterate it at the expense of your voice.
My Two Cents: Real-time tools are a trade-off. They give you instant results but can introduce weird audio artifacts if you push them too hard. Always start with the gentlest settings and increase them little by little.
The push for better real-time audio is huge right now. The market for noise suppression components is already valued between $24–$27 billion and is expected to skyrocket to $73–$86 billion by the early 2030s. This growth is being fueled by companies blending traditional filtering with AI to make these tools smarter. You can dive deeper into the market data from Straits Research.
Mastering Post-Production Cleanup
For pre-recorded content like podcasts or YouTube videos, you have a whole lot more power. Post-production lets you use more sophisticated tools to clean up your audio without the compromises of real-time processing. Your Digital Audio Workstation (DAW) becomes your command center.
The cleanup workflow I use generally involves a few key steps, each one designed to tackle a specific kind of noise.
Surgical EQ to Remove Hum
Think of an equalizer (EQ) as your sonic scalpel. While it’s great for creatively shaping sound, it’s also a killer tool for removing that constant, low-frequency hum from an air conditioner or electrical buzz. I’ll often use a "high-pass filter" to slice off everything below my vocal range (usually around 80-100 Hz). This instantly gets rid of that muddy rumble without touching my voice.
Intelligent Noise Reduction Plugins
For more complex noise, like the steady hiss from a preamp or a computer fan, a dedicated noise reduction plugin is your best friend. These tools work by first "learning" what the noise sounds like. You do this by finding a few seconds of silence in your recording where only the hiss is present and letting the plugin analyze it.
The plugin creates a "noise profile" from that sample. You then apply this profile to the entire track, and the software intelligently subtracts that specific noise pattern, leaving your voice much cleaner. It's almost like magic.
Taming Echo with De-Reverb Tools
If your recording space was a bit too "live" and echoey, a de-reverb plugin can be a lifesaver. These tools are designed to identify the sound reflections—the "tail" of the sound—and dial back their volume. This can tighten up your audio and make it sound like it was recorded in a much more acoustically treated room. It won't work miracles on a recording made in a cathedral, but it can make a huge difference for audio from a typical home office.
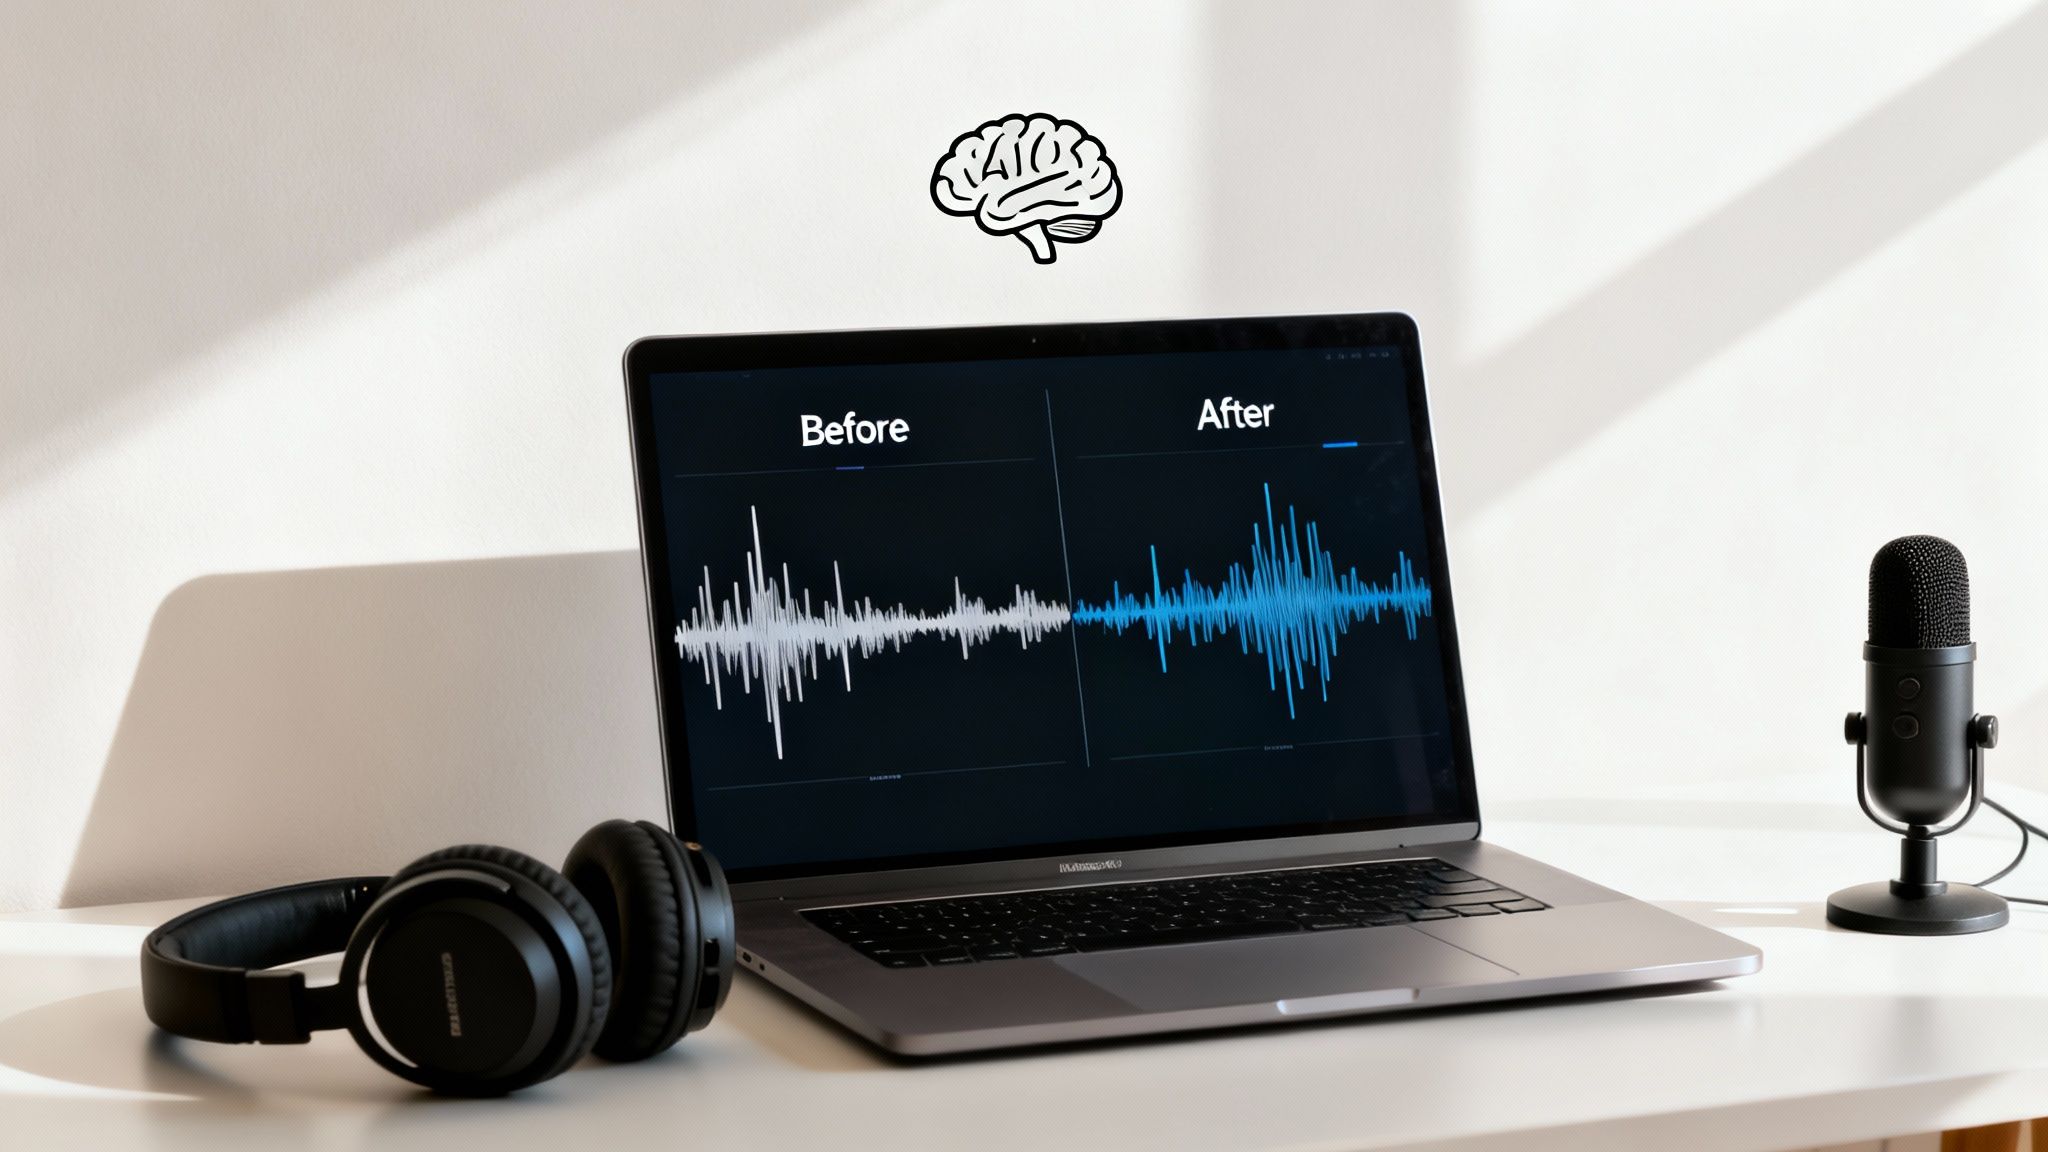
Embrace AI-Powered Audio Cleanup Tools
While traditional tools like noise gates and EQs give you a ton of manual control, the next big leap in audio cleanup is already here, and it’s powered by AI. These tools aren't just a small step forward; they completely change how we think about getting rid of background noise from a microphone recording. We're moving away from manual filtering and into the realm of intelligent voice separation.
So, how does it work? Instead of just cutting out a specific frequency or muting audio below a certain volume, AI models are trained on thousands of hours of speech and noise. This process teaches them to recognize the unique, complex patterns of a human voice and tell it apart from almost everything else—whether it's a dog barking, a fan humming, or the unpredictable chatter of a nearby conversation.
The AI Advantage Over Traditional Methods
I’ve spent countless hours with traditional noise reduction plugins, and they really struggle with sounds that change or don't repeat. A standard plugin can learn the consistent hiss from your air conditioner and do a decent job subtracting it. But throw a car horn, keyboard clicks, or a crying baby into the mix, and it gets completely lost because those sounds don't have a steady profile to "learn."
This is exactly where AI tools come in and save the day. They don’t just hunt for a repeating noise pattern; they actively identify what sounds like a human voice and work to keep it, while intelligently separating everything else out.
- Intelligent Identification: An AI can often tell the difference between your voice and other voices in the room, something that’s nearly impossible for older tools.
- Variable Noise Removal: It handles sudden, unpredictable sounds like a door slamming or a notification chime without needing you to capture a "noise profile" first.
- Natural Voice Preservation: Because the AI truly understands vocal frequencies and harmonics, it's far less likely to create those weird, robotic, "underwater" artifacts that you get from aggressive traditional noise reduction.
This intelligent approach means you can salvage audio that you would have had to throw away in the past. Imagine you nail a crucial interview, but when you listen back, you realize a lawnmower was running outside the entire time. An AI tool can often isolate the dialogue and remove that mechanical drone with stunning clarity.
AI audio tools are a genuine game-changer, especially for creators working in less-than-perfect spaces. They let you focus on your content without obsessing over every little background sound, giving you the confidence that a studio-quality result is just a few clicks away.
A Practical One-Click Workflow
The best part about many of these modern AI tools is just how simple they are to use. All the complex machine learning is handled behind the scenes, leaving you with a dead-simple process. We built our own platform, SimpleClean, around this very idea.
Forget about fiddling with dozens of confusing sliders and knobs. The workflow usually looks something like this:
- Upload Your File: Just drag and drop your audio or video file right into the app.
- Let the AI Do Its Thing: The tool processes the file, figuring out what’s speech and what isn't.
- Download the Clean Version: In a short time, you get back a clean, professional-sounding track that’s ready to go.
This kind of workflow is a lifesaver for podcasters, YouTubers, and educators who need to turn around high-quality content quickly without needing a degree in audio engineering. It makes professional sound cleanup accessible to everyone. For a deeper dive into how this stacks up against other methods, our guide on software noise cancellation breaks it all down.
By making AI a part of your post-production checklist, you’re adding a powerful final polish that catches any noise your mic, room, and other tools missed. Think of it as your ultimate safety net, ensuring your voice is always the star of the show and giving your audience a crystal-clear, distraction-free experience, every single time.
Common Questions About Microphone Noise
Even after following every step, you might run into some stubborn audio issues that just won't quit. I get it. Over the years, I've heard the same frustrating questions from creators of all stripes. This is where we tackle those common, nagging problems head-on.
Think of this as your rapid-fire troubleshooting guide. We'll dig into everything from on-the-fly fixes for live calls to why that expensive new microphone might not be the magic wand you were hoping for.
What Is the Fastest Way to Reduce Background Noise Live?
When you’re live, there's no "we'll fix it in post." You need a solution, and you need it now. The quickest fix is real-time AI noise suppression, often built right into platforms like Zoom, Discord, or Google Meet. Just flip the switch and let the software do the heavy lifting.
No software available? Fall back on the oldest trick in the book: solid microphone technique. Get that mic really close to your mouth—we're talking 3 to 6 inches—and turn the gain down. This one move makes your voice so much louder than everything else in the room that the background noise just fades away.
A great microphone technique is the ultimate analog noise reducer. By getting closer to the mic, you allow it to focus on your voice, making distant noises less relevant and easier for any software to filter out.
This approach massively improves your signal-to-noise ratio right at the source, which is always the best first move.
Can Software Completely Remove All Background Noise?
Honestly, no. While modern AI tools are phenomenal, expecting them to erase 100% of severe background noise without any collateral damage is setting yourself up for disappointment. The more aggressive the noise reduction, the higher the risk of weird digital artifacts that make your voice sound thin, robotic, or kind of "watery."
Software is a precision scalpel, not a sledgehammer. It’s there for the final polish, not for fixing a recording that was a disaster from the start.
Your best bet is always a layered defense:
- Start with the Room: Quiet your environment. Turn off the fan, shut the window, and maybe throw a blanket over that echoey bookshelf.
- Nail Your Mic Technique: Get up close and personal with your mic and set your gain levels properly.
- Finish with Software: Use your favorite tool to gently scrub away the last bit of remaining, low-level noise.
Think of software as handling the final 10-20% of the job, not the whole thing.
Why Do I Hear a Constant Hiss or Hum?
That persistent, low-level sound that's driving you crazy usually comes in two flavors: hiss or hum. Figuring out which one you have is the key to killing it.
A constant, high-pitched hiss is what we call the "noise floor" of your equipment. It's the self-noise generated by the electronics inside your mic's preamp or your audio interface. This becomes way more obvious when you have to crank the gain way up. Generally, more affordable gear has a higher, more noticeable noise floor.
A low-pitched hum, on the other hand, is almost always electrical interference, usually buzzing at 50 or 60 Hz. The most common culprits are ground loop issues between your connected devices or unshielded cables picking up static from nearby power cords. To fix a hum, try plugging your gear into a different wall outlet, investing in a power conditioner, or switching to balanced XLR cables if your setup supports them.
Does a More Expensive Microphone Guarantee Less Noise?
This is a big one. And the answer is a surprising "no." In some cases, a pricey microphone can actually make your background noise problem worse.
Here's why: high-end studio condenser mics are engineered to be incredibly sensitive. They're designed to capture every subtle detail of a vocalist's breath or the delicate decay of a guitar string in a perfectly treated, silent studio.
But in a typical bedroom or home office, that extreme sensitivity becomes a liability. That beautiful, expensive mic will pick up your air conditioner, the neighbor's dog, and the echo off your bare walls with pristine, heartbreaking clarity.
The type of microphone you choose and how you use it are far more critical for noise reduction than its price tag. A simple, affordable dynamic mic used up-close in a noisy room will deliver a cleaner track than a top-of-the-line condenser mic used from a few feet away. Always choose the right tool for the job, not just the most expensive one.
Ready to skip the complex software and get studio-quality audio with a single click? SimpleClean uses advanced AI to intelligently remove background noise, echo, and other distractions from your audio and video files. Upload your file, let our AI work its magic, and download a crystal-clear track in minutes. Try it for free today at https://simpleclean.app.