Let's face it: bad audio will absolutely tank a great video. It's a hard truth of content creation that viewers are far more forgiving of poor video quality than they are of poor audio quality. Nailing your noise reduction isn't just a technical task to check off a list; it’s one of the best ways to keep your audience hooked and build real credibility.
Why Clean Audio Is Your Video's Secret Weapon

We've all done it. You click on a video that looks promising, but seconds later, you're mashing the back button. Why? It probably wasn’t blurry footage or a shaky camera. More likely, it was the distracting hum of an air conditioner, the roar of wind noise, or dialogue so muffled you couldn't make out a single word.
This isn't just a simple annoyance; it's a cognitive issue. When our brains have to strain to understand what someone is saying, it creates frustration and fatigue. Clean, crisp audio does the opposite—it forges a direct, effortless connection with your audience.
The True Cost of Bad Audio
Distracting background noise does more than just irritate people; it actively sabotages your message. Just think about these common situations:
- The Professional Webinar: That low-level office hum or the sound of keyboard clicks can make an otherwise brilliant expert sound amateurish and unprepared.
- The Travel Vlog: What good is exciting on-location commentary if wind noise makes it completely unintelligible? The viewer is immediately pulled out of the experience.
- The Online Course: An echoey room or a refrigerator buzz forces students to struggle, which hurts their ability to learn and lowers the perceived value of your course.
In every one of these scenarios, bad audio sends a clear, if unintentional, message: this content wasn't important enough to produce correctly. This is exactly why mastering noise reduction is an essential skill for any serious creator today.
The Demand for Clarity Is Growing
You don't have to take my word for it—the market trends tell the same story. The global background noise reduction software market was valued at $2.5 billion in 2025 and is on track to hit $8 billion by 2033. This explosion is fueled by our collective demand for crystal-clear sound in everything from work calls to social media content.
Some creators have even reported a 40% increase in viewer engagement after cleaning up their audio, proving a direct link between sound quality and audience retention. If you're curious, you can dive into more research about the background noise reduction market to see the full picture.
Ultimately, when you stop seeing noise reduction as a chore and start treating it as a core part of your creative strategy, you're on the path to creating polished, professional work that truly stands out.
How to Diagnose Your Audio Noise Issues

Before you jump into applying filters or running your audio through a tool, you have to play detective. Trying to fix a noise problem without knowing what it is you're fixing is a recipe for disaster—you can easily do more harm than good and end up with audio that sounds thin and unnatural. The first real step is to pinpoint exactly what kind of noise you're up against.
So, grab a good pair of over-ear headphones (earbuds won't cut it for this kind of detailed work) and just listen. Listen to the raw audio from your video, paying close attention to the parts where nobody is talking. Your mission is to identify the noise's unique "fingerprint." Is it a steady, low hum that's always there? Or is it a random, jarring sound that pops up out of nowhere?
This distinction is everything, because different types of noise need completely different battle plans.
Constant vs. Intermittent Noise: What's the Difference?
Let's break down the two main culprits you'll encounter.
First, you have constant noise. This is the steady, predictable sound that runs underneath your entire recording, sometimes called broadband noise. Think of it as the sonic floor of your audio—the drone of an air conditioner, the whir of a computer fan, or a persistent hiss from a cheap microphone cable. It’s always there, lurking in the background.
Then you have intermittent noise. These are the unwelcome guests that crash the party for a moment and then vanish. A dog barking next door, a loud car horn, a sudden cough, or a phone notification are all classic examples. They're usually sharp, sudden, and much more distracting than a low hum.
To make this crystal clear, here’s a quick guide to what you might be hearing.
Common Types of Background Noise in Video
This table can help you quickly identify the kind of noise plaguing your track. Knowing the source and character will guide your next steps.
| Noise Type | Common Sources | Audio Characteristic |
|---|---|---|
| Hum/Buzz | Electrical grounding issues, power cables near audio lines, refrigerators, fluorescent lights | A low-frequency, constant tone, often at 50Hz or 60Hz (depending on your region) |
| Hiss | Microphone preamps, camera audio circuits, audio interfaces, tape recordings | A high-frequency, "shushing" sound, like static; consistent and steady |
| Wind Noise | Recording outdoors without a proper windshield or "deadcat" | Low-frequency rumbling and popping sounds that overwhelm the microphone's diaphragm |
| Room Reverb | Hard surfaces like walls, floors, and ceilings in an untreated room | An echoey, hollow sound where the speaker's voice bounces around the space |
| Transient Noises | Door slams, keyboard clicks, coughs, phone notifications, bumps on the mic stand | Sharp, sudden, and short-lived sounds that spike in volume |
| Handling Noise | Moving a microphone, adjusting clothing with a lavalier mic attached | Scrapes, bumps, and rustling sounds caused by physical contact with the mic |
Getting familiar with these sounds is the first major step toward cleaning up your audio professionally.
Pro Tip: Find a few seconds in your video where no one is speaking. Loop this section of "room tone" and listen to it over and over. This is the absolute best way to isolate and understand the character of the constant noise you need to surgically remove.
Look for Clues in Your Waveform
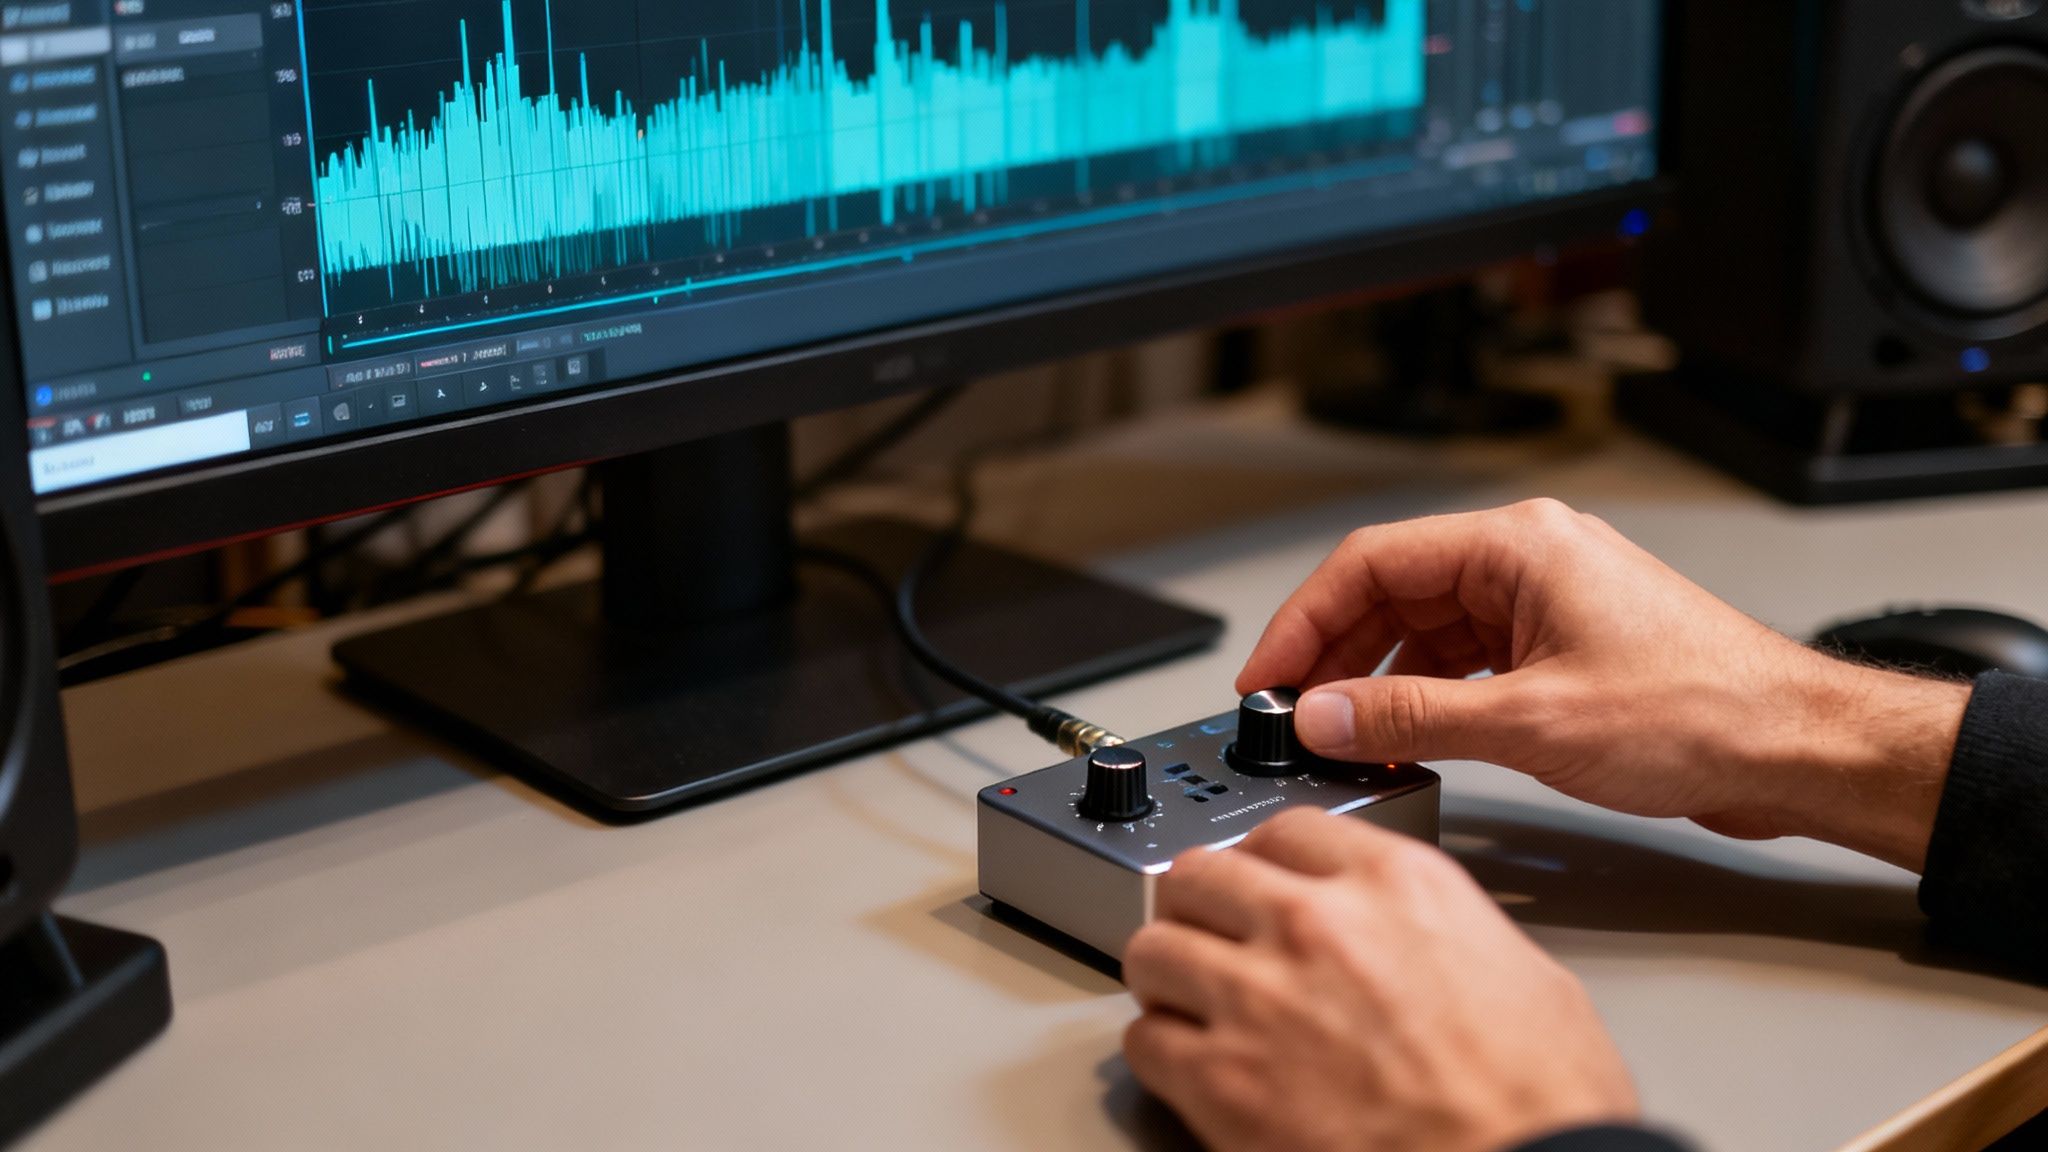
Your ears are your best tool, but your eyes can offer a second opinion. Pull your audio track into your editing software and take a good look at the waveform.
A constant noise source, like a fan, will often show up as a thick, solid-looking line at the bottom of the waveform, raising the entire "noise floor" even during silent moments. In contrast, an intermittent noise, like a loud clap, will look like a huge, sharp spike that rockets up and then disappears.
Learning to spot these visual cues helps confirm what you're hearing. A massive, blocky spike in the waveform is almost certainly that door slam you heard. A consistently "fuzzy" or thick baseline in the quiet parts? That's your HVAC system. This two-pronged approach—listening and looking—is what separates a quick fix from a truly professional result.
Choosing Your Noise Reduction Toolkit
Once you know what kind of noise you're dealing with, it’s time to pick your weapon. The world of audio cleanup isn't a one-size-fits-all situation anymore. The right tool really depends on what you're trying to fix, how comfortable you are with technical tweaking, and of course, your budget.
Think of it like a toolbox. Sometimes you need a sledgehammer for a big, obvious problem, but other times you need a precision chisel for fine detail work. Each type of noise reduction software has its place.
Built-In Video Editor Effects
Most video editing software—think Adobe Premiere Pro or DaVinci Resolve—comes with a decent set of built-in audio tools. These are a great first stop because, well, they're already there. No extra cost, no new software to learn.
These native effects are usually at their best with simple, consistent background noise. Got a steady hum from an air conditioner or the low drone of a refrigerator? A built-in filter can often smooth that right out without much fuss. The downside? They can be a bit blunt. If you push them too hard on more complex noise, you risk making your dialogue sound muffled or watery.
Specialized Audio Repair Plugins
When you need surgical precision, you bring in the specialists. Dedicated plugins, like the ones from iZotope RX, are the gold standard for a reason. These are the scalpels of the audio world. They let you visually see the audio frequencies and literally paint away unwanted sounds, from a rogue cough to an annoying electrical buzz, without collateral damage to the voice.
A dedicated plugin gives you granular control that built-in effects just can't touch. It’s what you reach for when you need to meticulously repair a specific flaw, like zeroing in on a nasty 60Hz electrical hum while leaving the rest of the audio pristine. This is why the pros swear by them.
AI-Powered Web Tools
The newest players on the block are AI-powered web platforms, and they’ve completely changed the game. These tools use sophisticated algorithms trained to do one thing incredibly well: separate human speech from everything else. Their superpower is dealing with the complex, unpredictable noise that gives traditional tools a headache.
Imagine you're vlogging on a busy city street—you've got traffic, sirens, and people talking in the background. An AI tool can listen to that mess, identify your voice, and pull it out cleanly, often with just a single click. The technology has gotten scary good; some algorithms can now distinguish speech from noise with up to 95% accuracy in real time. For creators on a deadline, this is huge. GPU-accelerated tools have been shown to cut denoising time for 4K video by as much as 60%.
Cloud-based options like SimpleClean are built for exactly this kind of speed and simplicity, making high-quality noise reduction for video something anyone can do. If you want to dive deeper, we have a comprehensive guide comparing different types of noise reduction software for audio that can help you find the perfect match. For fast-turnaround projects where you just need clean audio now, these AI tools are an absolute lifesaver.
A Practical Workflow for Removing Background Noise
Knowing which tools to use is one thing, but getting them to work for you is another entirely. So, let’s walk through a repeatable workflow that I’ve found delivers clean, professional-sounding audio time and time again. This isn't about magic buttons; it's about a methodical process and, most importantly, careful listening.
Before you touch a single setting, do this one crucial thing: duplicate your audio track. Always. This gives you a clean, untouched backup in your timeline. If you get a little too aggressive with the noise reduction—and it happens to the best of us—you can always pull from this original track without starting over. It’s a simple, non-destructive habit that will save you headaches down the road.
Starting with Traditional Tools
If you’re working with a classic plugin like a spectral denoiser, your first job is to capture a noise print. Think of this as giving the software a sonic fingerprint of the exact sound you want to remove.
To do this, you'll need to find a two or three-second-long snippet of your audio where nobody is talking. This is your "room tone" or ambient sound—the air conditioner hum, the refrigerator buzz, the computer fan. Select just that portion and use your plugin’s "learn" or "capture" function.
Once the plugin has that fingerprint, it knows which specific frequencies to target and reduce throughout the rest of the clip. The key here is finding a pure sample. If your noise print has even a whisper of dialogue in it, the plugin can get confused and start carving out parts of the speaker's actual voice.
The AI-Powered Approach
In contrast, modern AI-driven tools offer a much more hands-off experience, especially when you're dealing with unpredictable noise like street traffic or cafe chatter. With a service like SimpleClean, you pretty much just upload your file and let the algorithm do its thing.
You don't need to hunt for a perfect noise print. The AI is already trained on thousands of hours of audio and knows how to separate the human voice from almost everything else. It analyzes the entire file, intelligently isolates the dialogue, and pushes the distracting background noise down.
This diagram gives you a good sense of how these different approaches can fit into your editing sequence.

You can see how you might start with basic tools in your editor, step up to a more precise plugin, or go straight to a cloud-based AI tool for a fast, powerful solution.
The Art of Subtle Reduction
Here’s the single most common mistake I see, whether someone is using AI or a manual plugin: overprocessing. The goal of noise reduction for video is not total, dead silence. The goal is to make the background noise un-distracting while keeping the speaker’s voice sounding natural and present.
When you push the reduction too hard, you’ll start to hear weird digital artifacts—a "watery" or "phasey" sound that makes the dialogue sound robotic. That’s the sound of the software getting confused and eating away at the frequencies of the voice itself.
Pro Tip: Always start gently. Nudge the reduction amount up slowly while listening on good headphones. You should stop as soon as the background noise is no longer distracting, not when it's completely gone. A little bit of natural room tone is often a good thing.
Finding that perfect balance is an art, but here's a practical way to get there:
- Apply a light touch first. Start with a low setting, maybe 20-30% reduction.
- Listen carefully. Does the dialogue still sound full? Is the annoying hum less noticeable?
- A/B test your work. This is critical. Toggle the effect on and off to compare the processed audio to the original. Your ears are the best judge of whether you're hurting the voice quality.
- Increase in small steps. If the noise is still too present, nudge the reduction up a little more and repeat the A/B test until you hit that sweet spot.
Mastering this delicate balance is what separates amateur audio from a professional mix. For a deeper dive, our guide on how to reduce background noise in a microphone has more tips that are just as relevant for video post-production. At the end of the day, the best noise reduction is the kind your audience never even realizes is there.
Advanced Audio Polishing Techniques
Getting rid of that constant background hum is a massive win, but that's really just the beginning. The real art is in the final polish, where you take your audio from just "clean" to something that sounds rich, present, and completely natural. This is where a few extra techniques can make all the difference, separating the good from the truly great.
One of the most powerful tools for this is spectral editing. Think of it like a heat map for your sound, allowing you to see every little noise as a visual blip on a graph. This lets you spot and surgically remove specific sounds that standard tools would completely miss.
Surgical Precision with Spectral Editing
What about those one-off sounds that can ruin a perfect take? A single cough from an audience member, a chair squeak, or a phone buzzing for just a second. A normal noise reduction filter can't do much with these because they aren't consistent, predictable hums.
But with a spectral editor, like the one in iZotope RX, you can literally see that cough as a distinct blotch on the frequency spectrum. From there, you can use a tool—almost like a healing brush in Photoshop—to "paint" it out, leaving the dialogue around it perfectly intact.
The power of this approach can't be overstated. It’s the difference between using a sledgehammer and a scalpel. You're not just broadly reducing noise; you're performing microsurgery on the audio itself.
Bringing Back Warmth and Life with EQ
Sometimes, after aggressive noise reduction, a voice can sound a bit thin or sterile. The process of stripping out unwanted frequencies can accidentally take some of the natural body and warmth with it. This is where a good equalizer (EQ) becomes your best friend.
An EQ gives you control to boost or cut specific frequency ranges, putting life back into the dialogue.
- Restore Body: A gentle boost around 150-250 Hz can bring back some of that nice, warm foundation to a voice that sounds thin.
- Add Clarity: A little lift in the 2-5 kHz range can really enhance articulation, making every word feel crisper and easier to understand.
- Cut the Mud: If the voice sounds a bit boomy or cluttered, a small cut somewhere between 300-500 Hz can clean up that muddiness.
Subtlety is everything here. Even tiny EQ adjustments can have a massive impact, making the final track sound like it was recorded perfectly from the start. This same principle works wonders when you need to remove echo from audio, as you can use an EQ to dial back the specific frequencies causing that unwanted reverb.
The Secret Weapon: Room Tone
Here’s a pro tip that will instantly make your audio sound more professional: your silent moments should never be completely silent. After heavy noise reduction, the gaps between words can become an unnatural, dead void. This digital silence is often just as distracting to a listener as the noise you just removed.
The fix is to reintroduce a clean layer of room tone. This is just the subtle, ambient sound of the recording space, minus any of the distracting noises. All you have to do is find a clean one or two-second sample of this ambience, loop it, and place it under your entire dialogue track at a very low volume. This simple trick glues everything together, creating a seamless and natural listening experience. The goal isn't silence—it's believable space.
Common Questions About Cleaning Up Video Audio
Even with the best software at your fingertips, you're bound to have a few questions as you dive into cleaning up your audio. Let's walk through some of the most common ones I hear, so you can sidestep common mistakes and get a result you're proud of.
Can I Really Get Rid of All the Background Noise?
This is a big one. While today's tools are incredible, the goal is almost always noise reduction, not complete elimination.
If you get too aggressive and try to scrub out every last whisper of background sound, you'll often do more harm than good. This is how you end up with dialogue that sounds thin, robotic, and just plain weird. It can completely strip the natural warmth out of someone's voice.
A much better approach is to simply push the distracting noise down until it’s no longer the first thing you notice. In fact, leaving a little bit of the natural room tone is key. It prevents that jarring, unnatural silence between spoken words, which can be just as distracting as the noise you were trying to remove in the first place.
AI Tools vs. Manual Plugins: What’s the Real Difference?
It helps to think of it as a smart, all-purpose tool versus a specialized, surgical instrument.
- AI-powered tools are fantastic for complex, changing noises. Think busy street corners, crowd chatter, or gusty wind. They intelligently figure out what's a voice and what isn't, often with just a click. This is a massive time-saver and doesn't require a degree in audio engineering.
- Manual plugins, on the other hand, give you a ton of control. They shine when you're dealing with a constant, steady hum—like an air conditioner, a refrigerator buzz, or an electrical hiss. You can take a "noise print" of just the hum and then surgically remove those specific frequencies, leaving the dialogue largely untouched.
The trick is matching the right tool to the right problem. If you need a fast fix for a video with all sorts of chaotic background sounds, an AI tool is your best bet. If you have a persistent, simple hum you need to remove cleanly, a manual plugin offers the precision you're looking for.
Will Denoising Mess Up the Quality of My Dialogue?
Yes, it absolutely can if you overdo it. Pushing a noise reduction setting too hard is the quickest way to create digital artifacts—that dreaded "underwater" or robotic sound. This happens because the software starts accidentally removing frequencies that are actually part of the human voice.
The best way to avoid this is to start low and go slow. Apply a gentle amount of reduction first, then gradually increase it.
Keep toggling the effect on and off to compare the "before" and "after." Trust your ears. The moment the noise is under control and the voice still sounds natural, that’s your stopping point.
Ready to hear what AI can do for your audio? SimpleClean removes background noise from any video or audio file in just a few clicks. Try it for free and hear the difference.