So, you need to improve your audio quality, and you need to do it online. The best approach I've found over the years is a two-pronged attack: start with the best recording you can manage, then let a smart online tool do the heavy lifting. If you can get a clear, echo-free recording from the get-go, an online service can work wonders to remove background noise, even out the volume, and make vocals pop in just a few minutes.
Your Blueprint for Professional Sound
Welcome. If you're a podcaster fighting the hum of an air conditioner, a YouTuber trying to get crystal-clear dialogue, or an educator whose lessons are getting lost in fuzzy audio, you've come to the right place. Getting that professional-grade sound is easier than you think, and this guide is designed to give you a complete, practical workflow—not just a list of generic tips.
This is about more than just pointing you to the latest software. It's a full strategy. We'll start with the fundamentals of recording that can solve most of your audio problems before you even hit the record button. From there, we'll jump into the powerful online AI audio enhancers that can take your sound from "good enough" to "wow, that's crisp."
The whole process can really be broken down into three main stages.
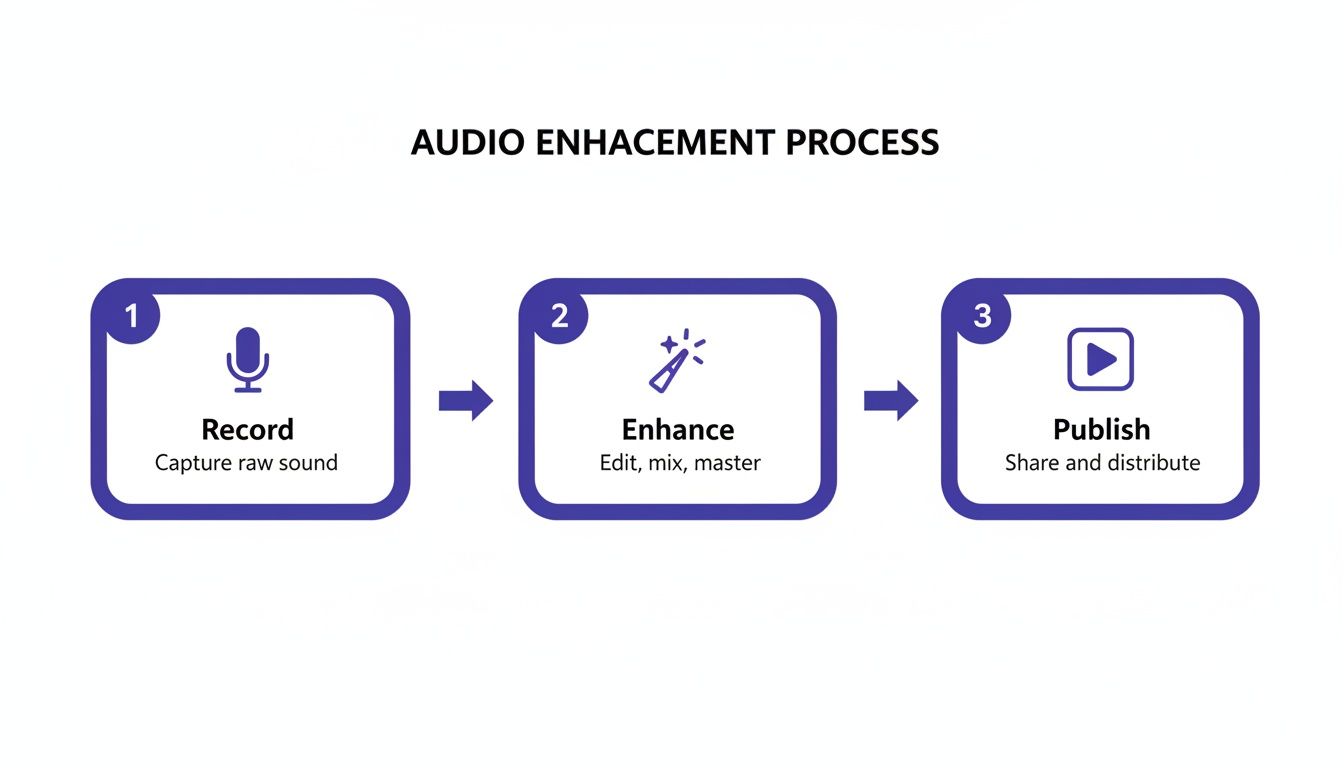
As you can see, it all starts with the recording itself. Nailing that first step makes everything that follows—the enhancement and the final publishing—so much easier and more effective.
What You'll Learn Here
We’ll get into the nitty-gritty of choosing the right audio formats for different platforms, setting up batch-processing workflows that save you a ton of time, and walking through fixes for those all-too-common audio headaches. The goal is to give you the confidence to tackle any audio challenge that comes your way.
The magic behind most online audio tools today is audio signal processing, which is just a technical term for altering an audio signal to improve it. What used to require a studio full of expensive gear and an audio engineering degree can now be done with a few clicks online.
For anyone who values their time (and who doesn't?), learning a few key techniques on how to clean up your audio is a game-changer. It can slash your post-production hours. You'll be amazed at how a little bit of prep work pays off big in the final product.
The absolute best way to fix bad audio is to stop it from happening in the first place. A clean source recording is, without a doubt, the most critical ingredient for a professional result, even with the most powerful online tools at your disposal.
Throughout this guide, I'll provide actionable steps for every skill level. You'll be able to take these techniques and apply them to your own projects right away, hearing a real difference in the quality of your work.
Quick Wins for Better Online Audio
To give you a quick overview, here are some of the most effective techniques we'll be covering, who they're for, and why they matter.
| Technique | Primary Benefit | Best For |
|---|---|---|
| AI Noise Reduction | Instantly removes background hum, hiss, and chatter. | Podcasters, YouTubers, anyone recording in imperfect environments. |
| De-Reverb | Reduces echo and room reflections for clearer speech. | Creators recording in untreated rooms like offices or bedrooms. |
| Loudness Normalization | Ensures consistent volume across your entire audio file. | All creators, especially for compliance with platform standards (e.g., Spotify, YouTube). |
| Vocal Enhancement | Boosts clarity and presence of the human voice. | Educators, voiceover artists, and interview-based content. |
These methods form the core of a modern audio workflow and deliver the biggest bang for your buck when you're working online.
Laying the Groundwork for Great-Sounding Audio
Before you even think about uploading a file to an online audio cleaner, the real work has already begun. The truth is, even the most advanced AI tools can only do so much. They work best when you give them a clean, solid recording to start with.
It's like cooking. A great chef can make a mediocre ingredient taste better, but they need high-quality ingredients to create something truly special. Your raw audio is that key ingredient. Getting a great recording isn't about building a million-dollar studio; it’s about controlling your recording space and nailing a few fundamental principles that make all the difference.
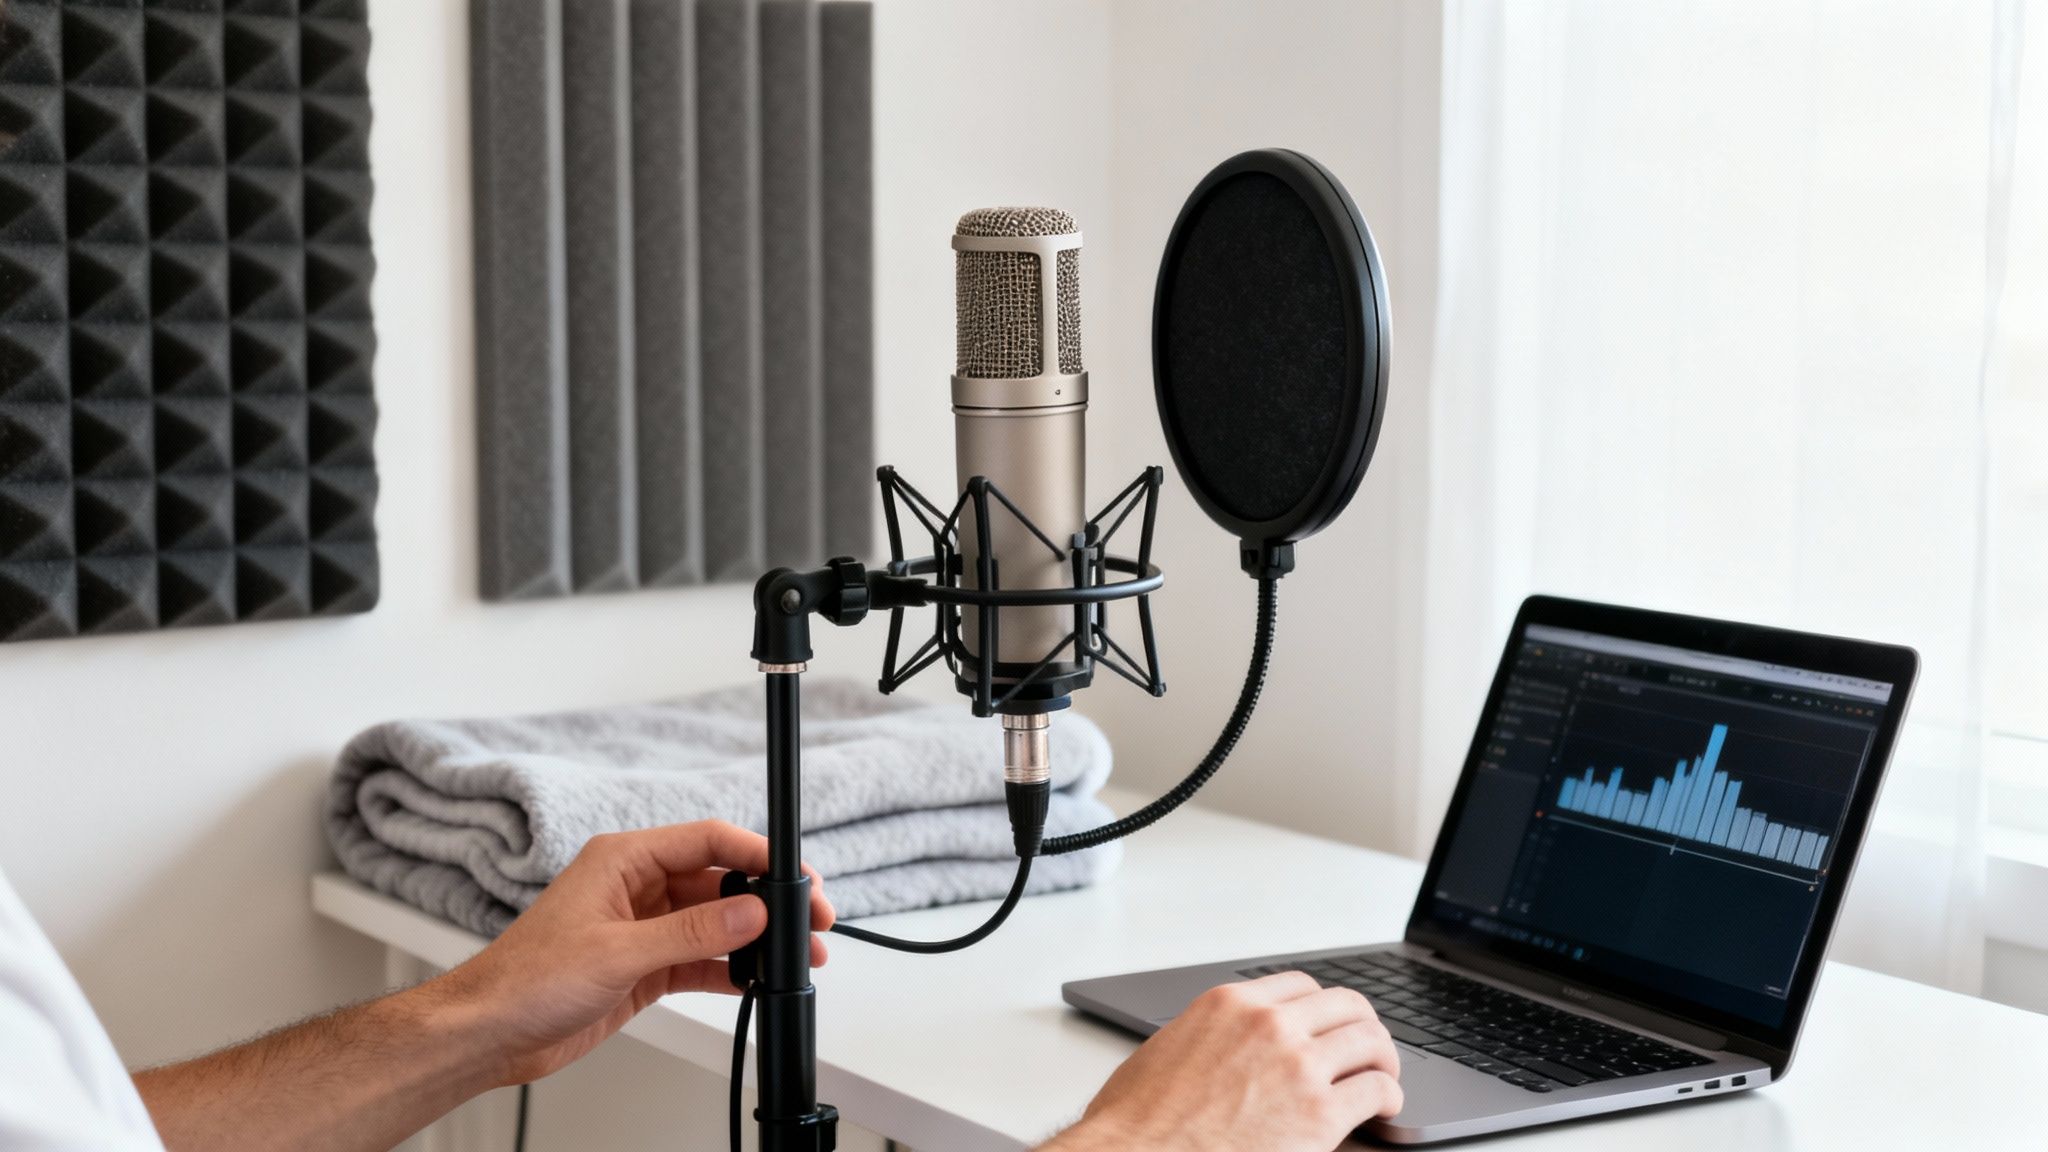
Tame Your Recording Space
The first thing your microphone hears isn't your voice—it's the room you're in. A room with lots of hard, flat surfaces (think bare walls and hardwood floors) will create a ton of echo and reverb. This makes your voice sound distant, hollow, and amateurish. The goal is to stop those sound waves from bouncing around.
Luckily, you don't need professional acoustic panels. You can get great results with things you already have.
- Soften everything: Throw some blankets or a rug on the floor. Hang heavy curtains or even tack a duvet to the wall behind you.
- Fill the space: An empty room is an echo chamber. A room filled with furniture, like a bedroom or even a walk-in closet, is fantastic for dampening sound. The soft surfaces and irregular shapes break up sound waves beautifully.
- Watch your position: Don't set up in the dead center of the room or right against a flat, empty wall. These are spots where sound waves love to collect. Tucking yourself into a corner often works wonders.
These little tweaks can slash the amount of echo in your recording, giving it a much closer, more professional feel. This one step alone will make any online audio processing you do later far more effective.
Choose the Right Microphone
Not all mics are built the same. The right one for you depends entirely on your room and what you're recording. For most people, the choice comes down to two types: dynamic and condenser.
Dynamic microphones are workhorses, perfect for rooms that aren't acoustically treated. They are less sensitive and are designed to pick up whatever is directly in front of them while ignoring noise from the sides. If you're podcasting from a lively apartment with street noise outside, a dynamic mic is your best bet.
Condenser microphones, on the other hand, are incredibly sensitive and capture every last detail. They're ideal for quiet, controlled spaces where you want to capture nuance, like a singer's breath or the shimmer of an acoustic guitar.
A classic beginner mistake is buying a pricey condenser mic for a noisy room. You'll end up capturing the hum of your air conditioner, the dog barking next door, and every other sound you don't want, creating a cleanup nightmare for yourself.
Master Your Microphone Technique
Once you've got your mic, how you use it is just as important as the gear itself. Simple adjustments to your placement and delivery can have a massive impact.
- Find the sweet spot: As a general rule, position your mouth about 4-6 inches from the microphone. This gets you that clear, present vocal sound without being too boomy or harsh.
- Speak across, not into: To avoid those harsh, explosive "p" and "b" sounds (known as plosives), try aiming the mic at the corner of your mouth instead of speaking straight into the capsule.
- Always use a pop filter: This is non-negotiable. A pop filter is a simple screen that sits between you and the mic, and it's your best defense against those distracting popping sounds that are a real pain to edit out later.
Set Your Recording Levels Correctly
Finally, let's talk volume. You need to record your audio at a level that’s loud enough to rise above any background hiss from your equipment, but not so loud that it clips. Clipping is when the audio signal is too hot for your gear to handle, resulting in a nasty, distorted sound that is basically unfixable.
Your recording software will have a meter showing your input level. You want your voice to consistently hit somewhere between -12dB and -6dB. This leaves plenty of "headroom" to prevent clipping if you suddenly laugh or speak louder, while still capturing a strong, clean signal. If you're finding it hard to get a good level, our guide on how to increase your mic volume safely walks you through the process step-by-step.
Nailing these fundamentals—your space, your mic, and your technique—means you’re feeding the best possible audio into your online tools. Do the prep work now, and you'll be rewarded with a much better final product every single time.
Turning to AI for an Instant Audio Upgrade
If getting a clean recording is step one, then using AI-powered online tools is where the real magic happens. This is the modern secret to taking good audio and making it sound absolutely incredible, often with just a few clicks. These platforms have essentially democratized complex audio engineering, making it accessible to everyone, regardless of their technical chops.
The whole idea is beautifully simple: you upload your imperfect audio, and a sophisticated algorithm gets to work. It analyzes the file, pinpoints the problems, and applies incredibly precise fixes. What used to take hours of painstaking manual work in expensive software can now be done in the time it takes to brew a pot of coffee. It’s a genuine game-changer for anyone who needs to improve audio quality online.
This isn't just a small shift; it's a massive trend. AI-driven audio tools for tasks like noise suppression and speech restoration have scaled at an incredible pace. This has opened the door for a new wave of creators who can now produce crystal-clear audio from home studios, reaching bigger audiences than ever before. These tools learn from enormous datasets of pristine audio, allowing them to intelligently filter out noise and even reconstruct missing details in your recording.
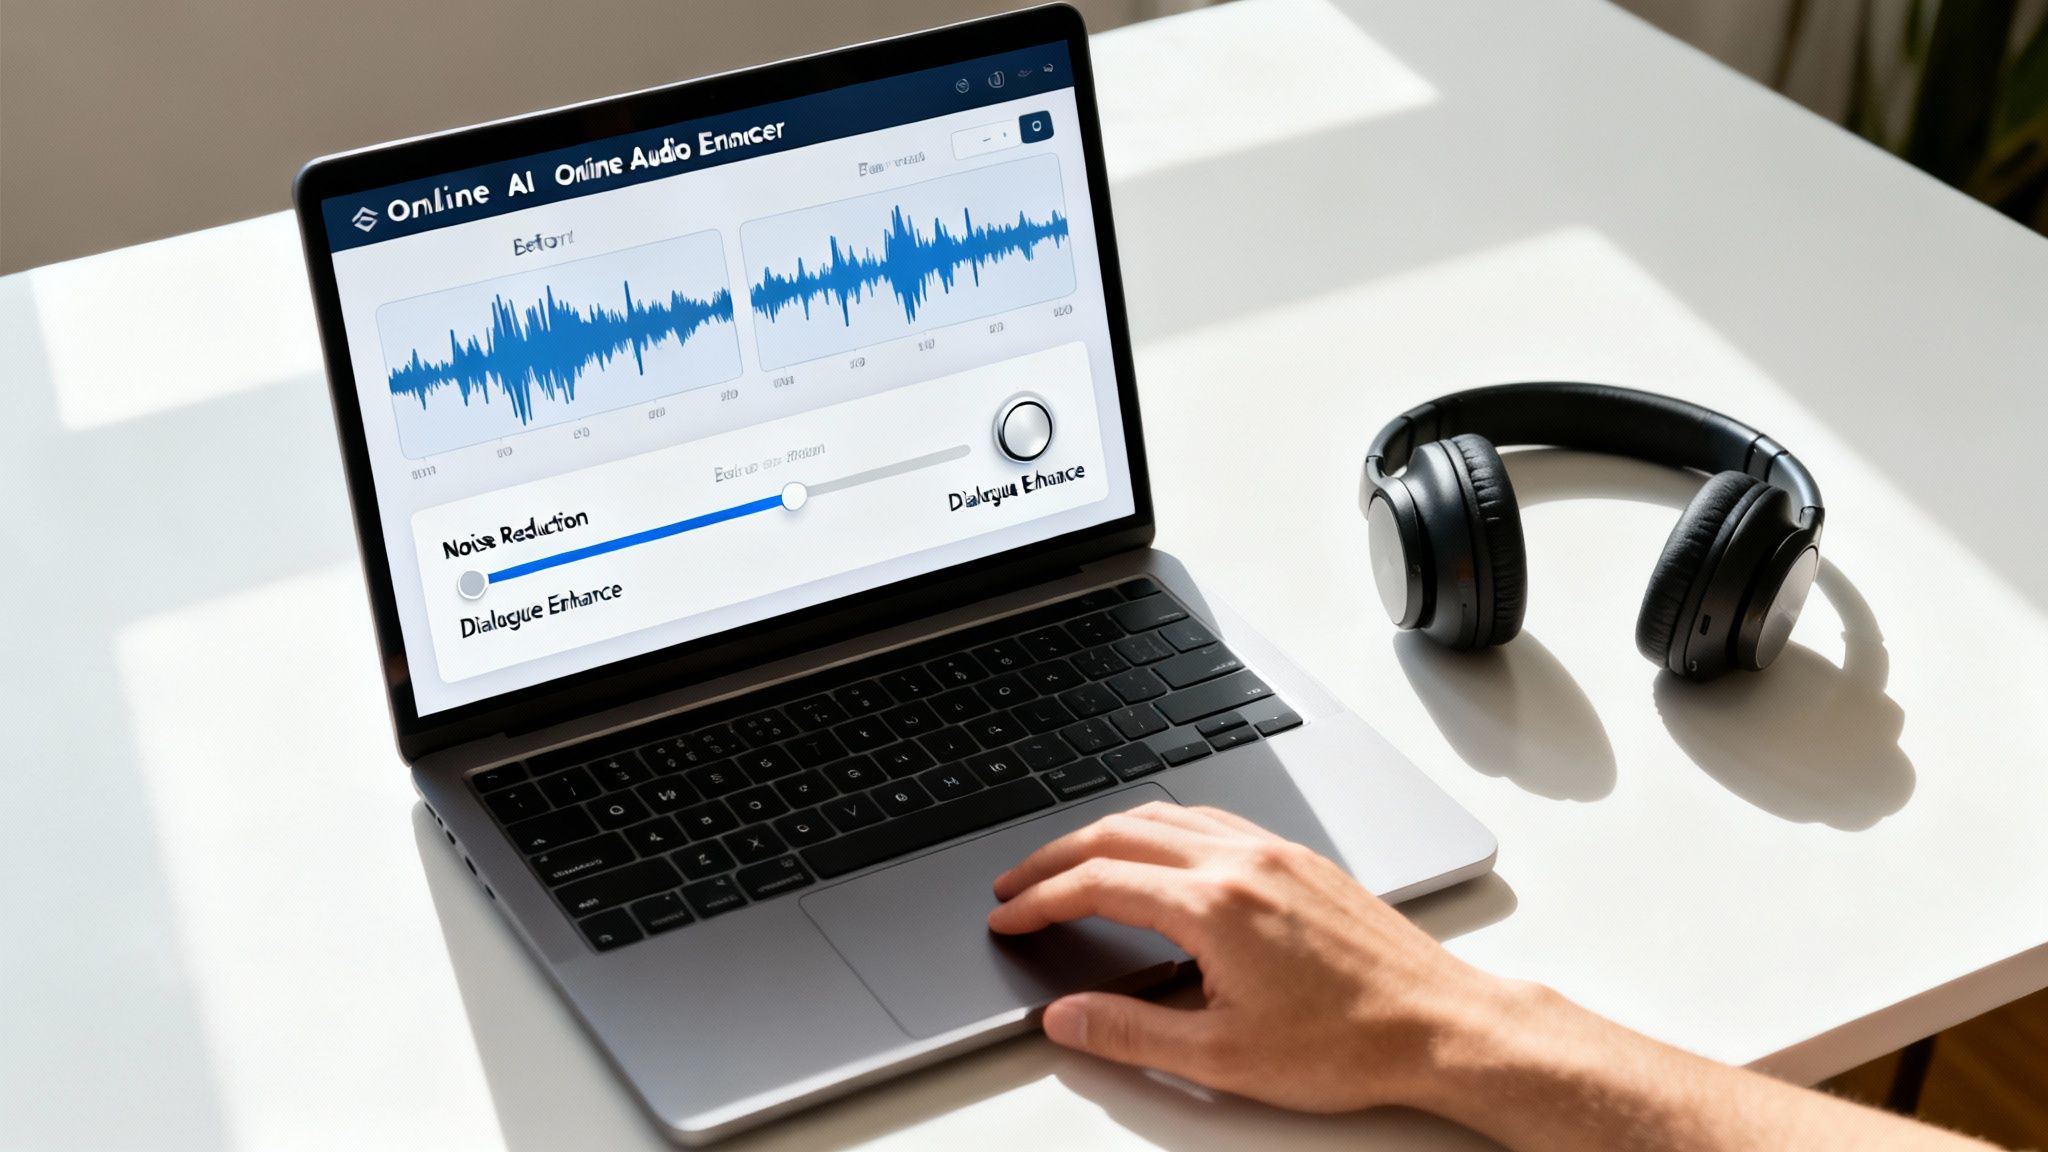
The Power of AI Noise Reduction
By far, the most common and impactful use for these AI tools is noise reduction. And this isn't your old-school noise gate that just crudely silences quiet parts. AI algorithms are trained to differentiate the human voice from a whole library of other sounds.
Let's paint a picture. You've just wrapped up a fantastic podcast interview. But on playback, you realize the air conditioner was humming in the background the entire time. In the past, trying to filter that out manually without making the speaker sound thin and robotic was a nightmare.
With an online AI tool, the workflow is totally different:
- You simply upload the interview file.
- The AI immediately identifies that consistent hum as background noise, separate from the vocal frequencies.
- It then intelligently subtracts that hum while carefully preserving the natural tone and richness of the speakers' voices.
The result? A clean track that sounds like the AC was never even on. This same principle works wonders on all sorts of common audio headaches, from the hiss of a cheap microphone preamp to the distracting chatter of a busy café. To get a better sense of the technology, take a look at our guide on how software-based noise cancellation actually works.
Boosting Vocals with Dialogue Enhancement
Sometimes, the issue isn't what's in the background, but the vocals themselves. Maybe a speaker was a bit too far from their mic, or the recording levels were set too low, leaving the dialogue sounding thin and distant. This is where a dialogue enhancement (or "speech enhancement") feature becomes your best friend.
These AI models are trained specifically on spoken-word content. They have a deep understanding of the key frequencies that give the human voice its clarity, presence, and warmth. When you apply this kind of processing, the tool does a lot more than just crank up the volume.
It’s actually making a series of smart, subtle adjustments:
- Boosting Presence: It might add a slight lift to the 2-5 kHz frequency range, which is crucial for making speech easier to understand.
- Adding Warmth: It can bring a little more body to a voice by enhancing the low-mid frequencies (around 150-300 Hz).
- Dynamic Leveling: It acts like an intelligent compressor, evening out the volume so that every word comes through clearly, whether it was whispered or shouted.
A perfect real-world scenario for this is cleaning up a recording from a video conference. You often have people using different mics in different rooms, leading to a really inconsistent sound. An AI dialogue enhancer can balance all those voices, making it sound like everyone was sitting in the same professional studio.
Rescuing Recordings with Audio Restoration
Finally, we have the heavy-duty work of audio restoration, which can tackle severe problems that would have once made a recording completely unusable. The most common culprit here is digital clipping. Clipping happens when your recording level is set too high, literally squaring off the top of the audio waveform and creating a harsh, ugly distortion.
While heavily clipped audio is notoriously difficult to fix perfectly, AI restoration tools can work miracles. They analyze the distorted parts and try to intelligently rebuild the clipped-off peaks of the waveform based on the clean audio surrounding them.
Another incredibly powerful restoration feature is de-reverb. If you recorded in a room with a lot of echo, the AI can identify those sound reflections and dial them back in the mix. This instantly tightens up the audio, making the speaker sound closer and more direct. It's a lifesaver for anyone recording in an untreated home office or living room. The key is to always start with the best possible source recording you can manage, and then let the AI do the final, brilliant polish.
Mastering Formats and Loudness Standards
After all the hard work you've put into cleaning up your recording, these final steps are what make sure it sounds professional and consistent, no matter where it’s played. Getting the technical settings right isn't just for audiophiles; it’s a non-negotiable step to improve audio quality online and meet listener expectations.
This final stage is all about delivery. You've got clean, clear audio, but if it's jarringly loud or frustratingly quiet compared to everything else on a platform, people will notice immediately. Nailing these settings adds that last layer of polish that separates amateur work from a truly professional production.
Choosing the Right Audio Format
The file format you choose is a trade-off between quality and file size. It's crucial to understand the difference so you can make the right call for your project.
You'll mainly deal with two types of audio files:
- Lossless Formats (WAV, AIFF): These are the gold standard for pure quality. Because they’re uncompressed, they contain every bit of the original audio information. I always recommend working with and archiving your master files in a lossless format to preserve every detail.
- Lossy Formats (MP3, AAC): These formats cleverly shrink file sizes, which is perfect for streaming and sharing online. They do this by permanently throwing away some audio data—data our ears hopefully won't miss. A high-bitrate MP3 can sound fantastic, but it's a terrible format for editing.
A solid workflow is to always upload a WAV file to any online audio tool. Once you're done, download the cleaned-up version as a WAV, too. Only when you're completely finished and ready to publish should you export to a lossy format like MP3.
My rule of thumb is simple: work in lossless (WAV) for as long as possible. Compress only once, right at the very end, for the final delivery. Every time you re-compress a lossy file (like saving an edited MP3 as another MP3), you're chipping away at the quality.
What's the Deal with Loudness and LUFS?
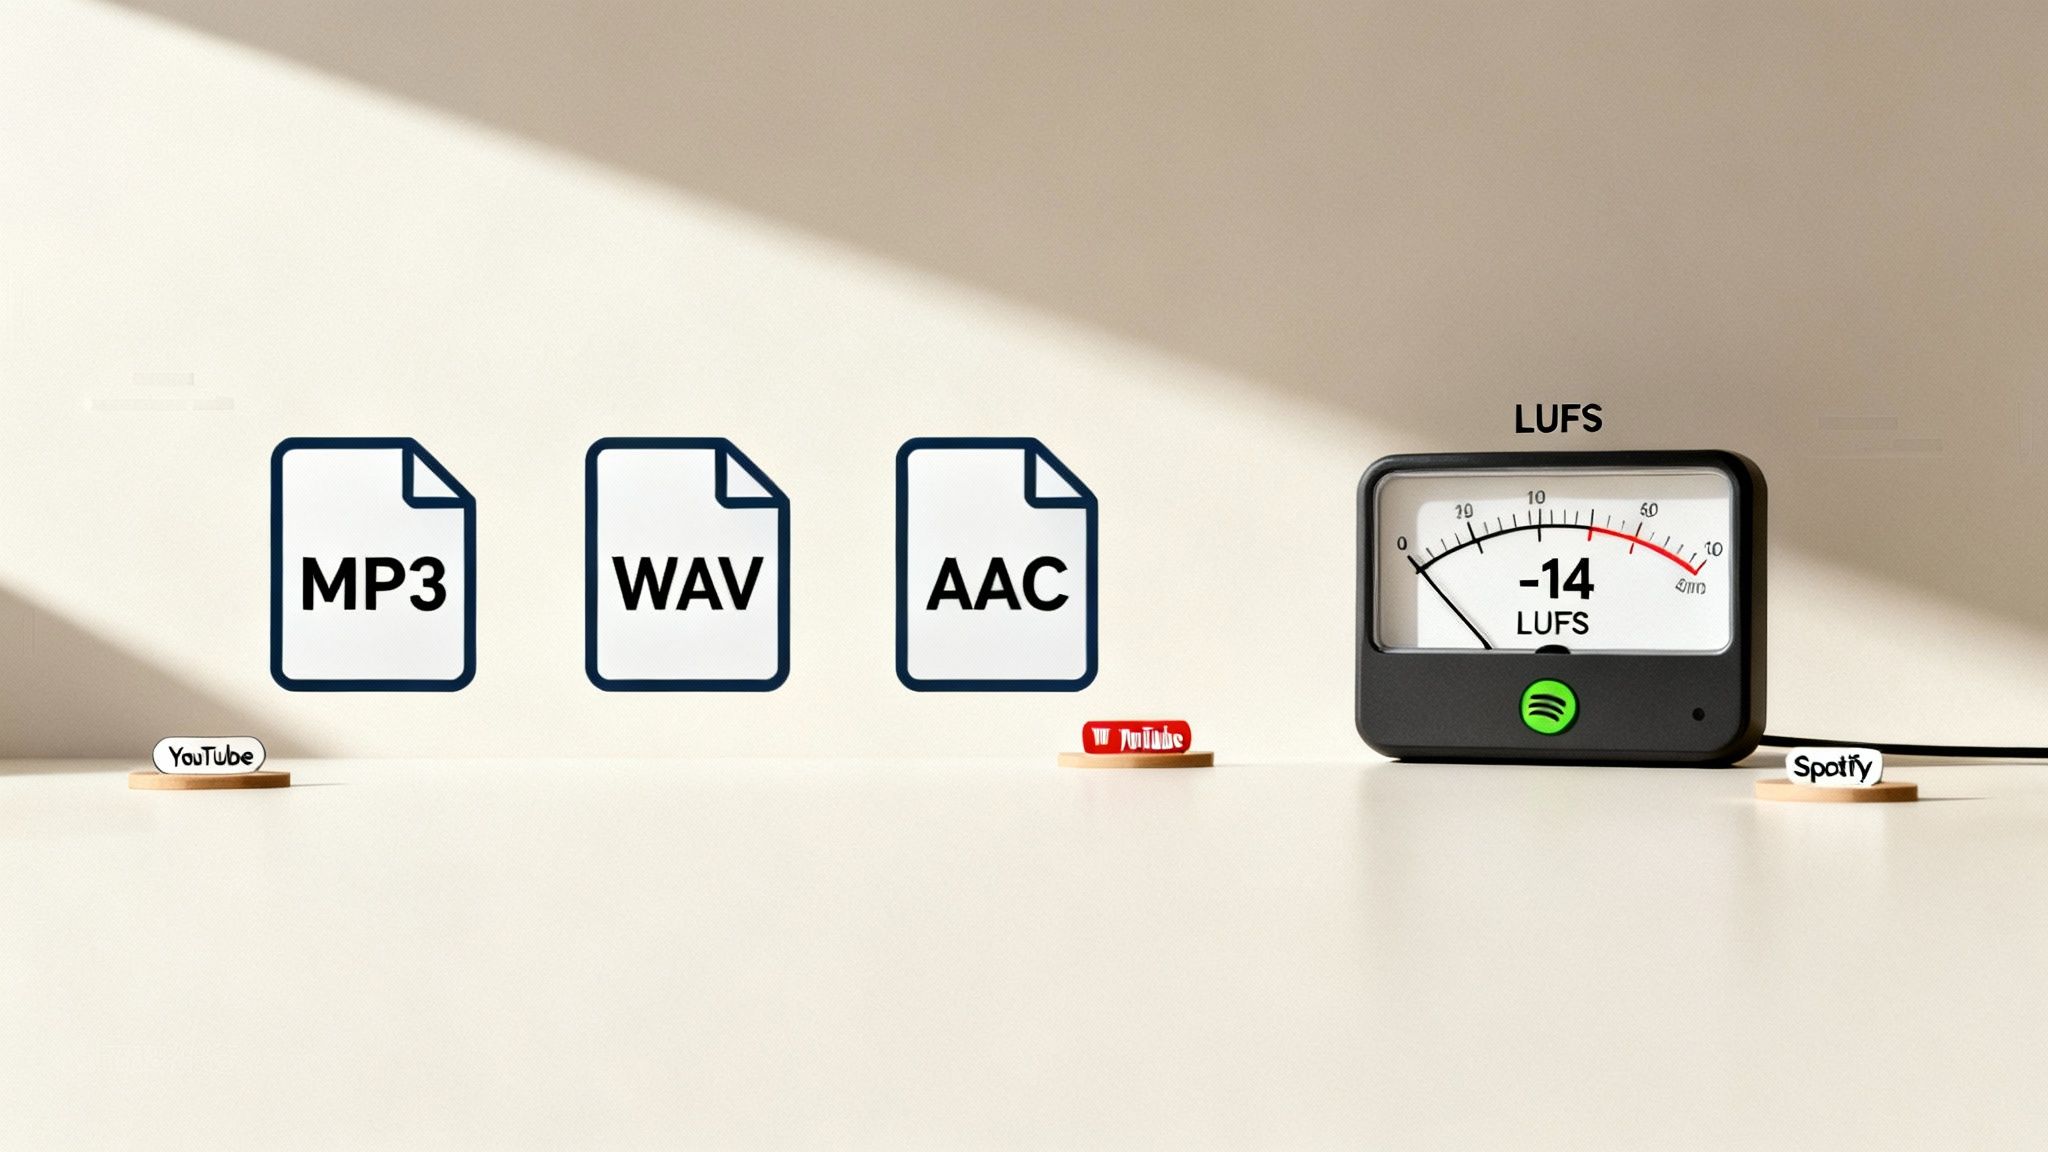
Ever wonder how you can jump from a quiet podcast interview to a high-energy music track on Spotify or YouTube without constantly reaching for the volume knob? That magic is loudness normalization, and the industry-standard measurement behind it is LUFS (Loudness Units Full Scale).
LUFS is a smarter way to measure volume because it's designed to reflect how our ears actually perceive loudness, considering both sharp peaks and the overall average level. Platforms use this to create a consistent listening experience, automatically turning down tracks that are too hot and boosting ones that are too quiet.
Hitting the right LUFS target for your destination platform is vital for a professional sound. If you upload audio that’s too loud, the platform will squash it with a limiter, which can sound distorted and awful. If it’s too quiet, they’ll turn it up, which also brings up any underlying noise floor you might have.
Hitting Platform-Specific Targets
Every platform has its own preferred loudness level. Aiming for these specific numbers ensures your audio sounds just like you intended it to. Thankfully, most online tools and DAWs now have LUFS meters or normalization features built right in.
To make things easier, here is a quick reference guide for some of the biggest platforms.
Audio Format and Loudness Targets for Major Platforms
This table outlines the recommended formats and target LUFS levels to ensure your audio sounds its best across popular content platforms.
| Platform | Recommended Format | Target Loudness (LUFS) | Key Consideration |
|---|---|---|---|
| YouTube | AAC | -14 LUFS | YouTube applies this standard across all video and audio content. |
| Spotify | Ogg Vorbis / AAC | -14 LUFS | While -14 is the default, their "Loud" setting targets -11 LUFS. |
| Apple Podcasts | AAC | -16 LUFS | Apple's standard is a bit quieter to maintain clarity for spoken word. |
| Amazon Music | MP3 / FLAC | -14 LUFS | This is a fairly common target for many music streaming services. |
To hit these targets, you'll use a function called Loudness Normalization. This is far more sophisticated than old-school peak normalization. Instead of just looking at the loudest single point, it analyzes the entire track's perceived loudness and adjusts the overall gain to hit a precise LUFS value. It's the final, critical touch to make your audio sound great everywhere.
Why Great Audio Is Your Biggest Competitive Advantage
Let’s be honest: spending time to improve audio quality online can feel like a chore. But it's not just about making things sound pretty—it's one of the most critical business decisions you can make. In a world overflowing with content, crisp, clear sound isn't a "nice-to-have" anymore. It’s the price of entry for keeping your audience from clicking away.
Bad audio is an instant turn-off. If someone has to struggle to hear you over background hum, room echo, or wild volume swings, they're gone. This isn't just a hunch; it directly tanks crucial metrics like listener retention and average watch time, which are the very signals that tell platform algorithms to show your content to more people.
Ultimately, professional audio builds credibility. It sends a clear message to your audience: you respect their time and you're serious about your craft. That’s how you build a loyal community.
How Sound Quality Directly Impacts Your Wallet
For any creator looking to make money, the line between audio clarity and revenue is crystal clear. Whether you rely on ads, sponsorships, or selling your own products, your entire business model depends on engagement. Annoying or amateur-sounding audio is a guaranteed way to lose a potential customer before they even get to your pitch.
Think about the podcasting and streaming world. The latest data shows that ad-supported listening is huge, making up about 63–64% of all time spent listening to audio. Podcasts have grabbed a solid 19% of that ad-supported pie, and that share is only getting bigger. Since most people are listening on platforms with ads, your audio quality has a direct effect on how many people stick around to hear those ads, which in turn impacts your bottom line. You can dig into more of these numbers in the U.S. audio listening trends report from Edison Research.
Using Superior Sound to Stand Out
In a crowded niche—whether you're creating educational videos or a true-crime podcast—fantastic audio can be what sets you apart. If two creators are talking about the exact same thing, the one with the clean, professional sound will almost always come across as the more credible expert.
This isn't just about perception; it has real-world benefits:
- Better Discoverability: Platforms notice when people stick around longer. They reward high-quality content that keeps users engaged with more visibility.
- More Loyal Subscribers: People will actively seek out and subscribe to a show that sounds consistently good. It's just a more pleasant experience.
- Stronger Sponsor Appeal: Brands want their name associated with polished, professional content. Great audio makes you a much more attractive partner.
Here’s something I’ve learned over years of creating content: A listener might forgive shaky video if the audio is perfect, but they will never stick around for poor audio, even with a Hollywood-quality picture. Sound is what connects emotionally.
So, stop thinking of audio cleanup as a tedious task. See it for what it is: a strategic investment. Every minute you spend dialing in levels and killing background noise is a direct investment in building a stronger, more successful brand.
Common Audio Questions Answered
Working with audio always brings up a few tricky questions, especially when you're trying to get everything sounding just right with online tools. Let's dig into some of the most common things people ask when they're dialing in their sound.
Can I Really Fix Truly Awful Audio with Online Tools?
You can, but it’s important to have realistic expectations. Today’s AI-powered tools are shockingly good at fixing problems that would have made a recording completely unusable just a few years ago.
They are absolute wizards at getting rid of consistent, droning background noise. I'm talking about things like:
- The hum from an air conditioner or a computer fan.
- The hiss you get from a cheap microphone preamp.
- The low-end rumble from traffic outside your window.
They're also great at taming echo from a big, empty room and evening out volume levels when one person is way louder than another. For example, if you recorded an interview in a coffee shop, an AI tool can do a fantastic job of isolating the voices and pushing that background clatter way down, making the conversation perfectly clear.
But the tech isn't magic. The one thing that's nearly impossible to fix is severe digital clipping. That's the crunchy, distorted sound you get when your recording level was set way too high. Once that information is gone, it's gone for good. Similarly, if a loud, sudden noise like a dog barking completely masks a word, the AI might struggle to perfectly reconstruct what was said.
Think of online tools as finishers, not saviors. Your goal should always be to get the best recording you can at the source. Use the tools to take something good and make it sound polished and professional, not to rescue a disaster.
What’s the Difference Between Normalization and Compression?
This is a great question, and it’s one of the most common points of confusion. They sound similar, but they do two very different jobs. Simply put, normalization changes the overall volume, while compression controls the volume dynamics.
Normalization is about hitting a specific volume target. It looks at your whole audio file and adjusts the gain up or down to a set level. You’ll run into two types:
- Peak Normalization: This one is pretty basic. It finds the single loudest peak in your audio and raises the entire track until that peak hits a ceiling (usually just under 0 dBFS to avoid clipping). The loud parts are still loud and the quiet parts are still quiet; everything is just globally louder.
- Loudness Normalization: This is the modern standard, measured in LUFS (Loudness Units Full Scale). It analyzes the perceived loudness—how loud it actually sounds to a human ear—and adjusts the file to meet a platform's target, like -14 LUFS for YouTube or -16 LUFS for most podcasts. This is what gives you that consistent listening experience across different videos or episodes.
Compression, on the other hand, squashes the dynamic range. It makes the loud parts quieter and the quiet parts louder. Think of a guest on your podcast who goes from whispering to shouting. Compression reels in those peaks and boosts the quiet moments so every word is easy to hear, and your listener isn't constantly reaching for the volume knob.
A typical pro workflow for spoken word uses both: you'd apply compression first to even out the performance, and then use loudness normalization to bring the finished track up to the delivery spec for your platform.
Do I Need to Pay for a Good Online Audio Enhancer?
Not necessarily to get started, but the paid tools almost always deliver better results and a smoother workflow. The good news is that many of the best services run on a "freemium" model.
This usually means you can expect:
- A certain amount of free processing time, like an hour per month.
- Limits on how long or how large your uploaded files can be.
- Access to the core features (like noise reduction), but with more advanced stuff (like de-reverb or batch processing) locked behind a paywall.
These free tiers are perfect for testing the waters. You can see how a tool works, clean up a short, one-off project, and decide if it's right for you. If you only record audio once in a blue moon, a free plan might be all you ever need.
However, if you're creating content regularly, a subscription is a no-brainer. Paying for a plan unlocks the good stuff: higher-quality processing algorithms, faster speeds, the ability to upload and process a whole folder of files at once, and much higher (or unlimited) usage caps.
Which Audio File Format Should I Upload for Editing?
Always, always upload the highest quality, uncompressed file you have. For 99% of people, that means a WAV file (or an AIFF if you're on a Mac). These are lossless formats, which means they contain 100% of the original audio data your microphone captured.
When you save something as an MP3, you're using a "lossy" compression. To make the file smaller, the algorithm permanently throws away audio data it deems less important. While a high-quality MP3 can sound fine for listening, it's a compromised source to start editing from.
The best analogy is photo editing. You'll always get a better result editing a massive RAW camera file than you will a compressed JPEG. The same goes for audio. Giving an AI tool a compressed file is like asking it to work with one hand tied behind its back.
Your professional workflow should look like this:
- Record in an uncompressed format (WAV is the universal standard).
- Upload that original WAV file to your online tool for cleaning.
- Download the processed file as a WAV.
- Do all your final editing and mixing with these high-quality files.
- Only at the very end, when you’re ready to publish, should you export a compressed version like an MP3.
Ready to hear the difference AI can make on your audio? SimpleClean removes background noise and enhances speech with a single click, giving you studio-quality sound in minutes. Try it for free and clean up your first hour of audio at SimpleClean.