Let's face it: nothing kills the vibe of a great recording faster than distracting background noise. That low hum from the air conditioner, the faint sound of traffic, or even that subtle hiss from your own gear can instantly make your content feel amateurish and hard to listen to. For a long time, the only way to fix this was to dive deep into complex software, trying to figure out noise profiles and tweaking a dozen confusing settings.
Thankfully, those days are pretty much over. Modern AI-powered audio cleaners have completely changed the game, making professional-quality sound accessible to everyone. If you're a podcaster, YouTuber, or educator, you no longer need a degree in audio engineering to get crystal-clear audio. The new workflow is dead simple: upload your file, let the AI do its thing, and download a polished track a few minutes later.
This approach saves a massive amount of time and honestly, the results often blow away what many people can achieve with traditional tools, especially if you're not a seasoned pro.
This flowchart breaks down the two main paths you can take for audio cleanup. It helps you decide whether you need the speed and simplicity of AI or the fine-tuned precision of manual editing.
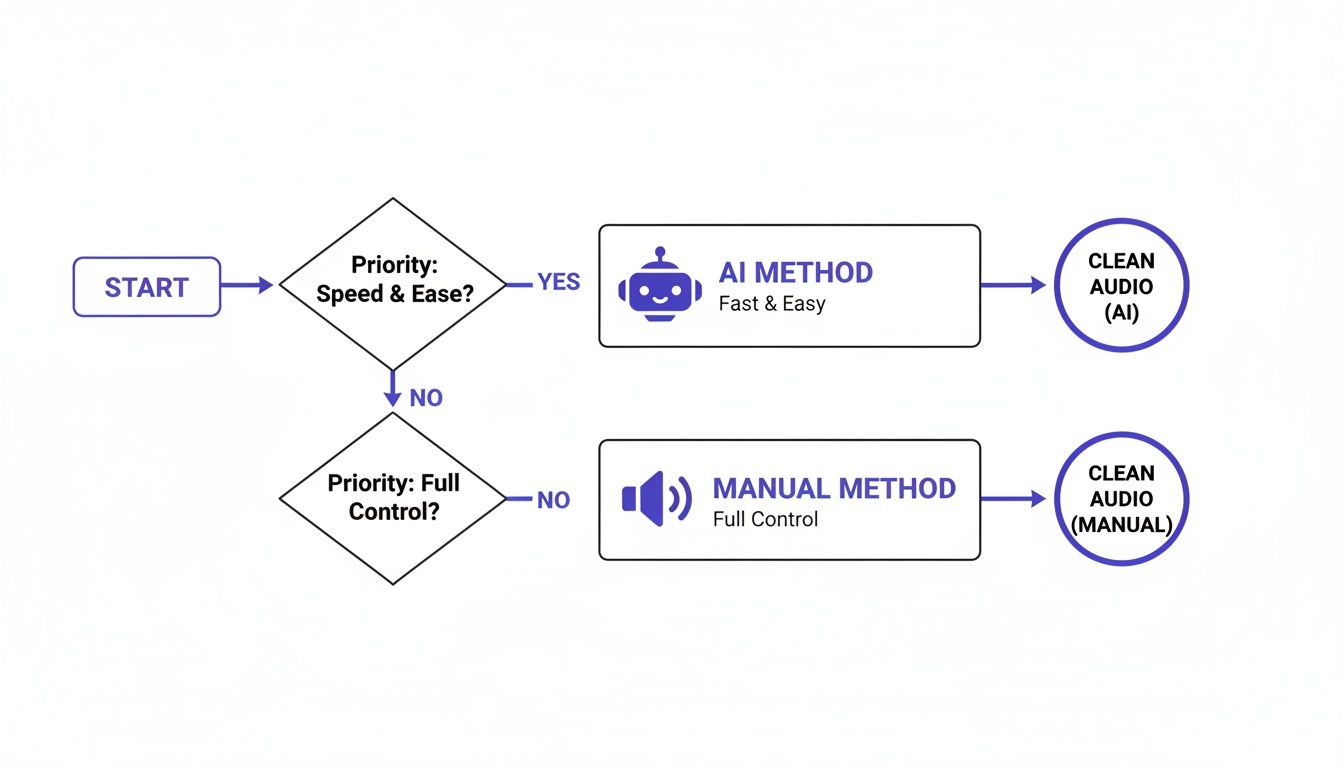
As you can see, for most creators who just want a great result without the headache, an AI-powered tool is the clear winner.
Why an AI-First Approach Makes Sense
Putting AI first is all about efficiency. Instead of spending hours learning the ins and outs of a complex Digital Audio Workstation (DAW), you can get a clean audio track in the time it takes to brew a pot of coffee. This is a huge advantage for anyone producing content on a regular schedule.
Here's what really matters: The goal isn't just to cut out the noise. It's to do it while keeping the speaker's voice sounding rich, clear, and natural. Modern AI models are trained on thousands of hours of speech, which makes them incredibly good at telling the difference between a human voice and all the junk in the background.
This isn't just a small trend; it's a fundamental shift in how we handle audio. The global market for this kind of software is expected to grow to a staggering USD 45.02 billion by 2034, which just shows how much demand there is for powerful, easy-to-use tools. If you're interested, you can read more about the growth in the audio technology market. This explosive growth is driven by creators like you who need pro-level audio without the technical baggage.
We'll start this guide with the fastest, most direct solution. After that, we’ll get into other methods for those who want more hands-on control or are looking to prevent noise from happening in the first place.
Understanding What Causes Background Noise
Before you can actually remove background noise, you need to know what you’re up against. It’s like a doctor diagnosing an illness before writing a prescription—if you can identify the specific kind of noise polluting your audio, you can pick the right tool to fix it.
Unwanted sounds typically fall into two buckets: environmental and technical. Each has its own sonic personality and requires a slightly different battle plan.
Environmental Noise Sources
This is the stuff that gets most people. It's the sound of the world going on around you while you're trying to lay down a perfect take. These noises are often unpredictable, making them a real headache to deal with without the right software.
Some of the usual suspects include:
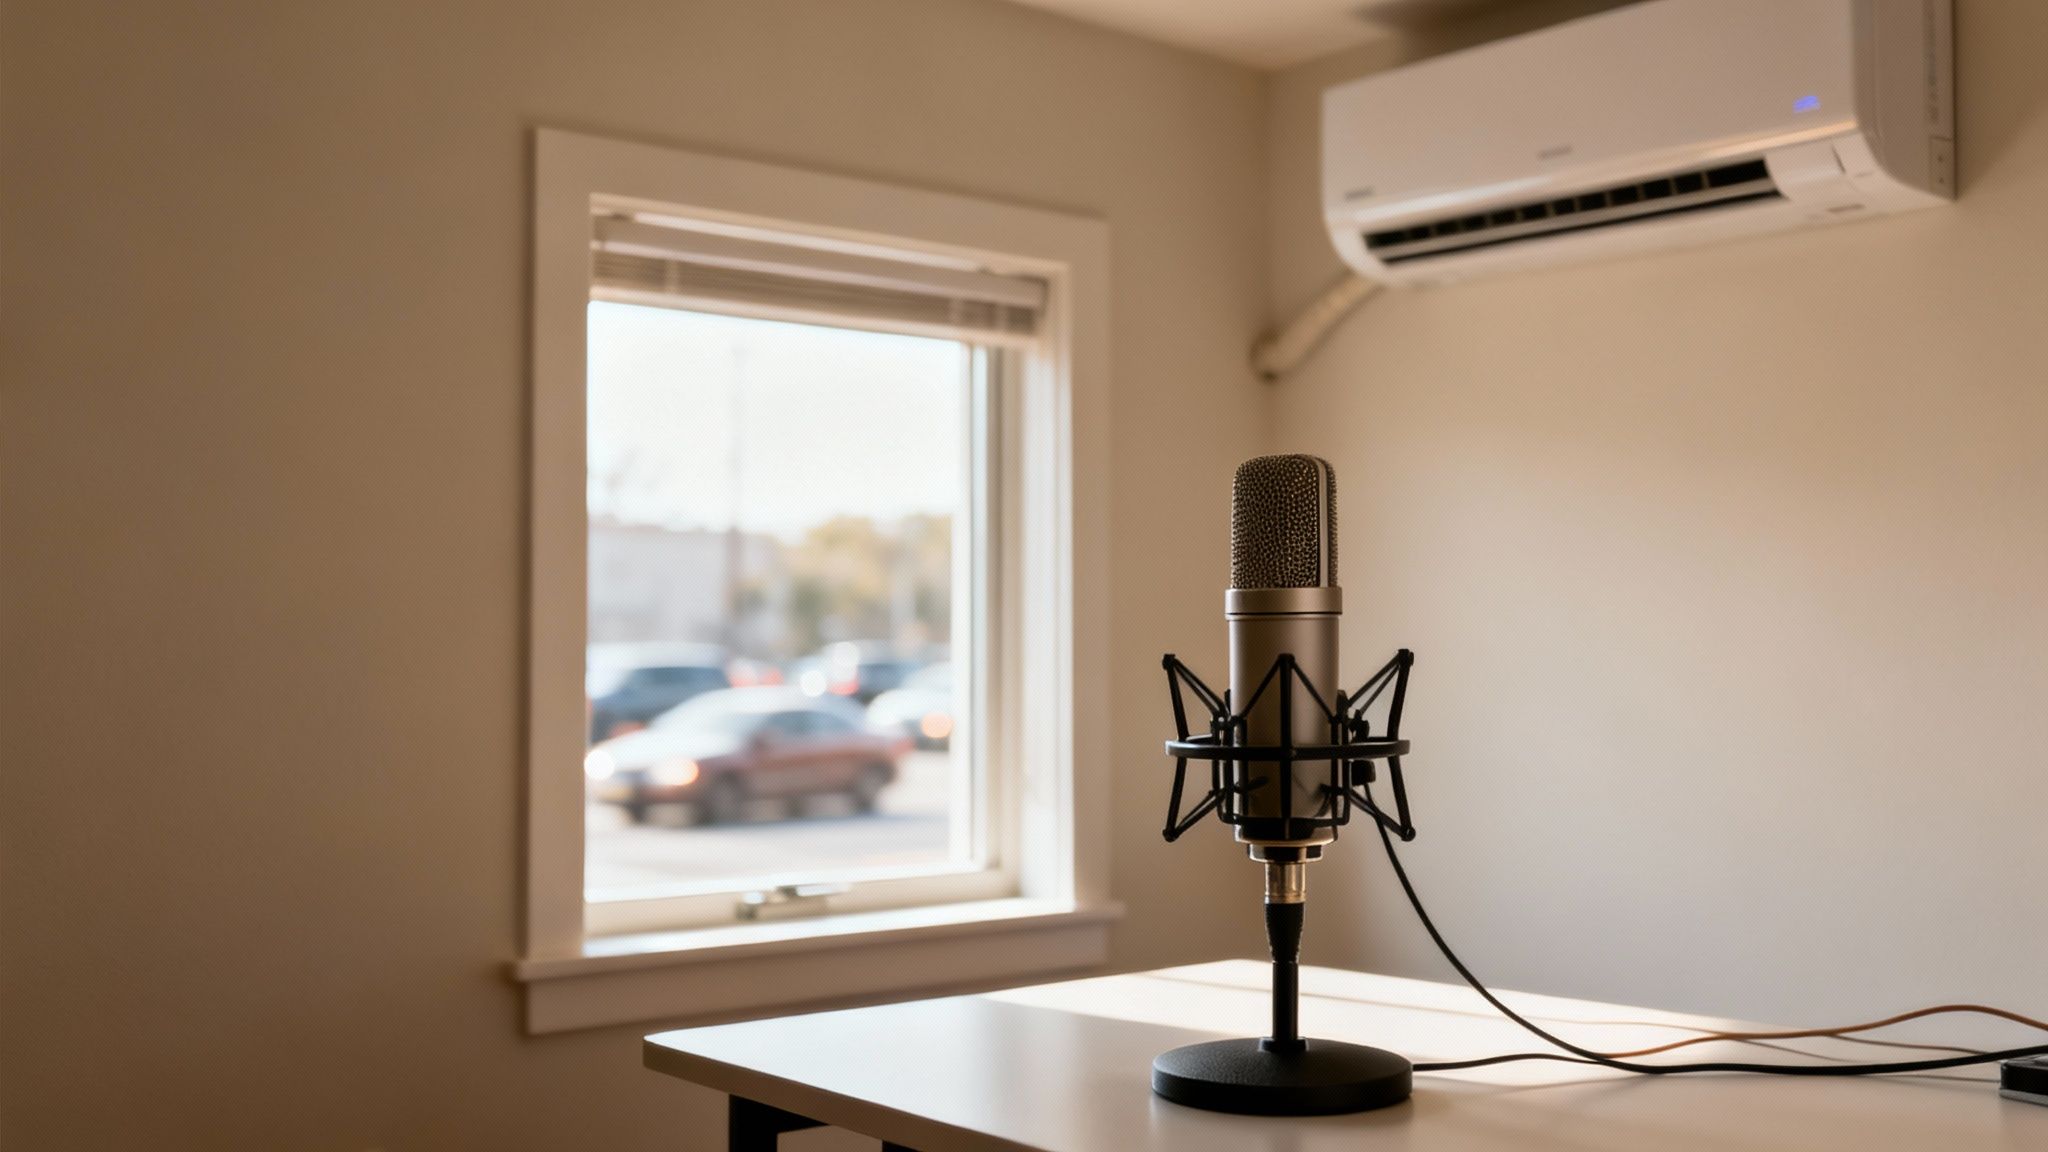
- HVAC Systems: That low, constant hum from an air conditioner or heater is a classic audio-killer. It creates a bed of noise that can instantly make your voice sound muddy and unprofessional.
- Traffic and Outdoor Sounds: Recording near a window? You’re inviting in every passing car, distant siren, or neighbor's lawnmower. Those sounds can bleed right into your microphone.
- Room Ambience and Chatter: If you're in a room with a lot of hard surfaces, your voice will bounce around, creating that hollow, echoey sound. Even the faint murmur of people talking in the next room can show up on your track. Our guide on how to remove echo from your audio gets into the nitty-gritty of fixing this exact problem.
The first step is just to listen. A low, steady drone is almost always an appliance. Sharp, random sounds are probably coming from outside. Knowing the difference helps you decide whether you need a tool for constant noise or one that can handle sudden bursts.
Even in a treated studio, some ambient sound is going to sneak in. That’s a big reason the market for physical noise control is booming; the global noise suppression components market is expected to hit USD 86.33 billion by 2034. It goes to show that while soundproofing is key, we all still rely on post-production software for that final polish.
Technical Noise and Artifacts
This second type of noise comes from your own gear. These issues can be more subtle than a passing truck but are just as distracting. They usually show up as a constant hiss, hum, or crackle that’s baked right into your recording.
Here's what to listen for:
- Microphone Preamp Hiss: Every preamp generates a bit of self-noise, which sounds like a faint "shhhh." Cheaper audio interfaces and mics are the worst offenders, especially when you crank up the gain to get a good level.
- Electrical Hum (60/50 Hz): This is that infamous low-frequency buzz. It’s a dead giveaway that you have electrical interference, usually from power lines or unshielded cables running too close to each other.
- Digital Clipping: While not "background noise" in the classic sense, it's a destructive artifact that ruins recordings. It happens when your recording level is set way too high, distorting the audio into a harsh, crackly mess that’s almost impossible to fix cleanly.
Once you can tell these sounds apart, you stop hearing just "noise" and start diagnosing specific problems like "60-cycle hum" or "preamp hiss." It’s a fundamental skill that not only helps you fix bad recordings but also teaches you how to prevent these issues from happening in the first place.
Using AI Tools for Effortless Audio Cleanup
Let's be honest, for most creators today, the fastest way to get pristine audio is with an AI-powered cleaner. These tools aren't a novelty anymore; they're a standard part of the content creation workflow because they deliver incredible results with almost zero effort. Instead of getting lost in complex plugins and equalizer settings, you can get studio-quality sound in just a few clicks.
This approach is all about speed and efficiency. If you're a podcaster on a tight schedule or a YouTuber pushing out daily content, you can't afford to spend hours tweaking audio. An AI tool collapses that entire frustrating process into a simple, fire-and-forget routine that just works.
The Core Workflow: At the end of the day, using an AI audio cleaner is a simple trade. You give it a file riddled with problems—hum, traffic noise, room echo—and it gives you back a clean file with just the clear, crisp voice you wanted to record in the first place.
This simplicity is exactly why the market is booming. The online audio noise reduction industry is valued at USD 563 million in 2024 and is expected to hit nearly USD 961 million by 2032. This explosion is driven by remote workers, podcasters, and video creators who need great audio without the steep learning curve of traditional software.
The Simple Upload and Process Steps
Getting started with a tool like SimpleClean is designed to be ridiculously easy. Everything happens right in your web browser, so there's no software to install or keep updated. You can clean up an audio file from your laptop, tablet, or even your phone while you're on the go.
You just drag and drop your media file to get started. Most online cleaners are built to handle a wide range of formats, so you rarely have to worry about converting your files first.
They typically accept common formats like:
- Video: MP4, MOV, AVI
- Audio: MP3, WAV, FLAC, M4A
Once your file is uploaded, the AI takes over. It scans the entire track, picking out the sonic fingerprints of unwanted sounds. It's been trained on thousands of hours of audio to know the difference between the human voice and all the junk that can creep into a recording. This allows it to surgically remove the bad stuff without making your voice sound thin or robotic. To get a better sense of how this tech is changing the game, check out this great overview of AI tools for podcasters.
Previewing and Downloading Your Cleaned Audio
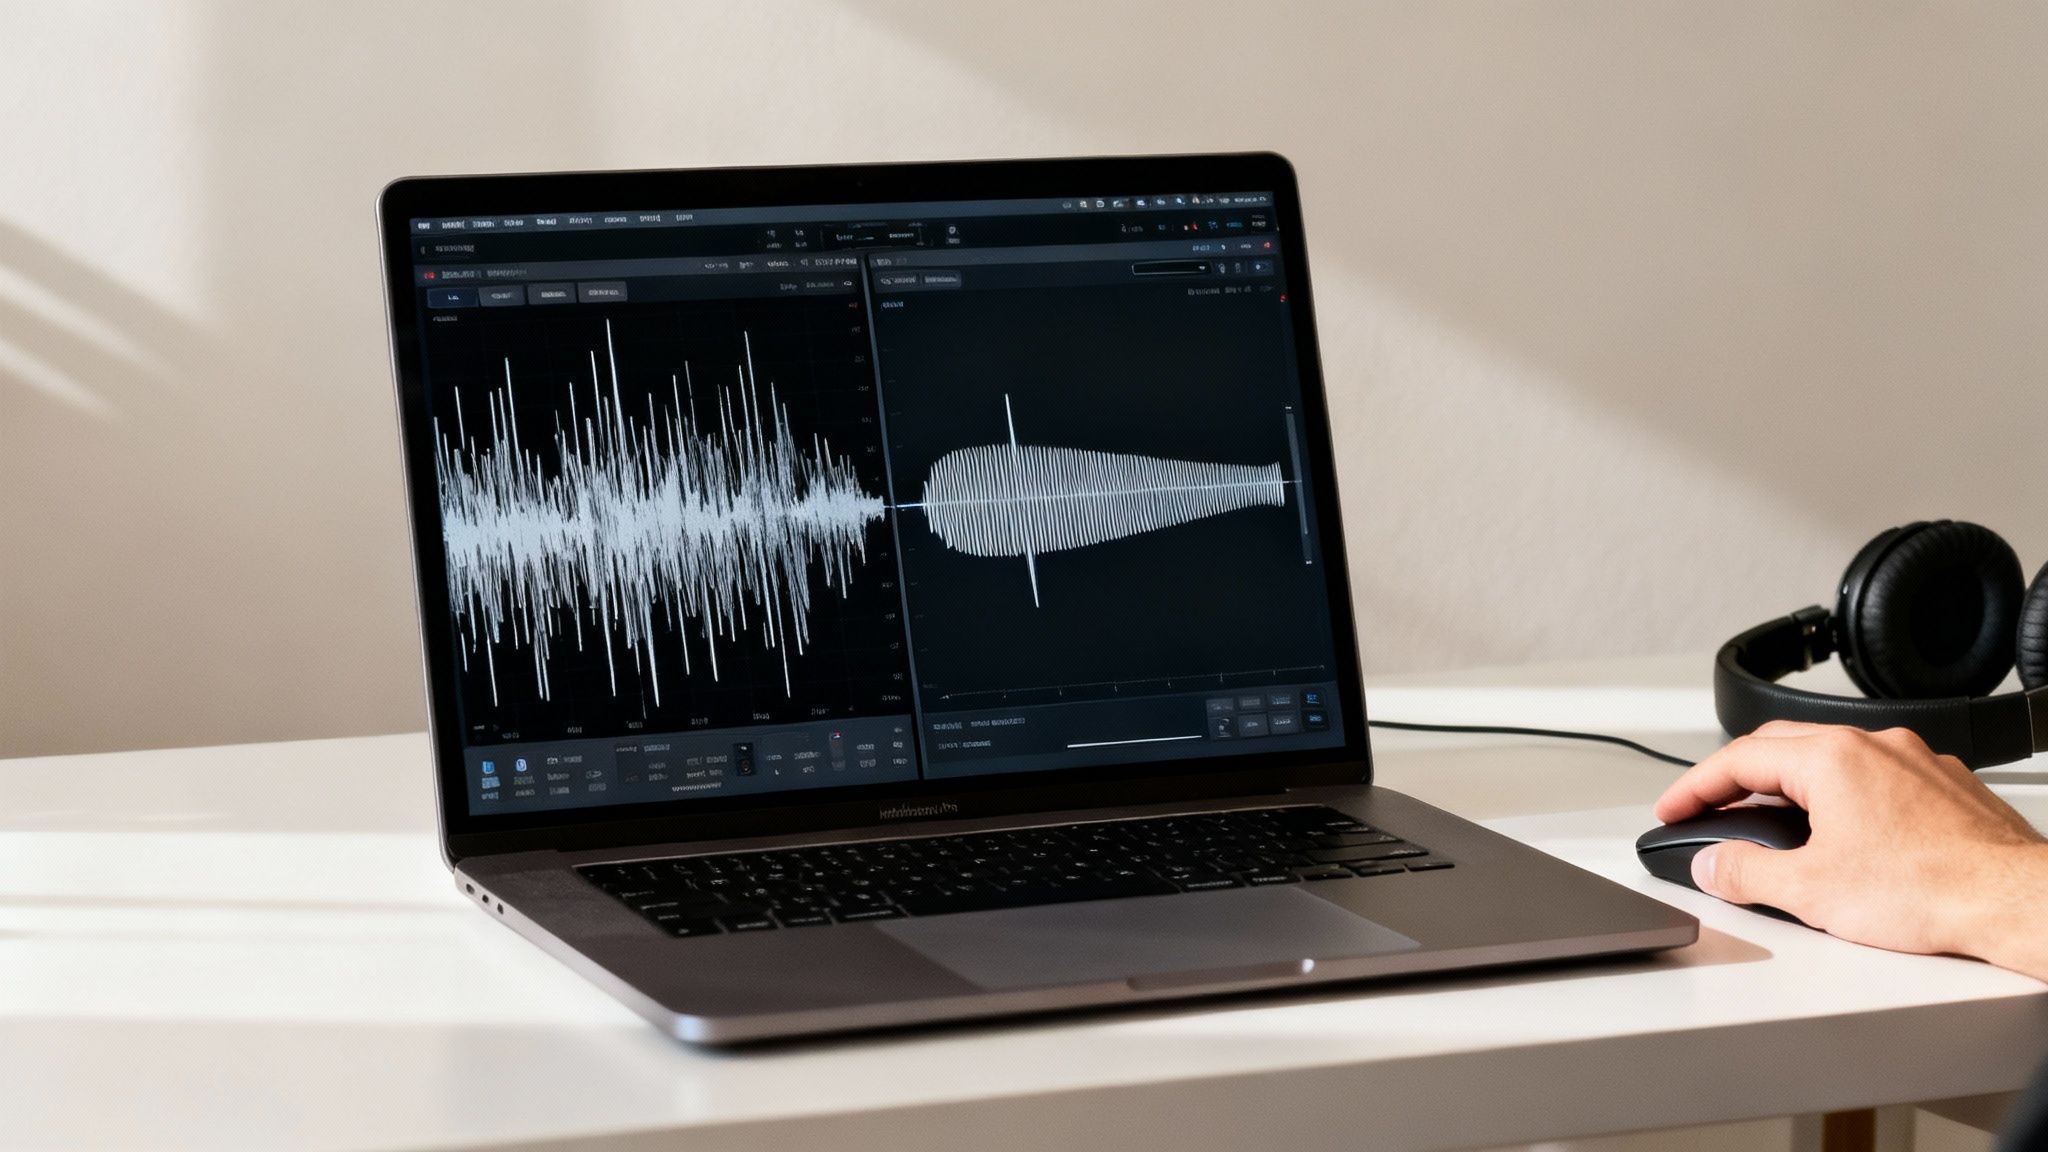
After the AI works its magic, you'll almost always get a preview. This is a critical step because it lets you hear the difference for yourself. A good tool will give you a simple A/B comparison, letting you switch between the original noisy track and the cleaned-up version.
This is your chance to confirm the result is what you wanted. Listen closely to a few spots to make sure no weird artifacts were introduced and that your voice still sounds natural and full.
If everything sounds great, you just hit download. You can usually pick the output format you need, making it a breeze to drop the clean audio right back into your video editor or podcasting software. To see how different tools stack up, have a look at our guide on the best https://simpleclean.app/blog/noise-reduction-software-for-audio.
Handling Larger Files and Ensuring Privacy
A question I get a lot is about file size limits. Modern online tools like SimpleClean are built to handle big files, often up to 1 GB or several hours of audio. That's more than enough for almost any podcast episode, YouTube video, or online course you might be creating.
And if you're working on a big project with lots of clips? Many platforms offer batch processing. You can upload a whole folder of recordings, and the system will email you when they're all cleaned and ready to download. This is an absolute lifesaver for bulk production work.
Finally, privacy is key. Reputable services automatically and permanently delete your files—both the original and the cleaned version—from their servers after a short period, usually around seven days. This means your content always remains your own. This private, automated workflow lets you stay focused on creating, not on worrying about data security.
Going Deeper with DAW Noise Reduction
AI cleaners are fantastic for speed and simplicity, but there are times when you need to get your hands dirty. For those really tough noise problems, or when you just want total control over the final sound, nothing beats diving into a Digital Audio Workstation (DAW).
Whether you're using Adobe Audition, the incredibly capable and free Audacity, or the Fairlight page in DaVinci Resolve, you're stepping into the audio equivalent of a surgeon's operating room. This approach isn't a one-click fix; it takes more time and has a bit of a learning curve. But the trade-off is precision. You get to tell the software exactly what to remove and, just as importantly, what to leave alone.
The Power of a Noise Print
The classic method for surgical noise removal hinges on something called a noise print. Think of it as giving your software a "fingerprint" of the exact sound you want to get rid of.
You start by finding a small, clean snippet of the problem sound—maybe a second or two of just the air conditioner hum, a computer fan's whir, or the hiss from your audio interface. By isolating this sound, you're essentially teaching the software, "This is the enemy. Go find it and get rid of it everywhere else."
The workflow is pretty standard across most DAWs:
- Find Your Sample: Hunt for a moment in your recording where no one is talking. All you want to hear is the background noise.
- Highlight It: Select that small segment of pure noise.
- Capture the "Print": Use your DAW's noise reduction effect (it might be called "Noise Reduction," "Denoise," or something similar) to analyze and "learn" the sound you've highlighted.
- Apply to the Track: Now that the tool knows what to look for, you can apply the reduction effect to your entire audio file.
From there, you'll have controls to dial in how aggressively it works. You can adjust the reduction amount and sensitivity until the hum is gone, but your voice still sounds full and present.
A Word of Caution: Don't crank the reduction dial to 100%. It's tempting, but it almost always introduces weird digital artifacts that can make you sound robotic or like you're talking underwater. A much more natural result comes from dialing it back to 80-90%, leaving just a whisper of the original room tone to keep things sounding real.
Erasing Sounds Visually with a Spectral Editor
What about sounds that aren't constant, like a sudden cough, a chair squeak, or a dog barking in the next room? You could try cutting them out, but that just leaves a jarring, unnatural silence. This is where the spectral frequency display comes in—and it’s a game-changer.
A spectral editor visualizes your audio as a kind of heat map, showing different frequencies over time. Your voice will show up as bright, dense shapes, while that annoying cough will appear as a distinct, separate splotch of color.
It feels a lot like using an image editor. You can literally use a selection tool to draw a box around the offending sound and simply delete it or turn its volume way down. It's like performing microsurgery on your audio, letting you remove a specific noise without touching the dialogue happening in the same moment.
If you’re dealing with a consistent electrical buzz or hiss, our guide on how to remove static sound from audio offers some more focused techniques for that specific problem.
Cleaning Up the Silence with a Noise Gate
A noise gate is one of the most fundamental and effective tools for cleaning up a track. Imagine a gatekeeper who only opens a gate when someone speaks and closes it tightly when they stop. That's exactly what it does.
You set a volume level, called the threshold. Any sound louder than that threshold (like your voice) passes through. Anything quieter (like the low-level room noise in between your sentences) gets completely silenced because the gate slams shut. It's an incredibly powerful way to get rid of that subtle hiss or hum that you only notice in the pauses.
To set it up right, you'll need to tweak a few key settings:
- Threshold: Set this just above the level of your background noise but comfortably below the quietest parts of your speech.
- Attack: This is how fast the gate opens. For speech, a quick attack is usually best so the beginning of your words isn't cut off.
- Hold: This keeps the gate open for a brief moment even after the sound dips below the threshold, preventing it from chattering on short pauses.
- Release: This controls how smoothly the gate closes. A slightly slower release sounds more natural and avoids an abrupt, choppy cutoff.
With a well-tuned noise gate, all those little gaps in your recording become pure, clean silence, giving your entire track a much tighter and more professional feel.
How to Record Cleaner Audio from the Start
Let's be honest: the absolute best way to remove background noise is to stop it from getting into your recording in the first place. AI tools and powerful software are incredible, but they're fundamentally repair tools. Adopting a few simple habits before you hit record will dramatically improve your audio quality and save you hours of headaches in post-production.
Think of it this way: editing is for polishing, not for rescue missions. A clean source file gives any software, whether it's an AI cleaner or a manual plugin, a much better foundation to work with.
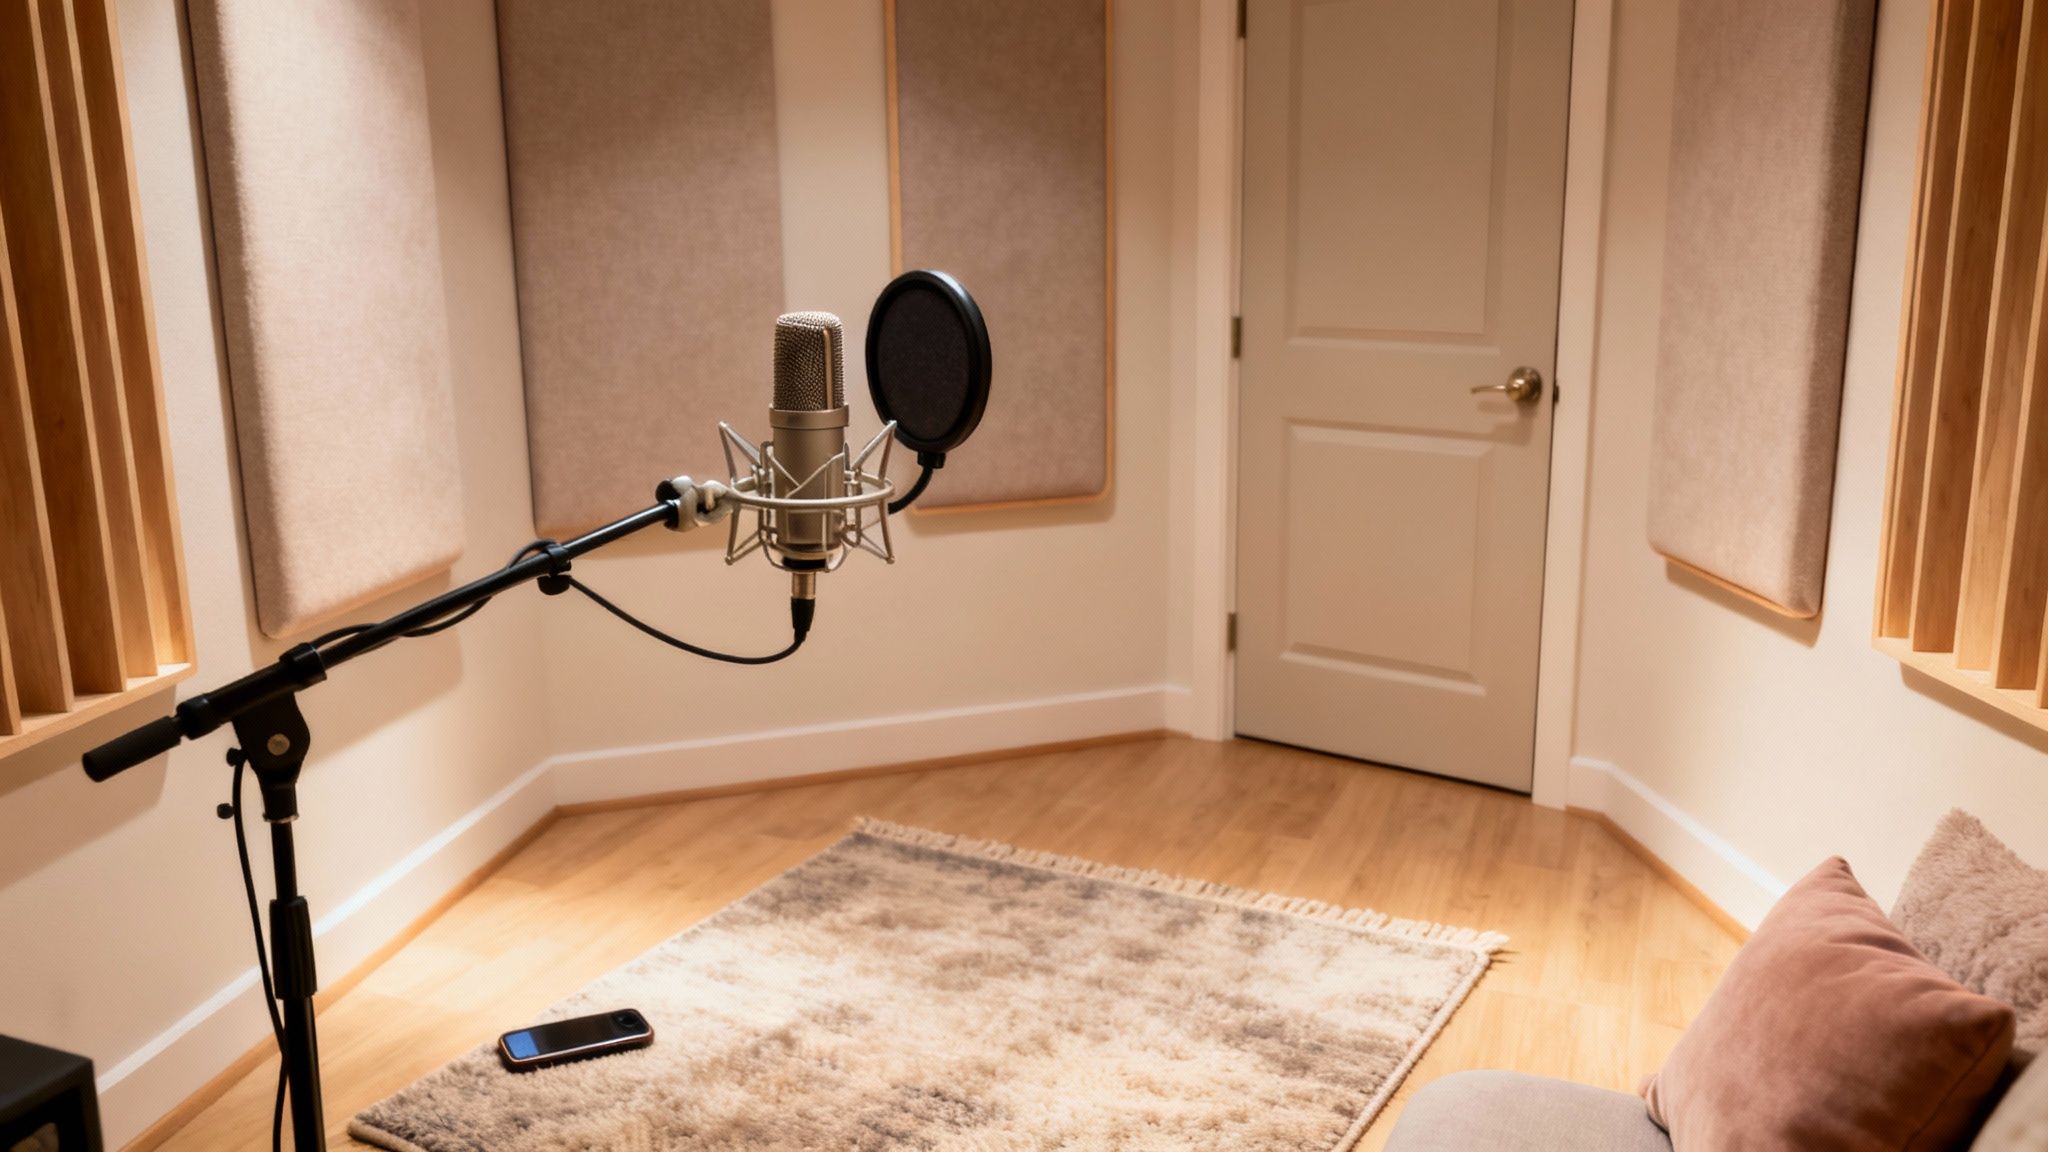
Choose Your Recording Space Wisely
Your environment is your biggest ally or your worst enemy. A room with lots of hard, flat surfaces—like bare walls, hardwood floors, and large windows—is an echo chamber. Sound waves bounce around endlessly, creating reverb and a hollow "room tone" that can be just as distracting as a humming fan.
To fight this, seek out spaces with soft furnishings that absorb sound.
- Carpets and Rugs: These are fantastic for killing sound reflections from the floor.
- Curtains: Heavy drapes do a great job of dampening sound bouncing off windows.
- Sofas and Bookshelves: Soft, irregular surfaces are perfect for breaking up and absorbing sound waves. There’s a reason a walk-in closet full of clothes is a legendary DIY recording booth—it works!
Your goal is to create a "dead" space where your voice is the main event, not the room's echo. In a pinch, even throwing a heavy blanket over a couple of chairs to make a small fort can work wonders.
Simply picking a better room can win half the battle against environmental noise. It's a zero-cost change with a massive impact.
Master Your Microphone Technique
Once you’ve tamed your space, how you use the microphone is the next critical piece of the puzzle. Mic placement isn’t just about being loud enough; it’s about maximizing your voice while minimizing room noise. This all comes down to the signal-to-noise ratio—you want your voice (the signal) to be way louder than the background junk (the noise).
A common mistake is placing the mic too far away. This forces you to crank up the gain, which amplifies not only your voice but also every little hiss, hum, and echo in the room.
Instead, get closer. For most vocal mics, 4-6 inches away is the sweet spot. This lets you set a lower gain on your interface, capturing a strong, clean vocal signal without boosting all that background noise along with it. If you want to dive deeper, there are some great techniques on how to reduce background noise on your mic.
Eliminate Noise Sources Before You Record
This last step sounds completely obvious, but it’s the one people forget most often in the excitement of hitting record. Before you start, take two minutes to do a full environmental sweep. Turn off anything and everything that makes a sound.
Here’s your pre-flight checklist:
- Shut all windows and doors to block outside traffic, sirens, and chatter.
- Kill the air conditioner, heater, and any fans. Yes, even the quiet ones.
- Silence your phone and move it away from your gear to avoid potential electrical interference.
- Unplug nearby appliances that produce a low hum, like mini-fridges or noisy computer power supplies.
After you’ve silenced everything, just stand there for a minute and listen. You'll probably be surprised by the subtle sounds you never noticed before. Pro tip: capture 30 seconds of this "room tone" before you start speaking. It can be incredibly useful later if you need to do manual noise reduction in a DAW. Building these habits ensures your raw recordings are as clean as possible, right from the start.
Frequently Asked Questions About Cleaning Up Audio
Even with the best tools at your fingertips, you're bound to run into questions when you're deep in an audio cleanup session. Let's tackle some of the most common ones that pop up for creators.
Can I Just Upload a Video File to Remove Background Noise?
Yes, you absolutely can. Most modern AI-powered cleaners are built to handle video files directly.
You can drop in an MP4, MOV, or other common video formats, and the tool will isolate the audio track, work its magic, and then sync it perfectly back to the video. The final download is a new video file with the clean audio already baked in, which saves you a ton of time you'd otherwise spend splitting and re-merging tracks.
Is This Going to Make My Voice Sound Like a Robot?
That’s a totally fair question, especially if you’ve ever dealt with older noise reduction plugins that left voices sounding thin and artificial. The good news is that today's AI tools are far more sophisticated.
They’ve been trained on thousands of hours of speech, so they're incredibly good at telling the difference between your voice and the annoying hum from your air conditioner. The result is a process that surgically removes the noise while leaving the natural warmth and character of your voice intact.
My Two Cents: Never skip the preview. Before you commit and download, always listen to a before-and-after comparison. This is your chance to make sure the audio sounds crisp and clear, not overly processed or robotic.
What’s the Best Audio Format to Use for Noise Removal?
If you want the absolute best results, start with a lossless audio format. We're talking about WAV or AIFF files.
These formats are uncompressed, meaning they hold all the original audio data. Giving the noise reduction algorithm more information to analyze leads to a much cleaner, more natural-sounding result. You can certainly clean up an MP3, and you'll still hear a massive improvement, but starting with a high-quality source like WAV gives you the best possible foundation to build on.
Ready to hear what this sounds like on your own recordings? Give SimpleClean a try and turn your noisy audio into something polished and professional. Clean up your first hour of audio for free.