The best microphone for your YouTube channel really comes down to what you’re filming. If you’re a beginner recording at your desk, a solid USB mic like the Rode NT-USB+ is a fantastic starting point. But if you’re a vlogger out in the world, you’ll need an on-camera shotgun mic to capture clear, directional audio.
Finding the right mic isn't about picking the most expensive one; it's about matching its strengths to your specific recording setup and creative workflow.
Why Finding the Right Microphone Matters
Let's be honest: great audio is non-negotiable on YouTube. You can have the most beautiful 4K footage, but if your audio is tinny, echoey, or full of background noise, viewers will click away in a heartbeat. Poor sound is one of the fastest ways to lose an audience.
Your microphone is the critical link between you and your viewers. Clear, professional-sounding audio doesn't just make you easier to understand—it builds trust and makes your content feel more authoritative. This guide is designed to go beyond just a list of popular mics. We'll dig into the key differences between microphone types and show you exactly how they fit into real-world YouTube scenarios, so you can find the perfect fit for your channel and budget.
Microphone Types at a Glance
Getting a handle on the basic technology behind each mic type is the best first step. They’re all built for different jobs, each with its own pros and cons for a content creator.
| Microphone Type | Best For | Key Advantage | Main Drawback |
|---|---|---|---|
| USB Condenser | Voiceovers, podcasts, streaming | Simple plug-and-play setup | Sensitive to background noise |
| XLR | Professional studio setups | Superior audio quality & flexibility | Requires an audio interface |
| Shotgun | Vlogging, interviews, on-camera | Excellent sound isolation | Can sound thin if off-axis |
| Lavalier | On-camera interviews, tutorials | Discreet and hands-free | Can pick up clothing rustle |
This explosion in content creation has fueled massive growth in the audio gear market. The global microphone market was valued at $4.46 billion and is expected to climb to $5.81 billion by 2032. This boom is directly linked to millions of creators looking for great, accessible audio for platforms like YouTube, which is great news for us—it means there are more high-quality options than ever. You can dig into more insights about the growing microphone market on fortunebusinessinsights.com.
Key Takeaway: There's no single "best" microphone. The right choice is the one that fits your recording space and content style. A vlogger and a voiceover artist have completely different audio challenges, so they'll need different tools to get that professional sound.
Why Your Audio Can Make or Break Your YouTube Channel
You can have the most beautifully shot 4K video, but if the audio is a mess of static, echoes, and muffled words, viewers are going to click away. Fast. We've all done it. While stunning visuals might get someone to stop scrolling, it’s the sound that makes them stick around. On a platform that lives and dies by watch time, clear audio isn't just a nice-to-have; it's a core part of growing your channel.
Think about it: bad audio instantly screams "amateur." It makes your content feel cheap and can make viewers lose trust in what you're saying before you’ve even made your point. On the flip side, crisp, clean sound gives your videos an immediate sense of authority and polish. This keeps people watching longer, which is a signal the YouTube algorithm absolutely loves.
How Bad Audio Kills Viewer Engagement
Every time you upload, you're competing for eyeballs in an incredibly crowded space. With around 2.49 billion monthly active users, the bar for quality is higher than ever. Here's a key stat to remember: over 70% of those viewers are watching on their phones, often with tiny, unforgiving speakers. Muffled dialogue that sounds okay on your editing headphones can turn into an unintelligible mess on a smartphone, which is a massive problem. You can dig into more of these viewing habits in these YouTube engagement statistics on Rev.com.
This is exactly why putting some money into the best microphone for your YouTube videos is one of the smartest upgrades you can make. It's a direct investment in making your content easier and more pleasant to consume, which pays off in your analytics.
A viewer might forgive a slightly grainy shot if the story is good, but they almost never forgive bad audio. Clear sound is the foundation of actually connecting with your audience.
Building a Professional Brand, One Sound Wave at a Time
Great audio does more than just keep people from leaving. It helps build your brand. It tells your audience that you value their time and that you're serious about what you do. That perception of professionalism is what earns you loyal subscribers and opens up better opportunities down the road. Even if you're using modern shortcuts like AI text-to-video generation tools to create slick visuals, a professional voiceover or clear dialogue is still what sells it.
Of course, a good mic is just one piece of the puzzle. Your recording space matters just as much. That annoying echo in your spare room, the hum of your computer fan, or the traffic outside can sabotage even the most expensive microphone. That's why learning how to reduce background noise from your microphone is a skill every creator needs to master.
At the end of the day, clean audio ensures your message lands exactly how you meant it to. It breaks down the barrier between you and your viewer, letting your personality and expertise come through without any distracting noise. That's how you turn a random viewer into a real fan.
Comparing the Top Microphone Types for YouTubers
Choosing the right microphone for your YouTube channel isn't just about specs; it's about matching the tool to the job. The three main players are USB, XLR, and shotgun mics, and each one is built for a completely different creative workflow. Let's break down which one makes sense for your specific content style.
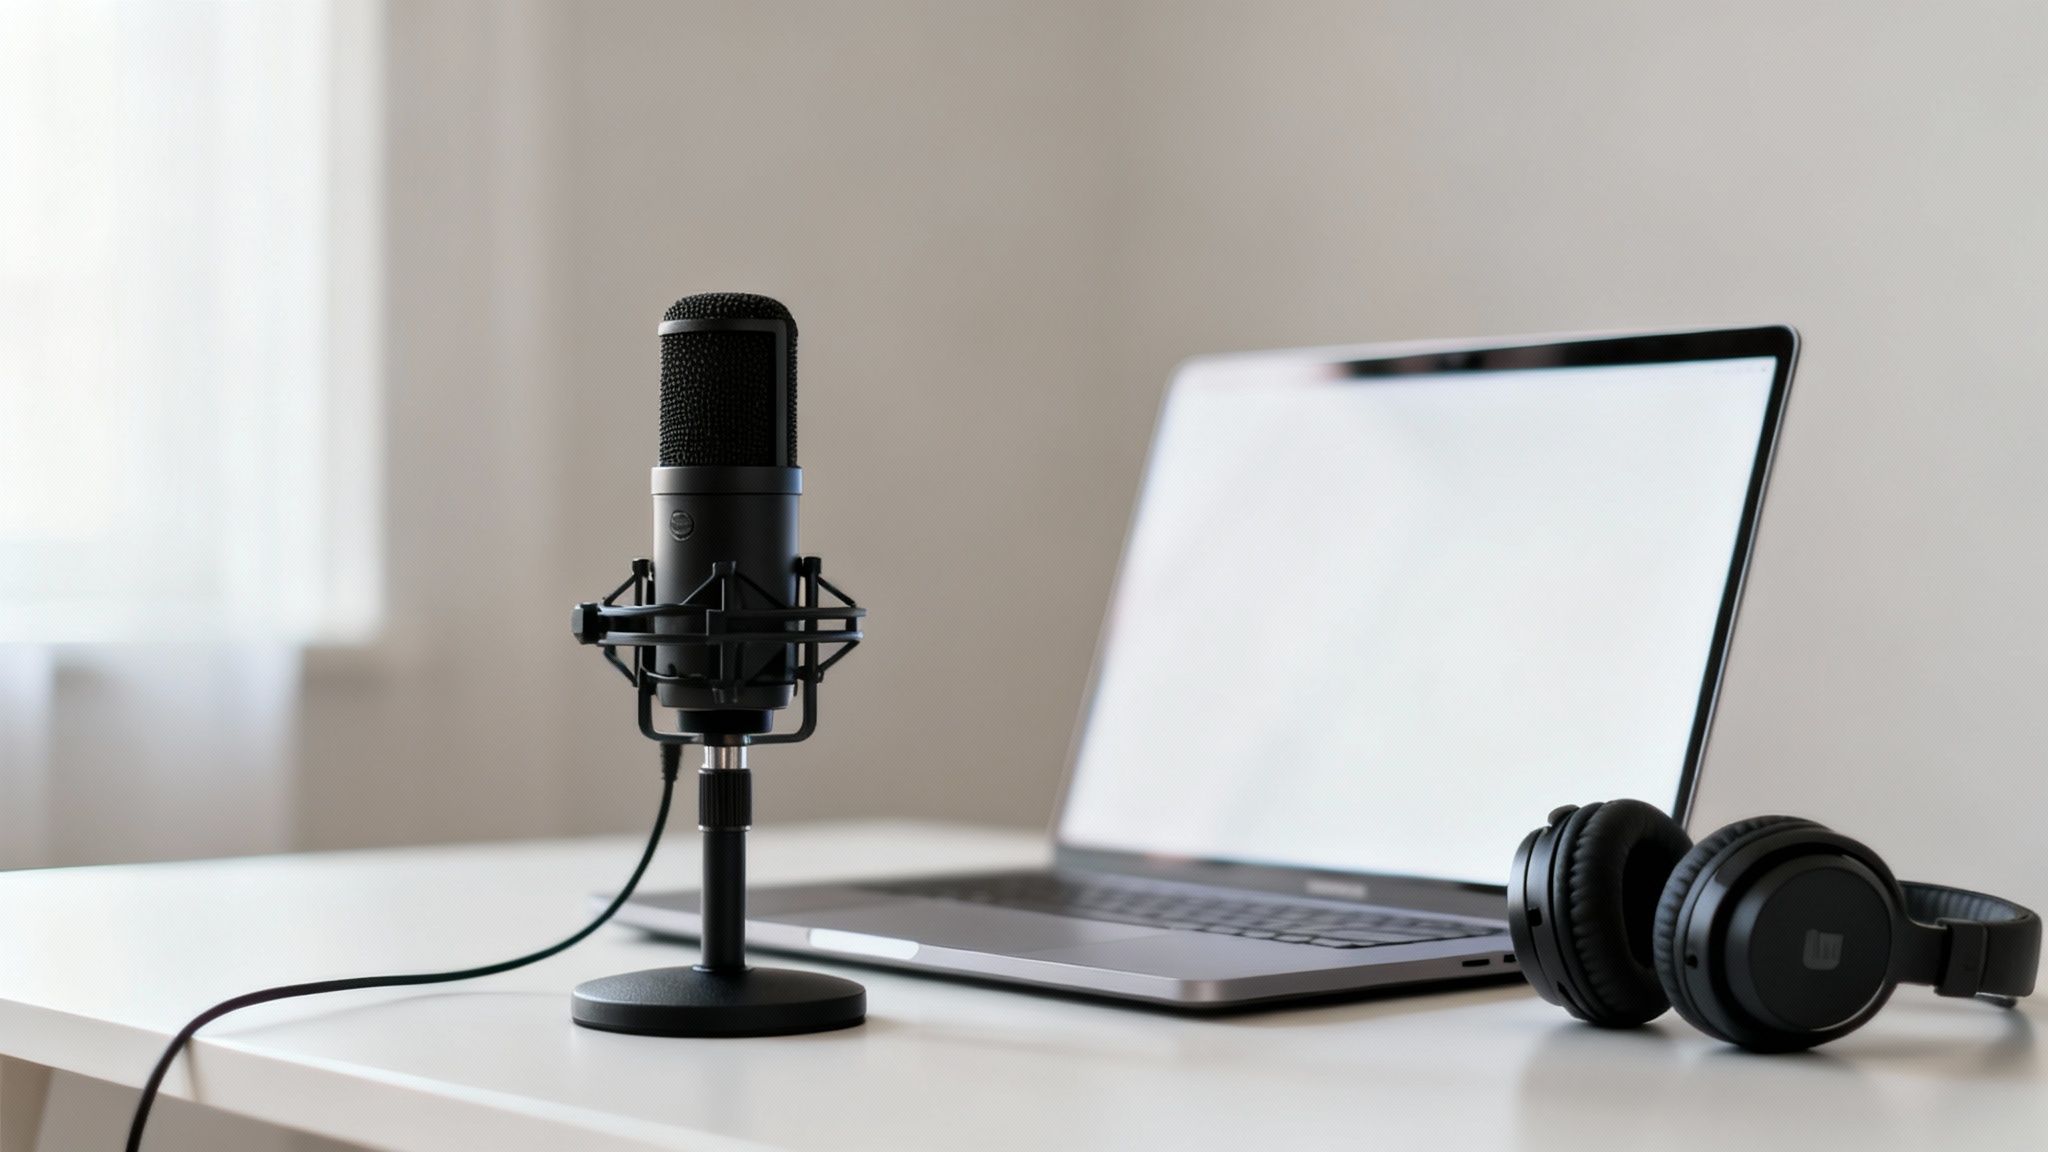
A USB microphone is your classic plug-and-play solution. You connect it straight to your computer, and you're ready to go. This makes it a fantastic starting point for anyone recording voiceovers, podcasts, or streaming from a desk.
An XLR microphone, on the other hand, is the professional standard. It needs an audio interface to talk to your computer, but that extra step unlocks far greater flexibility and noticeably better sound quality. This is the path for creators building a dedicated home studio.
Finally, a shotgun microphone is a specialist's tool built for one thing: directionality. It's designed to capture sound from whatever it's pointed at while rejecting noise from the sides, making it perfect for vlogging, on-camera work, and interviews in less-than-perfect locations.
The USB Microphone: Your Simple Studio Starter
For a huge number of new YouTubers, a USB microphone is the most sensible first investment. The sheer simplicity of plugging it into your computer and hitting "record" removes a massive technical headache. It's this accessibility that made models like the Blue Yeti so famous, even with their quirks.
But that simplicity comes with a trade-off. Most USB condenser mics are incredibly sensitive. This is great for capturing the rich details in your voice, but it also means they're notorious for picking up every distracting background sound—from the whir of your computer fan to the traffic outside your window.
A USB mic offers an incredible convenience-to-quality ratio for beginners, but its sensitivity forces you to control your recording environment. Soft furnishings, closed doors, and a quiet room are non-negotiable for getting clean audio.
The perfect use case for a USB mic is a static, controlled setup. Think "talking head" videos, screencasts, or gameplay commentary where you're sitting at a desk and can treat the room for better acoustics. If you're looking for a solid entry-level option, the Audio-Technica ATR2100x is often recommended over the Yeti because it offers both USB and XLR connections, giving you room to grow.
This commitment to clean audio directly impacts your channel's growth in very real ways.

As you can see, better audio isn't just a technical detail—it’s a strategic decision that can increase watch time, build trust with your audience, and improve the experience for the massive number of people watching on mobile.
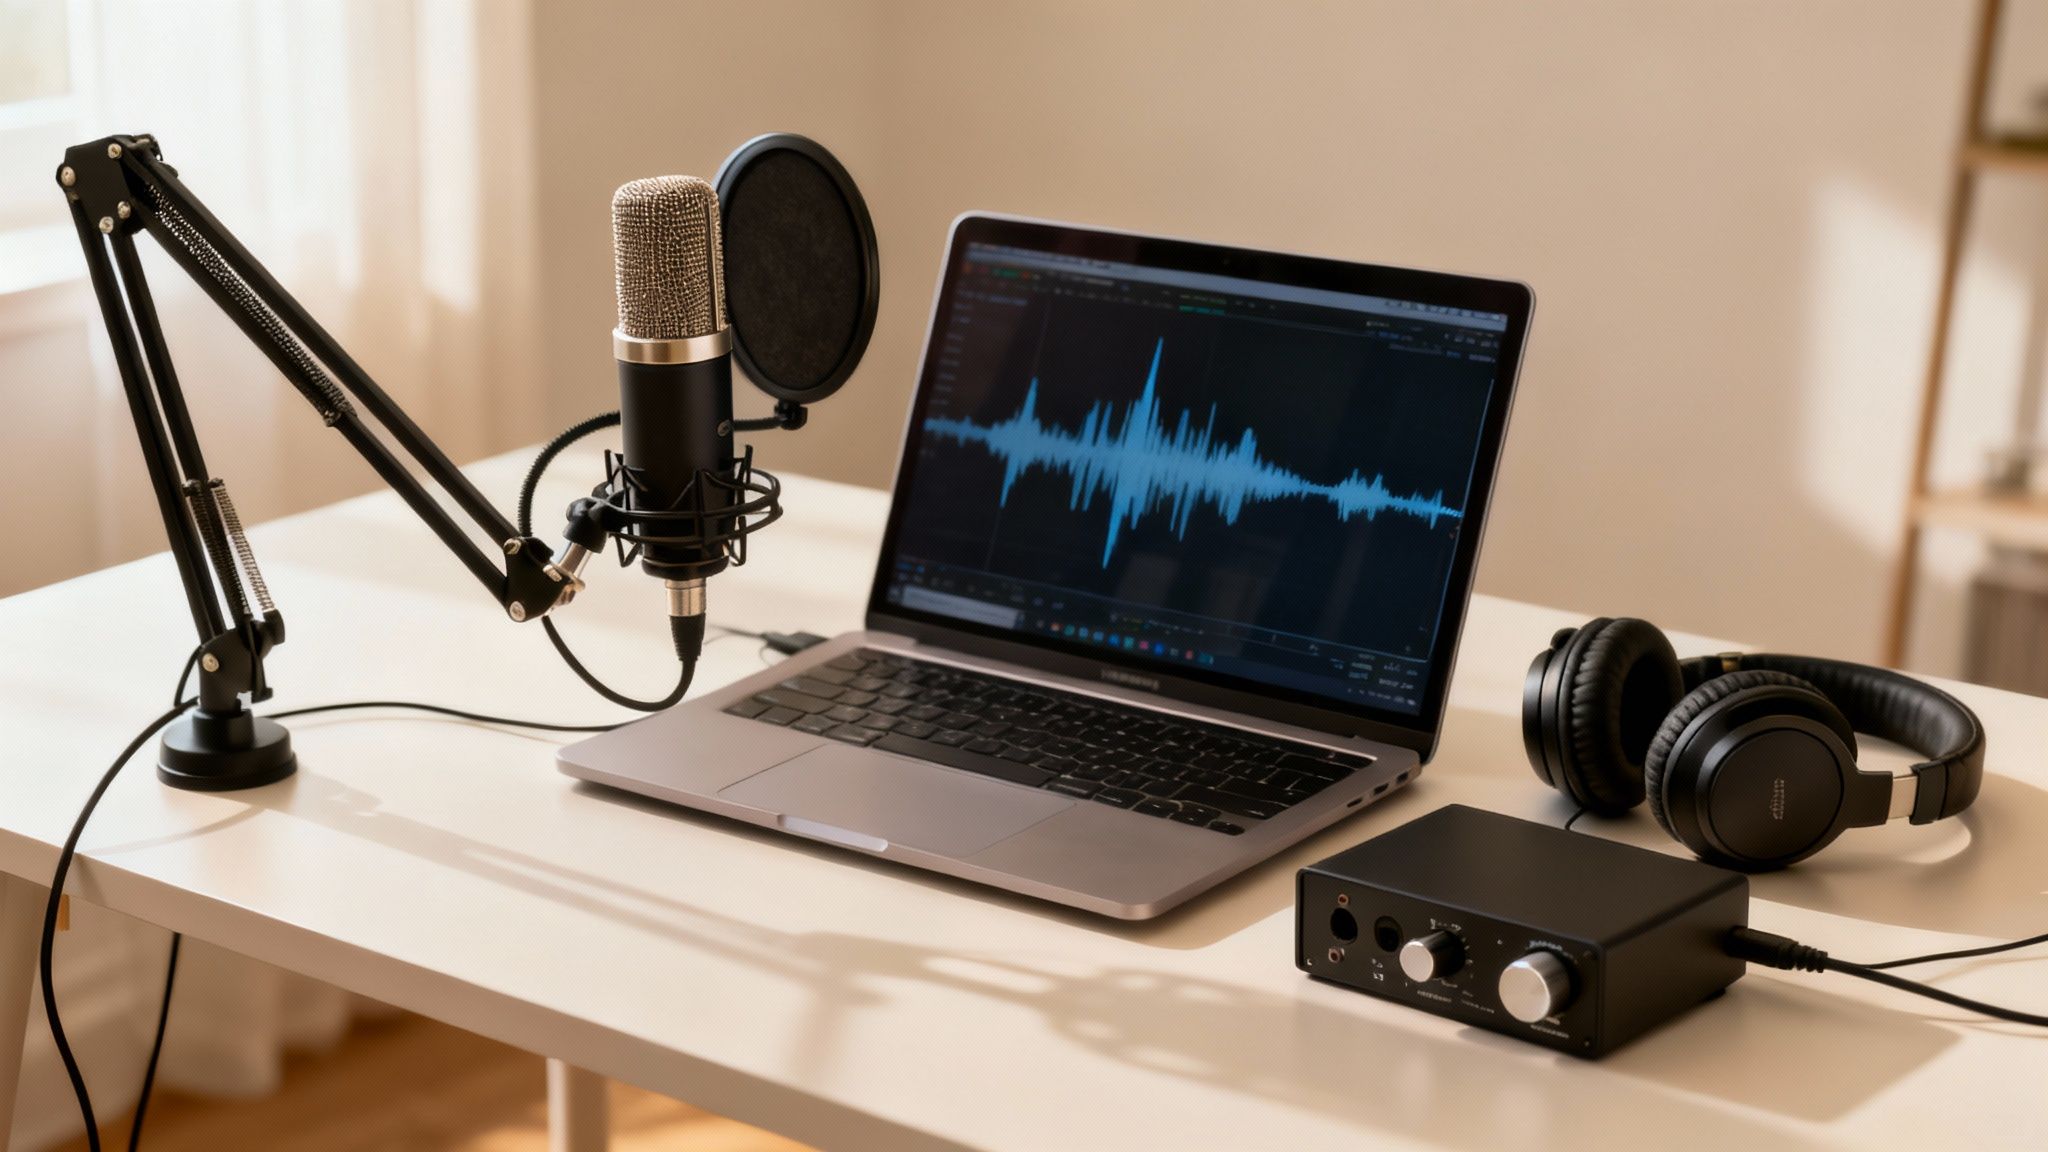
The XLR Microphone: The Professional's Choice
When you're ready to get serious about your sound, upgrading to an XLR microphone is the next logical step. These mics require an external audio interface or mixer to convert their analog signal into a digital one your computer can use. Don't think of this extra piece of gear as a hassle; it's a massive upgrade.
An audio interface gives you physical knobs to control gain (your mic's input level), a headphone jack for real-time monitoring, and often lets you connect multiple microphones for interviews. This setup delivers superior audio quality and the flexibility to expand your studio down the road. Dynamic XLR mics like the legendary Shure SM7B are famous in broadcasting for rejecting background noise while capturing that warm, rich radio voice. For a rugged and more affordable alternative, many podcasters swear by the Shure SM58.
You can dive deeper into these professional-grade setups in our guide to the best microphones for podcasting.
Ideal Scenario for XLR
- Dedicated Home Studio: Perfect for creators with a permanent recording space who want the absolute best vocal quality for voiceovers or music.
- Multi-Person Interviews: An interface with multiple inputs allows you to record two or more people on separate audio tracks, giving you total control in post-production.
- Future-Proofing Your Setup: An XLR mic is a long-term investment. You can upgrade your interface or add other gear without ever needing to replace the microphone itself.
The Shotgun Microphone: Your On-the-Go Solution
Shotgun microphones are purpose-built to solve a completely different problem: how to capture clean audio in noisy, unpredictable environments. Their highly directional pickup pattern, known as a lobar pattern, is designed to "hear" what's directly in front of it and ignore everything else.
This makes them the undisputed champion for any on-camera work where you can't control the acoustics. Whether you're vlogging in a bustling city or conducting an interview outdoors, a shotgun mic mounted on your camera is your best bet for isolating your subject's voice from the surrounding chaos.
The only real downside is that they're unforgiving. If your subject moves even slightly off-axis from where the mic is pointing, their volume will drop noticeably. This means you have to be mindful about keeping the microphone aimed directly at the sound source at all times.
To help you decide, here's a quick breakdown of how these microphone types stack up for real-world YouTube creation.
Microphone Type Comparison for YouTube Creators
| Feature | USB Microphones | XLR Microphones | Shotgun Microphones |
|---|---|---|---|
| Best For | Voiceovers, Streaming, Beginners | Studio Recording, Interviews | Vlogging, On-Camera, Outdoors |
| Connectivity | Direct USB to computer | Requires Audio Interface/Mixer | Typically 3.5mm jack or XLR |
| Sound Quality | Good to Excellent | Excellent to Professional | Highly Directional, Good |
| Ease of Use | Easiest (Plug-and-play) | Intermediate (Requires setup) | Easy to Intermediate |
| Cost | $50 - $250 | $100 - $500+ (plus interface) | $100 - $400+ |
| Key Advantage | Simplicity and affordability | Flexibility and superior audio | Excellent noise rejection |
Ultimately, the right choice comes down to your content. A USB mic is a fantastic, no-fuss starting point for desk-based recording, while an XLR setup offers a true professional upgrade for a controlled studio. And for creators on the move, a shotgun mic is an essential tool for capturing clean audio out in the wild.
Matching Your Microphone to Your Content Style
There's no such thing as a single "best microphone for YouTube." Anyone who tells you otherwise is trying to sell you something. The right mic for you has nothing to do with a fancy brand name or a high price tag and everything to do with what you’re actually filming.
A microphone that sounds incredible for a gamer sitting at a desk would be a nightmare for a travel vlogger filming in a windy city square. Understanding this is the first and most important step. Your choice should be guided by your environment, how you move, and the unique audio hurdles your content throws at you.
Let's break down the most common YouTube formats and pair them with the right microphone tech. This way, you can invest in a tool that actually fits your workflow, not one you have to fight with.
The Classic Talking Head Video
If you film tutorials, product reviews, or any kind of commentary from a fixed spot (like a desk), your goal is to get that rich, warm vocal tone in a controlled setting. This is the perfect job for a large-diaphragm condenser microphone. These mics are built for sensitivity, designed to pick up all the subtle details that make a human voice sound professional and engaging.
Because they are so sensitive, they work best in rooms that have some basic sound treatment—even simple things like a rug, curtains, or a few foam panels can make a huge difference. They deliver that classic "studio sound" audiences instantly recognize as high-quality.
- Why it works: Their incredible sensitivity captures broadcast-quality vocal recordings, making your voice sound full, present, and crystal clear.
- Key Feature to Look For: A cardioid pickup pattern is non-negotiable. This pattern makes the mic listen to what's directly in front of it while ignoring most of the noise from the sides and back.
- Setup Tip: Get a boom arm. It lets you position the mic about 6-8 inches from your mouth for maximum clarity while keeping it out of the camera shot. This simple tool is the secret to minimizing room echo and getting that close, intimate sound.
Vlogging and Run-and-Gun Content
The moment you step outside your studio, the rules change. Travel vlogs, event coverage, and street interviews are constantly battling unpredictable background noise. For this kind of on-the-go filming, the on-camera shotgun microphone is your best friend.
These microphones are hyper-focused. They use a special tube design to aggressively reject sound coming from the sides, zeroing in on whatever you point your camera at. Isolating your voice from the chaos of the real world is their superpower.
A shotgun mic is like a telephoto lens for sound. It punches through the noise—traffic, wind, crowds—to pull your subject's voice forward, making sure your dialogue is always the main event.
They’re also designed to be compact and lightweight, mounting directly onto your camera's hot shoe. This turns your camera and mic into a single, seamless rig, which is crucial when you need to move fast and capture moments without wrestling with gear.
Interviews and Multi-Person Podcasts
Recording a clear conversation with two or more people adds a new wrinkle. You need to capture every voice cleanly without them bleeding into each other's audio. You’ve really got two solid options here, each with its own pros and cons.
The Multi-Mic Dynamic Setup
For top-tier quality and maximum editing control, using a separate dynamic microphone for each person is the professional standard. Think of classic podcast setups where everyone has their own mic, like the workhorse Shure SM58 or a USB/XLR hybrid like the Audio-Technica ATR2100x.
- Why it works: Dynamic mics are less sensitive than condensers and are brilliant at rejecting off-axis sound. This means Person A's mic will almost exclusively pick up Person A, dramatically reducing crosstalk from Person B.
- Workflow: You'll need a multi-channel audio interface or recorder to capture each mic on its own track. This gives you complete freedom in post-production to tweak levels, cut out mistakes, and process each voice independently.
The Single Omnidirectional Mic Setup
If you need a simpler, more budget-friendly option for a group discussion, a single omnidirectional microphone can get the job done. These mics are designed to hear sound equally from all directions.
- Why it works: You can place one omni mic in the middle of a table, and it will pick up everyone sitting around it. It’s a fast and easy solution for casual roundtables.
- The Trade-Off: You give up all control. Every voice is baked into a single audio track, so you can't adjust individual levels later. This setup will also capture more room echo and background noise, so it's best for quiet environments.
Gaming and Live Streaming
Gamers and streamers have a very specific audio challenge: their voice needs to be perfectly clear while the frantic clicks of their keyboard and mouse need to disappear. The mic has to hear them, but not their hands.
A high-quality USB or dynamic microphone on a boom arm is the only way to go. Here, positioning is everything. The boom arm lets the streamer get the mic right next to their mouth—well away from the keyboard's clatter.
- Why it works: With the mic so close to the source (your mouth), you can turn the microphone's gain down. Lower gain makes the mic less sensitive to quieter, more distant sounds... like your keyboard.
- Dynamic vs. Condenser: A dynamic mic like the Samson Q9U or Shure MV7+ is often the better choice here, as it naturally rejects more background noise. That said, a good condenser mic can also work if you're careful with your gain settings.
- The Boom Arm is Non-Negotiable: A desk stand is a recipe for disaster. It puts the mic on the same surface as your keyboard, turning every keystroke into an audible thump in your audio. A boom arm completely isolates the mic from these vibrations for a clean vocal track.
From Recording to Publishing: Nailing Your Audio Workflow
Choosing the right microphone is a huge first step, but your journey to amazing audio is just getting started. Honestly, great gear is only half the equation. The real magic happens in how you use it. A solid audio workflow—from the second you press record to the moment you hit publish—is what truly separates amateur-sounding videos from polished, professional content.
This really boils down to two key stages. The first is the recording itself, where your environment and microphone technique make all the difference. The second is post-production, where you'll polish the raw audio and get it ready for your audience.
Dialing in Your Recording Environment
Your microphone is a sensitive piece of equipment. It’s designed to pick up sound, and it’s not smart enough to know the difference between your voice and the echo in your room. That’s why creating a sound-friendly space is the single most effective thing you can do for clean audio. Get this right, and you'll save yourself hours of headaches later.
The biggest enemy you'll face is reverberation—that pesky echo that makes you sound like you're in a bathroom. Hard, flat surfaces are the main cause. Think bare walls, hardwood floors, and big windows that just love to bounce sound waves all over the place.
Pro Tip: You don't need a pro-level studio. Just adding soft, absorbent materials to your room can make a world of difference. Toss down a rug, hang some heavy curtains, or even just make sure there’s a couch in the room. Even decorative acoustic panels can work wonders without breaking the bank.
Here are a few simple things you can do to improve your recording space:
- Pick a Small, Furnished Room: Smaller spaces with plenty of furniture naturally absorb sound. There's a reason so many people start out recording in a walk-in closet—it works.
- Soften the Hard Surfaces: If you have hard floors, lay down a thick rug or even just a blanket. Got big windows? Close the curtains before you record.
- Kill the Background Noise: This one sounds obvious, but it’s easy to forget. Turn off the A/C, ceiling fans, and any buzzing appliances. Shut the door and close the windows to block out traffic or the neighbor's barking dog.
Mastering Your Microphone Technique
Once your room is prepped, it's time to focus on how you're actually using the mic. Good technique is all about getting a strong, clear signal of your voice without capturing all the little unwanted sounds.
The main goal is to keep a consistent distance from the microphone. For most mics you’d use for voiceovers, like condensers or dynamics, staying about 6 to 8 inches away is the sweet spot. This lets the mic capture the full, warm tone of your voice without picking up distracting mouth clicks or harsh "p" and "b" sounds (plosives). A pop filter is non-negotiable here.
Consistency is everything. If you're leaning in and pulling back from the mic as you talk, your volume levels will be all over the place, making for a really jarring listening experience. A good boom arm is a creator's best friend because it holds the mic in the perfect spot so you don't have to think about it.
The Power of AI in Post-Production
Look, no matter how perfect your setup is, some imperfections are going to sneak into your recordings. A little electronic hum from your gear, the low rumble of a truck driving by, or a touch of room echo can still be there. This is where modern post-production tools have become a game-changer for creators.
It used to be that cleaning up audio required expensive software and a ton of technical skill. Not anymore. Today, you can just clean up your audio online with AI-powered tools that do the heavy lifting for you.
These tools can analyze your recording, intelligently identify the background noise, and remove it without messing with the natural sound of your voice. The result is studio-quality audio without the steep learning curve.
Finally, after all that work, you need to make sure your audio plays nice with YouTube's platform. For that, you’ll want to check out some comprehensive compression strategies tailored for YouTubers. This final step ensures your awesome-sounding audio stays that way when your viewers hit play.
How Much Should You Spend on a YouTube Mic?
Let's get one thing straight: you don't need to break the bank to get great audio. The goal isn't to buy the most expensive microphone; it's to make a smart, strategic investment that matches where your channel is right now and where you want it to go.
Honestly, a good microphone is one of the highest-impact, most cost-effective upgrades you can make. It delivers a massive return on investment by boosting viewer engagement and making you sound like a pro. To simplify things, I’ve broken it down into three budget tiers, each tailored to a different stage of the YouTube journey. This way, you can find the best possible sound for the money you have.
The Starter Setup: Under $100
When you're just starting out, the mission is simple: get the biggest possible leap in quality from your built-in camera or laptop mic without spending a fortune. This price range is the sweet spot for high-value USB microphones that are perfect for voiceovers, streaming, and talking-head videos.
A solid mic in this category, like the Audio-Technica ATR2100x, gives you that clean, focused audio that instantly makes your videos feel more professional. It’s a plug-and-play solution that makes an immediate, noticeable difference to your audience.
The Creator Step-Up: $100 to $300
Once your channel starts to pick up steam, you'll probably find yourself wanting more flexibility. This budget opens the door to more advanced USB mics with better features, but more importantly, it gets you into the world of entry-level XLR setups. Pairing an XLR microphone with a basic audio interface gives you far superior sound quality and way more control.
This is the perfect tier for creators building a more permanent home studio or for vloggers who need a quality on-camera shotgun mic. Think of this as a serious commitment to audio fidelity, getting your content ready for a larger, more critical audience.
Your microphone is a direct investment in your channel's growth. When your audio improves, viewers stick around longer. That’s a powerful signal to the YouTube algorithm.
The Professional Rig: $300 and Up
For established creators running a business, audio isn't just a creative choice—it's a financial one. This tier is for high-end XLR microphones, professional audio interfaces, and premium shotgun mics built to deliver flawless performance in any situation. At this level, the cost is justified by the serious revenue potential.
Let’s not forget, content creation is a huge business. Top creators like MrBeast reportedly earn $54 million a year, and with YouTube pulling in $31.5 billion in ad revenue last year, the monetization opportunities are massive. You can learn more about the creator economy on Kapwing.com. For a serious channel, investing in pro-grade audio isn't just about sounding good; it's about building a sustainable, profitable brand.
Frequently Asked Questions About YouTube Microphones
Every creator wonders which mic suits their YouTube setup best. These FAQs address the most common sticking points, helping you zero in on gear that actually works.
Do I Really Need an External Microphone for YouTube?
Yes, the built-in mic on your camera or phone picks up everything—your voice, room echo, fan hum. An external mic narrows its focus to your vocals, delivering crisp, professional audio. It’s one of the simplest upgrades that keeps viewers engaged.
What Is the Difference Between a Condenser And Dynamic Mic?
The core distinction lies in sensitivity. Condenser microphones capture a wide frequency range with fine detail, making them ideal for controlled, quiet home studios.
Key Insight: In a treated room, a condenser mic brings out every nuance. In noisy or untreated spaces, reach for a dynamic mic.
Dynamic microphones are rugged and less sensitive to distant or ambient noise. They reject off-axis sound, so they work great for interviews, loud sources, and imperfect acoustic environments.
How Can I Improve My Audio Without a New Microphone?
You don’t need to splurge on gear to get better sound. Start by treating your recording space:
- Record in rooms with soft furnishings (rugs, curtains, even a closet full of clothes).
- Move closer to your mic—this boosts the vocal signal and drowns out background noise.
Then polish your tracks in post. Tools like SimpleClean can remove background hiss, hum, and echo, giving your existing audio a crisp, studio-quality finish.
Ready to transform your audio from noisy to pristine in just a few clicks? Grab the free trial of SimpleClean and hear the difference today: SimpleClean.