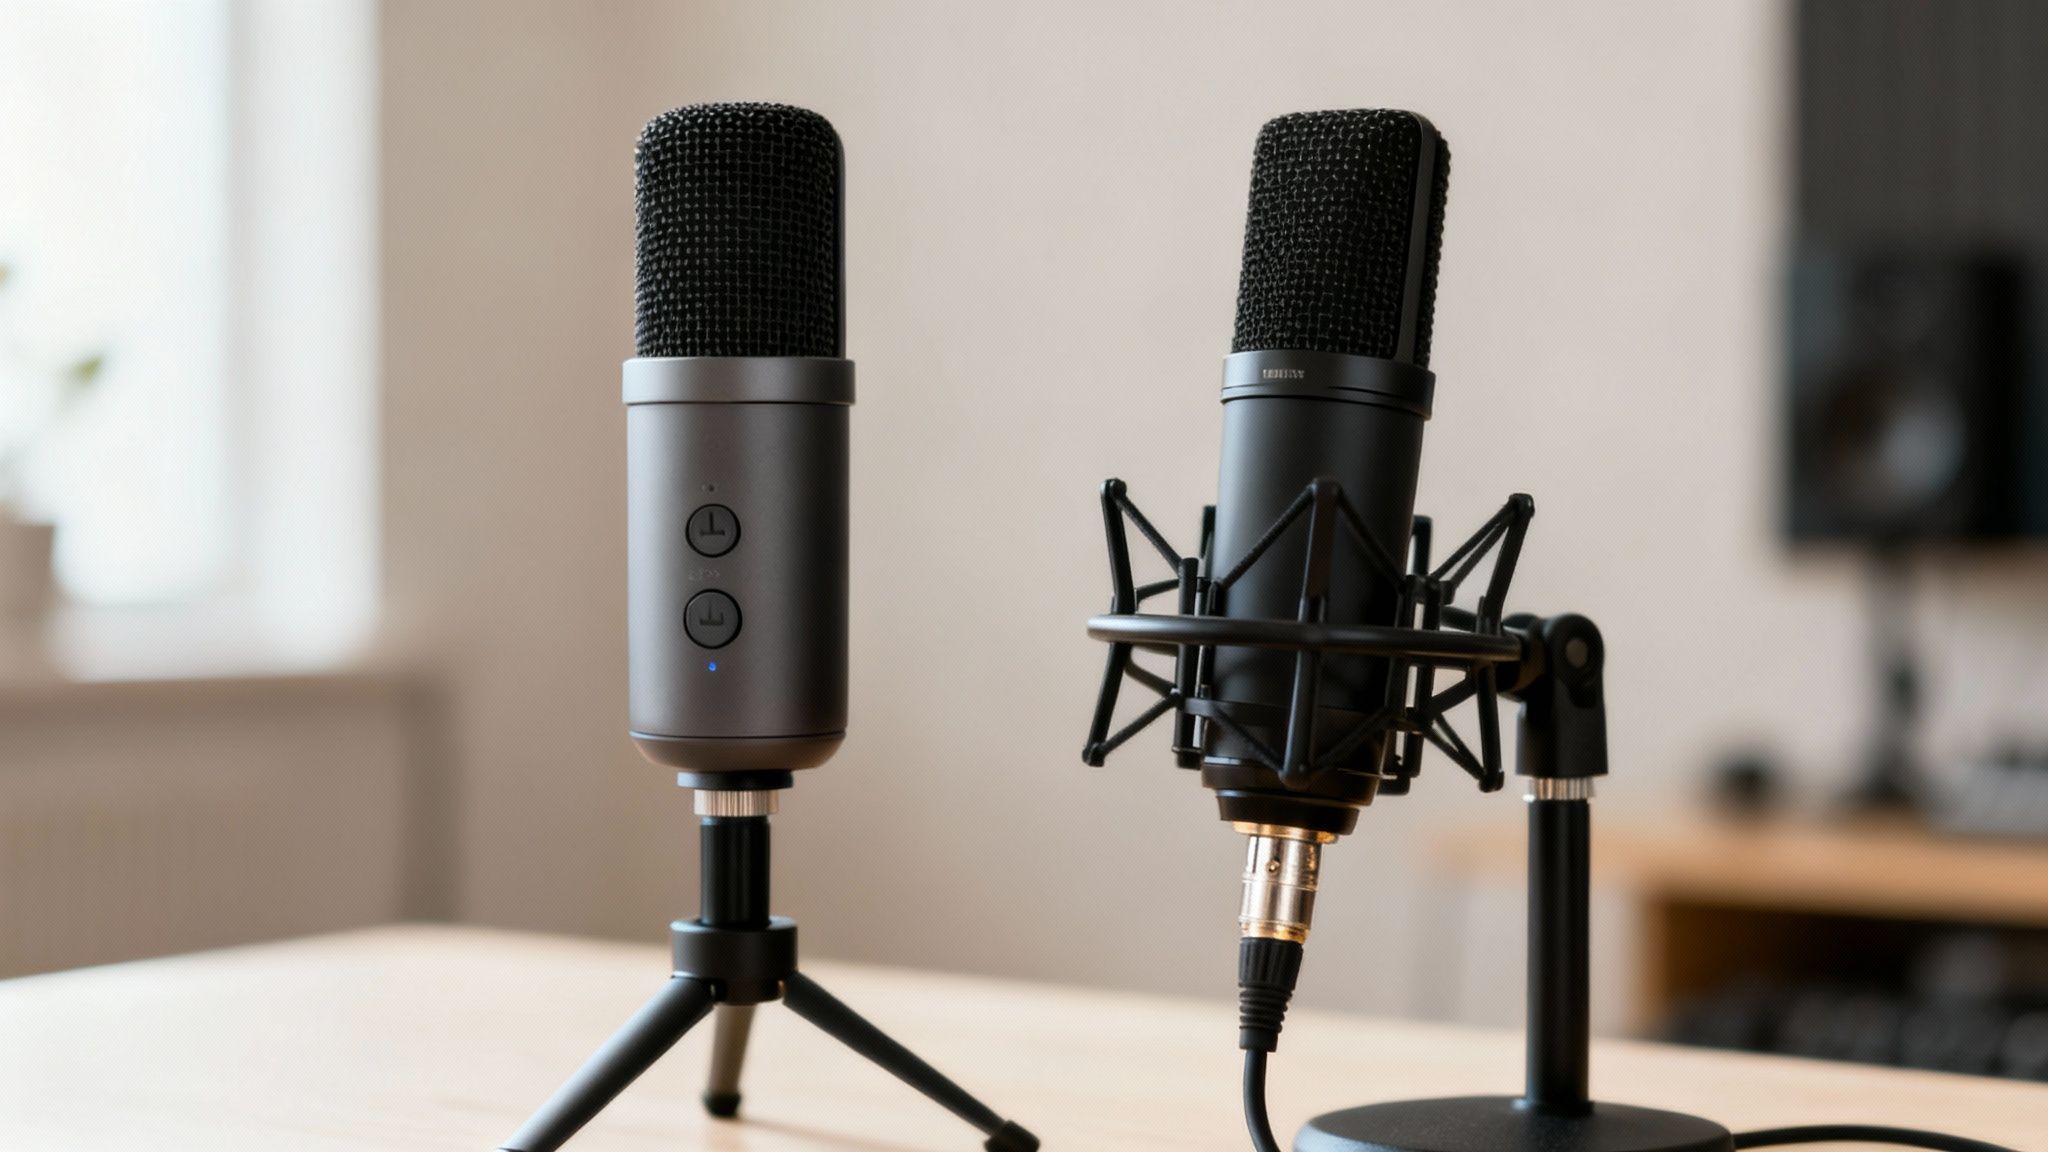
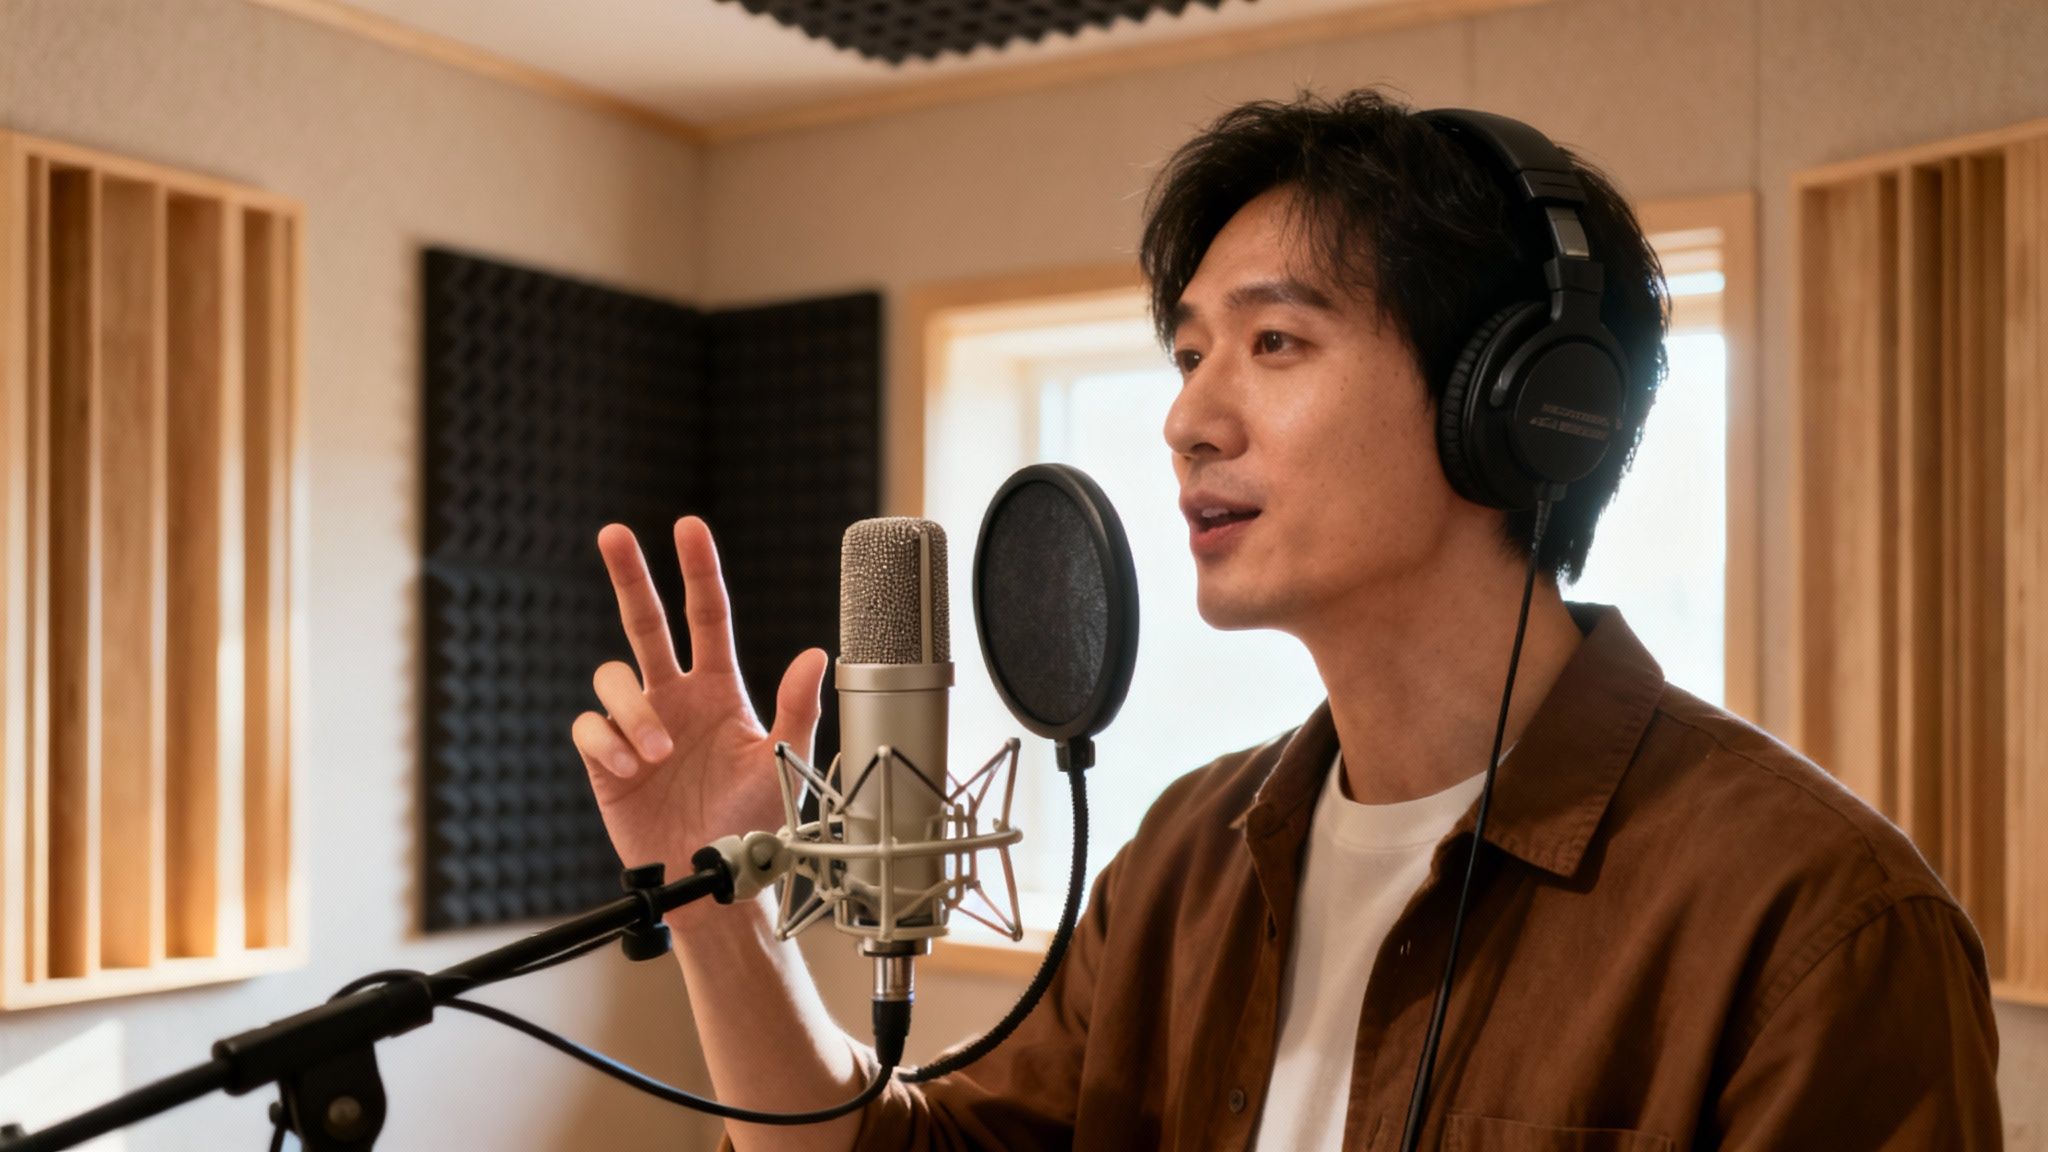
When you're searching for the best microphone for podcasting, you quickly realize there isn't a single right answer. It all boils down to what works for you. If you're just starting and want something that works right out of the box, a USB microphone like the Samson Q2U is a fantastic, no-fuss option. But if you’re aiming for that broadcast-quality sound and want a setup that can grow with you, an XLR mic like the Rode PodMic is a solid investment.
Choosing Your Perfect Podcasting Microphone
Picking a microphone can feel like a huge decision, but it really comes down to two main paths: USB or XLR. This choice sets the foundation for your entire recording setup, dictating everything from cables to the other gear you'll need. Think of it like choosing between an automatic and a manual car—both get you where you’re going, but one is built for simplicity while the other gives you far more control.
Remember, the goal isn’t just to record your voice. It’s to capture it with crisp clarity while leaving all the distracting background noise behind. As listeners get more sophisticated, their expectations for high-quality audio go up, making your mic choice more important than ever.
Quick Guide USB vs XLR Microphones
To help you figure out which path to take, let's break down the fundamental differences. This isn't just about the plug at the end of the cable; it's about your entire workflow and future potential.
Here’s a quick-glance comparison to help you see where you might fit.
| Feature | USB Microphones | XLR Microphones |
|---|---|---|
| Ease of Use | Plug-and-play; connects directly to your computer. | Requires an audio interface or mixer to connect. |
| Best For | Solo podcasters, beginners, and simple setups. | Multi-host podcasts, professional studios, and future growth. |
| Cost | Generally more affordable as a single purchase. | Higher initial investment due to the need for an interface. |
| Flexibility | Limited to one mic per computer in most cases. | Easily supports multiple microphones for co-hosts and guests. |
Essentially, a USB microphone is an all-in-one package. It has the mic capsule, preamp, and digital converter all built into a single unit. It’s the definition of convenience.
On the other hand, an XLR microphone is a purely analog device. It captures the sound but needs a separate piece of hardware—an audio interface—to convert that analog signal into a digital one your computer can understand. This extra step is where the magic happens, giving you far more control over your sound, from adjusting levels with physical knobs to leveraging professional-grade preamps for a warmer tone.
Key Takeaway: Your microphone choice is a strategic decision. A USB mic offers immediate results with minimal fuss, while an XLR mic provides a professional, expandable system for creators serious about long-term audio quality.
The market certainly reflects this growing demand for professional sound. The global podcasting microphone market was valued at about USD 1.1 billion in 2023 and is projected to hit USD 2.5 billion by 2032. This explosive growth shows just how much creators are prioritizing vocal clarity and noise rejection. You can explore more detailed data on the podcasting microphone market to see these trends for yourself.
In the end, the best microphone for your podcast is the one that fits your budget, your recording space, and your technical comfort level. The right mic makes it easy to produce clean, professional audio that keeps your audience hooked.
Understanding Core Microphone Concepts
Before you can pick the best microphone for your podcast, you need to speak a little bit of the language of audio. Don't worry, this isn't an engineering course. We're going to focus on just two concepts that will make or break your sound: the microphone type and its pickup pattern.
Nailing these two things is the difference between a voice that sounds crisp and present, and one that sounds distant and full of room echo. Getting this right means choosing a microphone that works with your recording space, not against it. This is your first real step toward getting that pro-level audio quality everyone's after.
Dynamic Mics vs Condenser Mics
Your first major decision is whether to get a dynamic or a condenser microphone. These terms describe the guts of the mic and how it physically captures sound waves. Each one is built for a different job, and your recording environment will dictate which is right for you.
Dynamic microphones are tough, less sensitive, and absolutely brilliant at rejecting background noise. Think of a dynamic mic as a spotlight—it’s intensely focused on whatever is directly in front of it and ignores most of what's happening on the sidelines. This makes it the undisputed champ for anyone recording in an untreated room, like a spare bedroom or home office where sound can bounce off the walls.
On the other hand, a condenser microphone is much more sensitive. It’s designed to capture a wide range of sound frequencies with incredible detail. A condenser is more like a floodlight, picking up everything with stunning clarity. While this can make your voice sound incredibly rich, it also means the mic will hear your computer fan, the air conditioner kicking on, and the dog barking down the street.
Key Insight: For 95% of podcasters recording in a typical home setup, a dynamic microphone is the smarter, more forgiving choice. It does a lot of the heavy lifting for you by naturally cutting down on background noise.
Choosing the Right Polar Pattern
Once you've decided between a dynamic and a condenser, the next piece of the puzzle is its polar pattern (also called a pickup pattern). This simply describes the area around the microphone where it "hears" sound the best. For podcasters, there's really only one pattern you need to worry about.
The cardioid pattern is a podcaster's best friend. It’s highly directional, meaning it captures sound from directly in front of it while rejecting sound from the sides and, crucially, the back.
Picture yourself sitting at your desk. A cardioid mic will zero in on your voice while largely ignoring the click-clack of your keyboard or the sound waves bouncing off the wall behind the mic. That tight focus is exactly why it's the go-to pattern for vocals and spoken word.
This isn't just my opinion. The data backs it up, with unidirectional mics (which are almost always cardioid) dominating the podcasting market in 2023. They excel at isolating a single voice. It's also worth noting that XLR microphones account for over 79% of the professional market, showing a clear preference for robust, high-quality connections. You can dig into the numbers in this podcasting microphone market report.
So, let's put it all together. If you're like most people recording in a regular room with a bit of ambient noise, a dynamic cardioid microphone is almost certainly your best bet. It's a powerful one-two punch designed to put your voice front and center, giving you a clean, professional recording right from the start.
Comparing Top Microphones for Every Podcasting Scenario
Let's get one thing straight: there is no single "best" microphone for podcasting. The mic that sounds like a dream in a professionally treated studio could be an absolute nightmare in your spare bedroom. This is where we move past the technical specs and get into practical, real-world recommendations that match the right tool to your specific job.
We'll break down the top contenders across three distinct budget levels, but more importantly, we’ll frame each choice around a common podcasting scenario. This way, you’re not just buying a microphone that fits your budget, but one that actively solves the unique audio challenges you're actually facing.
To start, this simple decision tree can point you in the right direction.
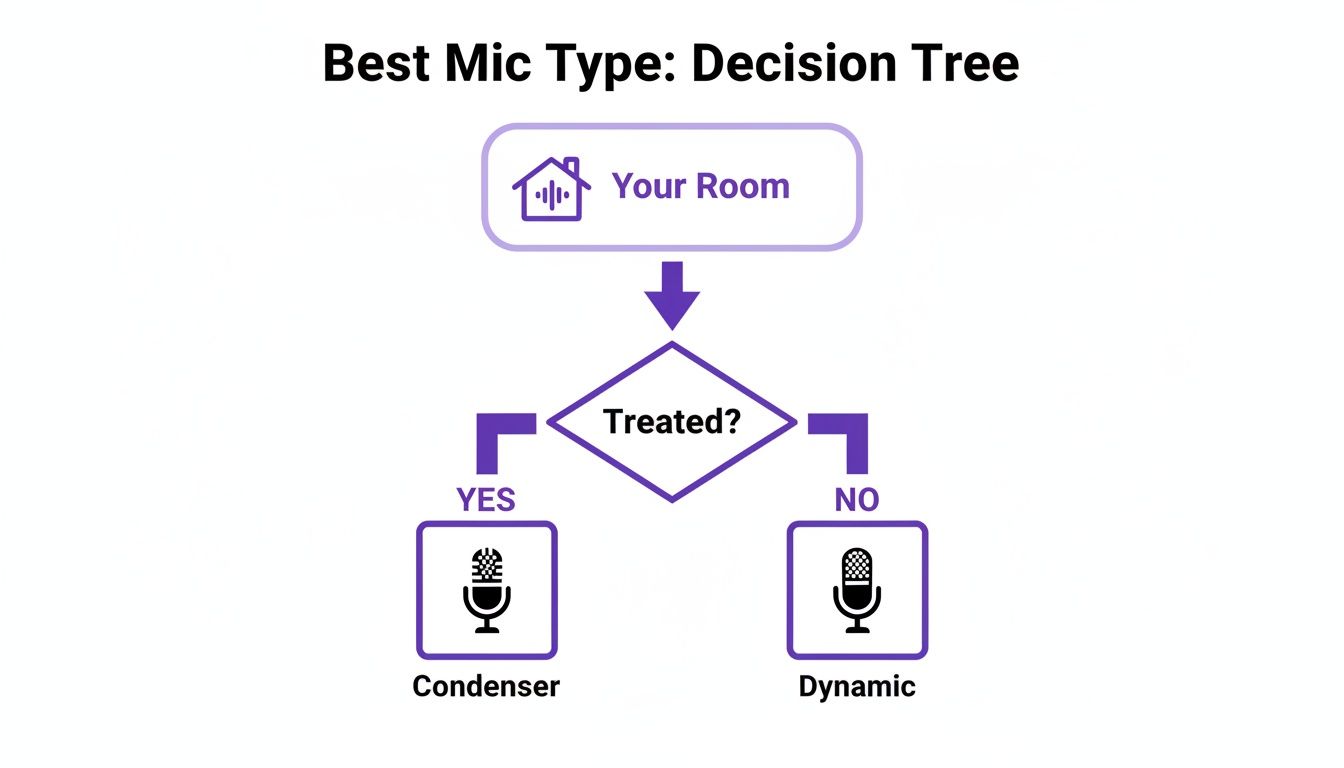
This visual gets right to the heart of the matter: your room is just as important as your microphone. If you're in a regular, untreated room, a dynamic mic's ability to reject background noise is your best friend. If you've got acoustic treatment, a condenser mic will let you capture every rich detail of your voice.
Entry-Level Picks for Solo Podcasters
When you're a solo host just getting your sea legs, you need a microphone that's simple, affordable, and delivers solid audio without a ton of fuss. This is where a great plug-and-play USB microphone shines.
Top Recommendation: Samson Q2U
The Samson Q2U is a legend in podcasting circles, and for good reason. It’s a dynamic microphone with a cardioid pickup pattern, which is a technical way of saying it’s brilliant at focusing on your voice and ignoring a lot of the background noise—like your computer fan, the traffic outside, or the natural echo in your room.
What really makes the Q2U special, though, is its hybrid USB/XLR connectivity. You can start right out of the box by plugging it directly into your computer's USB port. Down the road, when you're ready to upgrade to an audio interface for more control, you just switch to the XLR output. You get to keep the mic you already know and love.
Key Differentiator: The Q2U isn't just a starter mic; it's a future-proof investment. That dual-connectivity gives you a clear upgrade path that most other entry-level USB mics simply don't have, saving you from having to buy a whole new microphone later.
It’s the perfect blend of performance and practicality for anyone new to the game, delivering a clean, broadcast-style sound that's incredibly forgiving in less-than-perfect spaces.
Mid-Range Options for Growing Shows
Once your podcast starts gaining traction, you might want to bring on a co-host, interview guests in person, or simply elevate your sound to a more professional level. This is the point where investing in a mid-range setup really pays off, giving you a noticeable leap in audio quality and much more flexibility.
Top Recommendation: Rode PodMic (XLR) + Focusrite Scarlett Solo (Interface)
This combo is the ideal first step into the world of pro-level XLR audio. The Rode PodMic is a dynamic mic built from the ground up for spoken word, giving you that rich, warm vocal tone that sounds instantly polished. It also has fantastic internal noise rejection.
Because it’s an XLR mic, it needs an audio interface to connect to your computer, and the Focusrite Scarlett Solo is a perfect partner. This little box powers the mic and converts its analog signal to digital. The Scarlett series is famous for its clean, high-quality preamps, which give the PodMic plenty of power without adding any hiss or noise.
This kind of setup gives you two massive advantages over a simple USB mic:
- Superior Sound Quality: The dedicated preamps in an interface are far cleaner and more powerful than the tiny components crammed inside a USB microphone.
- Expandability: When you're ready for a co-host, you just upgrade to an interface with two inputs (like the Scarlett 2i2) and grab a second PodMic. Easy.
Interestingly, this approach reflects a global trend. North America, which makes up about 41% of the podcasting mic market, tends to lean into higher-end XLR setups like this one. Meanwhile, the fast-growing Asia-Pacific market often gravitates toward cost-effective USB models that rely on post-production software. You can dig deeper into these global microphone market trends to see how regional preferences shape equipment choices.
Professional Setups for Uncompromising Quality
For the podcaster who needs broadcast-grade audio and records in a controlled environment, a professional setup is the end goal. These are the industry-standard microphones you hear on top-tier podcasts and radio broadcasts all over the world.
Top Recommendation: Shure SM7B (XLR)
The Shure SM7B is, simply put, an icon. It’s a dynamic mic celebrated for its silky-smooth vocal reproduction and its incredible ability to reject off-axis sound. This mic has a magical quality that makes almost any voice sound better, all while filtering out room noise and electrical hum for an impossibly clean signal.
The one catch is that the SM7B is notoriously "gain-hungry," meaning it needs a lot of power to perform its best. While a high-end audio interface might do the trick, it’s almost always paired with an inline preamp like a Cloudlifter CL-1. This little device adds a boost of clean gain before the signal hits your interface, guaranteeing a strong, noise-free recording.
This setup is definitely an investment, but it delivers a level of quality and consistency that is second to none. It’s the choice for creators who refuse to compromise on their sound. The SM7B is what you'd call a "forever mic"—once you have one, you’ll never need to upgrade again.
Microphone Recommendations by Podcasting Scenario
To make things even clearer, here’s a breakdown of our top picks for the most common podcasting situations you're likely to encounter. This table should help you pinpoint the exact right tool for your specific needs and budget.
| Scenario | Budget-Friendly Pick (Under $150) | Mid-Range Pick ($150 - $400) | Professional Pick ($400+) | Key Feature |
|---|---|---|---|---|
| Solo Podcast (Beginner) | Samson Q2U | Rode NT-USB+ | Shure MV7 | Simplicity and excellent out-of-the-box sound. |
| Co-hosted Podcast (In-Person) | 2x Behringer XM8500 | 2x Rode PodMic | 2x Shure SM7B | Excellent noise isolation for multiple speakers. |
| Interview Podcast (Remote Guests) | Audio-Technica AT2020 USB+ | Rode Procaster | Electro-Voice RE20 | Clarity and focus to cut through call compression. |
| On-the-Go / Mobile Recording | Rode SmartLav+ | Shure MV88+ | Zoom H4n Pro Recorder | Portability without sacrificing significant quality. |
Ultimately, the goal is to choose a microphone that not only sounds great but also makes your recording process easier. Whether you're a solo host in a bedroom or a team in a studio, the right mic is the one that lets you forget about the tech and focus on creating a great show.
Essential Accessories for Professional Sound
Your microphone is the star of the show, but even the best mic can't deliver professional-grade sound all by itself. Think of these accessories as the crucial supporting cast; they aren't just for looks, they're practical tools that tackle common recording problems head-on, letting your mic perform at its absolute best.
It’s like owning a high-performance sports car—you wouldn’t put cheap tires on it. In the same way, your microphone needs the right gear to handle the bumps and scrapes of the recording process, from harsh vocal pops to vibrations traveling through your desk.
Taming Your Sound with a Pop Filter
If you buy just one accessory, make it a pop filter. This simple screen, which sits between you and the microphone, is your first line of defense against what engineers call plosives.
Plosives are those aggressive bursts of air that escape your mouth when you pronounce hard 'p' and 'b' sounds. Without a filter, that blast of air slams into the microphone's sensitive diaphragm, creating a distorted, muddy thud in your audio that’s a real pain to edit out later. A pop filter works by breaking up and dispersing that airflow, smoothing out the sound before it ever hits the mic.
You'll generally find two types:
- Fabric Mesh Filters: The classic, budget-friendly option. They get the job done effectively and are easy to find.
- Metal Mesh Filters: A bit more durable and easier to wipe clean. These often use a louvered pattern to direct air down and away from the mic, offering fantastic protection.
Achieving Perfect Placement with a Boom Arm
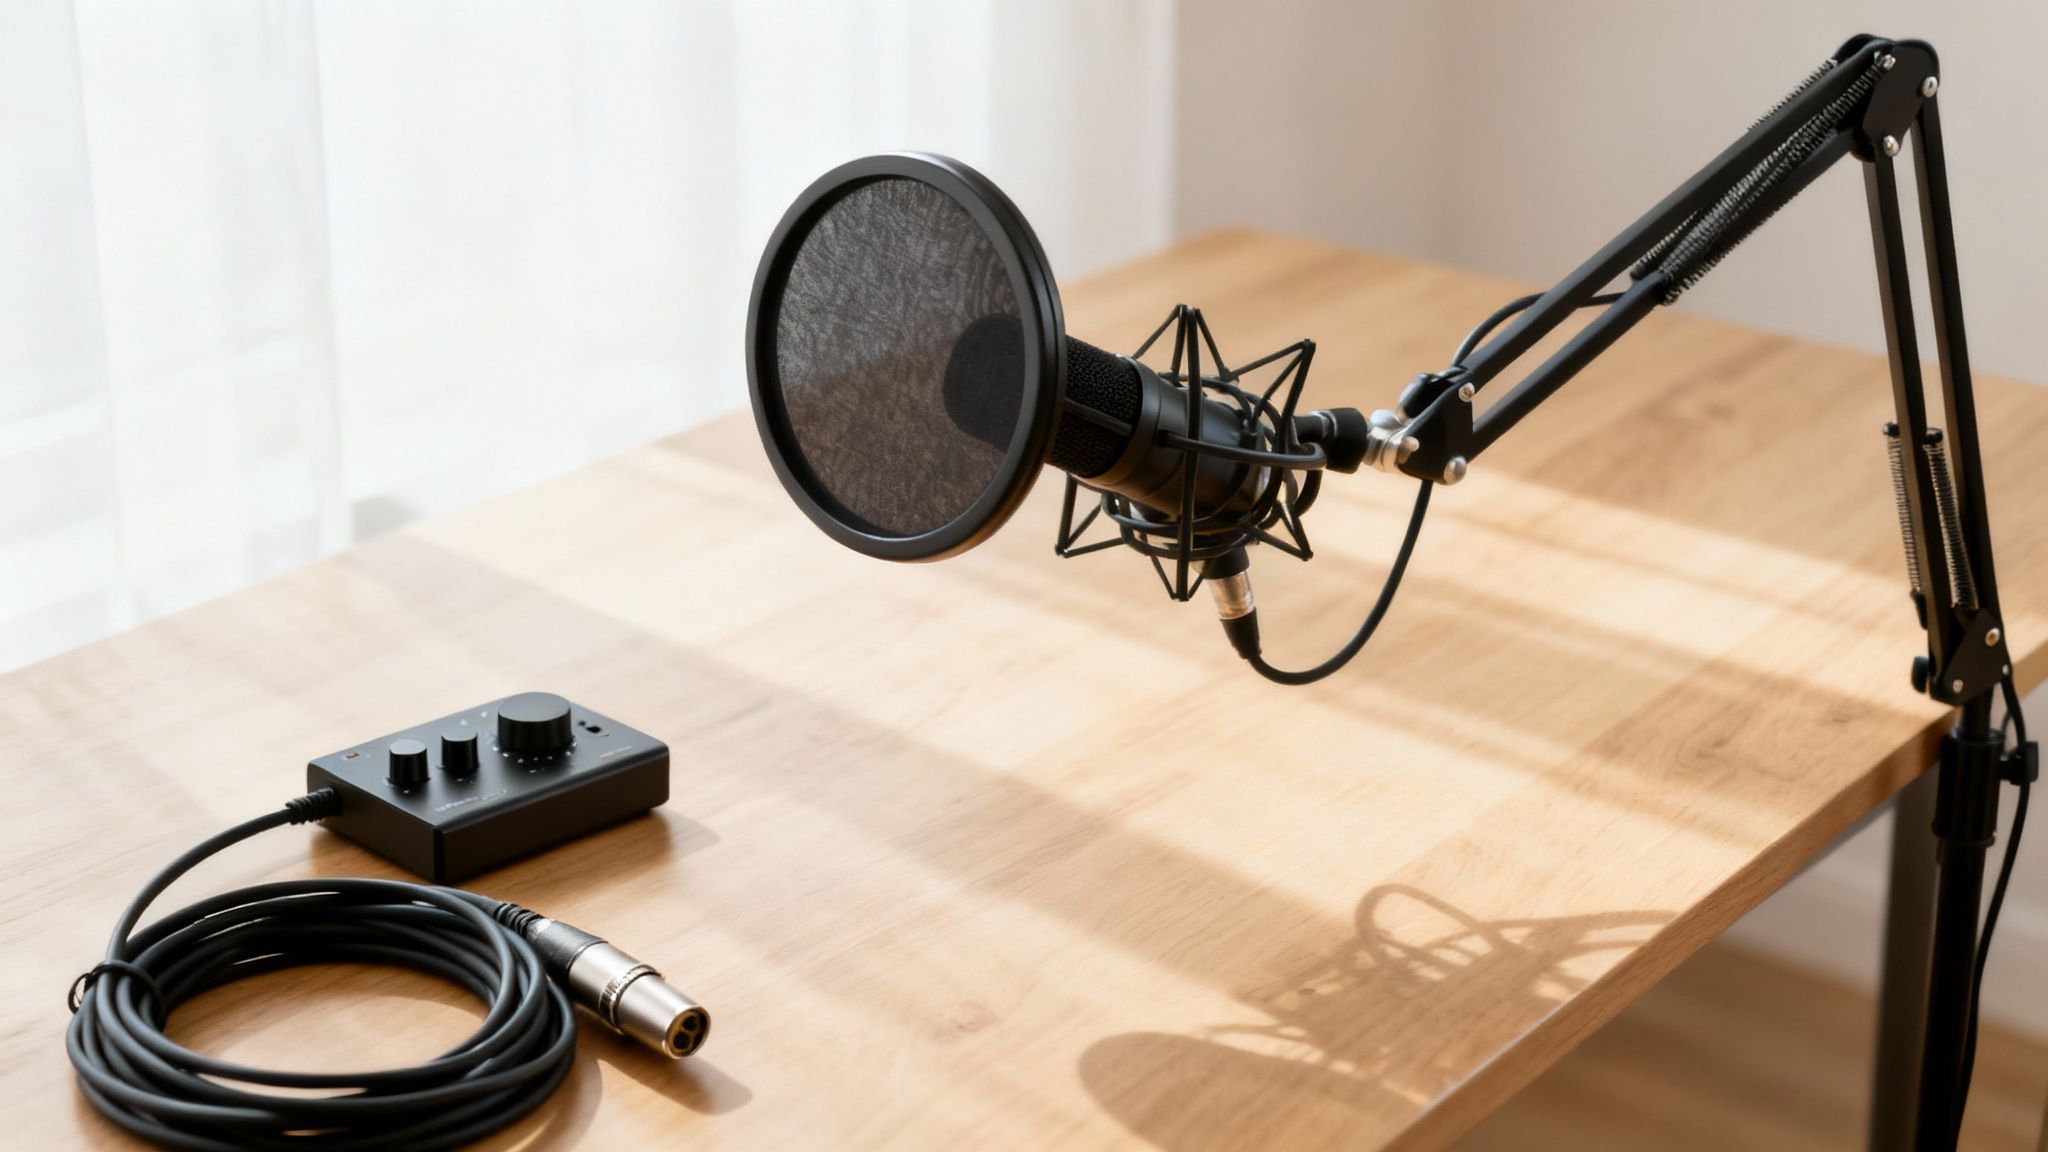
Most mics ship with a dinky little desk stand, but upgrading to a boom arm will radically improve your audio quality and recording comfort. A boom arm clamps right onto your desk, allowing you to float the microphone exactly where it needs to be—close to your mouth but out of your way.
This solves two huge problems at once. First, it helps you maintain a consistent distance from the mic, which is the secret to keeping your volume levels steady and even. Second, it isolates the mic from your desk, so thumps from typing, bumping the table, or even low-frequency rumbles won’t travel up the stand and into your recording. For ultimate isolation, most podcasters pair their boom arm with a shock mount, a special cradle that absorbs any lingering vibrations.
Pro Tip: A good boom arm doesn't just improve your sound; it improves your entire workflow. It clears up valuable desk space and lets you effortlessly swing the mic aside when you're done recording.
Power and Control with an Audio Interface
If you've gone the XLR microphone route, an audio interface isn't optional—it's essential. This little box acts as the translator between your professional analog microphone and your digital computer. It takes the mic's signal, converts it into a language your computer can record, and supplies the steady phantom power that many condenser mics need to operate.
Even more importantly, it gives you hands-on control. An interface has a physical gain knob that lets you dial in the perfect recording level, making your signal strong and clear without clipping or distorting. Great-quality, reliable units like the Focusrite Scarlett or PreSonus Studio series include clean preamps that boost the mic's signal without adding a layer of hiss or noise. Getting familiar with these components is key, and you can find solid primers on general voice-over equipment for beginners that cover a lot of the same ground as podcasting. Of course, even with perfect gear, the environment can throw you a curveball, which is why knowing how to remove wind noise from audio is a handy skill for any audio creator.
How to Record for Crystal-Clear Audio Quality
Even the world's best podcasting microphone can't save a bad recording. The real secret to pro-level audio isn't just about what you buy; it's about how you use it to capture clean sound right from the start. Getting a few fundamentals down means your raw audio will be pristine, saving you a massive headache in post-production.
This all begins with your software. Once you have your mic, a Digital Audio Workstation (DAW) is your command center for recording and editing. You can check out some of the best DAWs for beginners, including podcasters to find a great starting point.
Mastering Microphone Placement
The distance between you and your microphone is easily the biggest factor influencing your sound quality. If you're too far away, your voice will sound thin, distant, and swimming in room echo. Get too close, and you'll run into distortion and that boomy, bass-heavy sound known as the proximity effect.
A great rule of thumb is the "four-finger rule." Just hold your four fingers together and place them between your mouth and the mic—that’s your target distance. This usually puts you in the sweet spot of 4–6 inches away, which is perfect for capturing a full, present vocal tone without overwhelming the microphone.
You should also think about your angle. Speaking directly into the center of the mic can sound a little harsh or cause loud pops on "P" and "B" sounds. Try positioning it slightly to the side, aimed at the corner of your mouth. This technique, known as speaking off-axis, smooths out those harsh sounds and often produces a much warmer, more natural tone.
Setting Your Gain Levels Correctly
First things first: gain is not volume. It’s the input sensitivity of your microphone. Nailing this setting is critical for avoiding two huge problems: a signal that's too quiet and buried in hiss, or one that's way too loud and distorted.
Your number one goal is to avoid clipping. This happens when the audio signal is so loud that the tops of the sound waves get chopped off, creating a nasty crackling distortion that is completely impossible to fix later.
Here’s a simple process for setting your gain perfectly every time:
- Start Low: Turn the gain knob on your interface or USB mic all the way down.
- Speak Naturally: Talk into the mic using the same voice and volume you'll use when recording your show.
- Increase Slowly: Gradually turn up the gain until your voice consistently peaks between -12dB and -6dB on your DAW’s meter.
This range is the sweet spot. It gives you a strong, clean signal with plenty of headroom, so you won't clip even if you get excited and raise your voice. If you've maxed out the gain and still aren't hitting these levels, you may need to learn how to safely increase mic volume through other means.
Key Takeaway: Perfect gain staging is a balancing act. Aim for that -12dB to -6dB range to get a rich, clean signal without risking irreversible digital distortion.
Simple Room Treatments That Work
You don't need to build a professional studio to get clean audio. Your biggest enemy in a normal room is reverb—that echoey sound caused by your voice bouncing off hard surfaces like walls, ceilings, and your desk.
Luckily, you can squash a lot of that reverb with some simple, free solutions. The trick is to use soft materials to absorb the sound waves.
- Try recording in a room with a carpet.
- Hang some thick blankets on the walls in front of and behind you.
- Toss a few pillows or cushions in the corners of the room.
Seriously, even recording in a walk-in closet full of clothes works wonders. It creates a surprisingly effective vocal booth on the fly. By taming those reflections at the source, your voice will sound much more direct, focused, and professional.
The Final Polish with AI-Powered Audio Cleaning
Picking the right podcast microphone and nailing your recording technique will get you 90% of the way to pro-quality sound. But what about that last 10%? It’s the difference between good and great.
Even with a near-perfect setup, all sorts of subtle noises can bleed into your recording. Think about the low hum of your air conditioner, a distant siren, or the whir of a computer fan. These tiny distractions can pull a listener right out of the conversation.
This is where modern audio tools really shine. Instead of spending hours in an editing suite trying to surgically remove every little imperfection, you can use an AI-powered audio cleaner to handle the heavy lifting automatically. It’s the final step that makes your audio sound like it came straight from a professional studio.
How to Integrate SimpleClean into Your Workflow
Tools like SimpleClean are built to be dead simple, slotting right into your existing post-production process. The workflow couldn't be easier: once you've recorded your episode, just export the raw audio file and upload it. There's no complicated software to install or a bunch of confusing settings to tweak.
The AI immediately analyzes the audio, figuring out what's your voice and what's unwanted background noise. It then intelligently strips away those distractions while keeping the natural tone and richness of your speech. The goal is to sound clean, not robotic.
This isn’t about fixing huge recording mistakes. It’s about adding that final, studio-grade finish to ensure your message is heard clearly, without any interference. It gives every creator access to pristine audio, no matter their technical skill or recording space.
The process really is as simple as dragging and dropping your file.
As you can see, the interface is clean and intuitive. You just upload your file and let the AI do its thing behind the scenes.
This final step ensures all the work you put into choosing the right mic and recording properly pays off. AI audio enhancement is like a safety net, catching the subtle imperfections that even the best microphones can’t completely eliminate. If you want to dive deeper into the tech, our guide on software noise cancellation breaks down how it all works.
By adding this quick step to your routine, you’re guaranteeing a professional, distraction-free listening experience. It’s the easiest way to make sure your podcast sounds polished and ready to compete with the biggest shows out there. Your audience will hear nothing but you and your message.
A Few Common Questions About Podcast Mics
Jumping into the world of audio gear can feel like learning a new language. Let's clear up some of the most common questions that pop up when you're trying to find the right microphone for your podcast.
Think of this as a quick chat to get you on the right track. Getting these fundamentals down will help you feel confident that you're buying the right gear for your show from the get-go.
Do I Really Need a Super Expensive Mic to Start Podcasting?
Nope. Not at all. In the beginning, what really matters is your content and your ability to stick with it. You can absolutely get professional-sounding audio with a budget-friendly USB mic and a bit of smart setup.
The secret is combining good recording habits with smart post-production. A simple dynamic mic, used correctly, plus a good AI audio cleaner will sound miles better than a high-end mic in a noisy, untreated room. Focus on your content first; you can always upgrade your gear later as your show finds its footing.
What's the Real Difference Between Dynamic and Condenser Mics?
It really boils down to one thing: sensitivity. Dynamic mics are workhorses—they're durable and not overly sensitive, which makes them brilliant at ignoring background noise. This is why they're perfect for typical home recording spaces like a bedroom or office that haven't been acoustically treated.
Condenser mics, on the other hand, are built to be extremely sensitive. They capture every little detail and nuance in a sound, which is great in a studio but also means they'll pick up your computer fan, the air conditioner kicking on, and traffic outside. They truly shine only in very quiet, controlled environments.
Key Insight: For most people starting a podcast from home, a dynamic microphone is the safer, more practical choice. It does a lot of the work for you by naturally isolating your voice.
Should I Go with a USB or an XLR Microphone?
This choice is all about simplicity versus long-term flexibility.
A USB microphone is your best bet if you want something affordable that you can just plug in and start recording with. They're perfect for solo creators and anyone who wants to avoid dealing with extra hardware.
An XLR microphone is the way to go if you're aiming for that next-level, professional sound and want the ability to grow. This setup gives you more control and lets you easily add more mics for co-hosts or guests down the road. Just know you'll also need an audio interface to get the signal into your computer.
Ready to make your audio sound like it came from a professional studio? No matter which mic you choose, SimpleClean is the final step that makes all the difference. It gets rid of distracting background noise and makes your voice sound crisp and clear with just one click. Try SimpleClean for free and hear the difference.