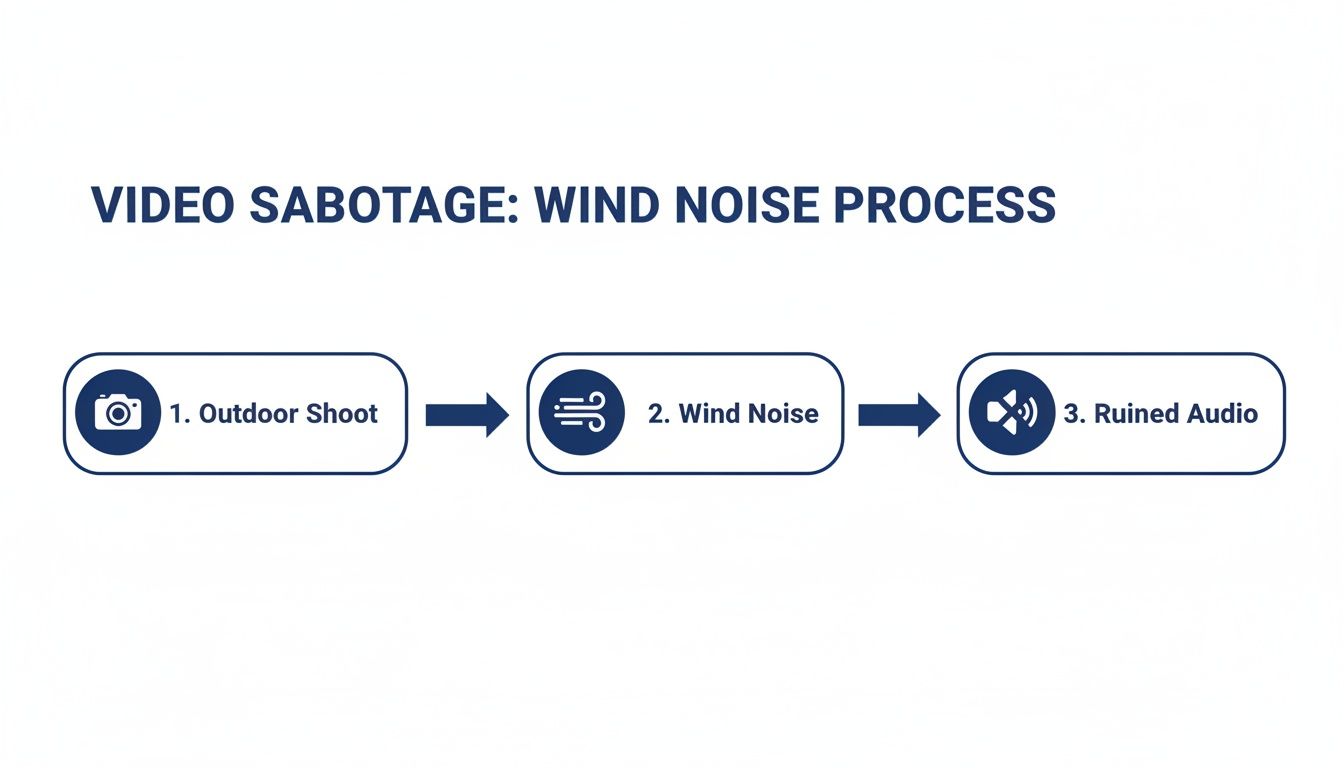
So, you’ve shot the perfect outdoor scene. The lighting is gorgeous, the action is spot-on, but when you hit playback, your heart sinks. All you can hear is that awful, low-frequency rumble of wind blasting the microphone. It’s a familiar story, and it's one of the most frustrating hurdles for anyone creating video content.
This isn’t just a minor glitch; it’s a showstopper. Wind noise can make your dialogue completely unintelligible, turning an otherwise professional video into an amateur mess.
Why Wind Noise Is Sabotaging Your Videos
We've all been there. You film a heartfelt testimonial, a killer travel vlog segment, or a key part of an online course, only to find the audio is a total write-off. That relentless, deep rumble has hijacked your soundtrack, and now the whole take feels like a waste.
This destructive sound is wind noise. It happens when wind slams into your microphone's diaphragm, overloading it and creating a distorted, bass-heavy sound that completely masks the important stuff—like your voice.
The Real-World Impact on Your Content
Let's be honest: bad audio is a dealbreaker. Viewers have zero patience for it. If they can't understand what's being said, they're gone in a flash, no matter how beautiful your footage is.
This issue cuts across all kinds of video creation:
- YouTubers and Vloggers: That crucial piece of dialogue during your outdoor adventure? Gone. The key feature you highlighted in a product review? Muffled beyond recognition.
- Course Creators and Educators: Trying to teach something outdoors with wind howling in the background makes it nearly impossible for students to learn.
- Marketing Professionals: A corporate video or a client testimonial filmed on-site loses all its impact and credibility if the core message is drowned out.
Just How Big Is This Problem?
This isn't some rare, niche issue. Wind noise is a massive headache for creators everywhere. According to a 2023 survey, it can ruin up to 70% of footage shot in even moderately breezy conditions.
This low-frequency rumble, typically sitting between 20Hz and 250Hz, just overwhelms microphones. It forces creators into a tough spot: either reshoot everything or brace for a long, tedious editing session. The problem is so widespread that a staggering 67% of audio professionals say they still fight wind noise every single week. Worse yet, only 18% of them feel genuinely happy with the results they get from traditional editing tools. If you want to dive deeper into the stats, you can find more data about video noise reduction on WinXDVD.
Here's the bottom line: Viewers will forgive shaky video, but they won't tolerate bad audio. Fixing wind noise isn't just a technical tweak; it's about keeping your audience hooked and making sure your message actually lands.
AI Cleaning vs. The Old-School Manual Grind
For years, the only fix was to roll up your sleeves and dive into a complex audio editor. This meant painstakingly applying high-pass filters and parametric equalizers, trying to surgically remove the offending frequencies without destroying the dialogue. In the right hands, it can work, but it takes forever and has a seriously steep learning curve. One wrong move, and you've made the speaker sound thin, tinny, and completely unnatural.
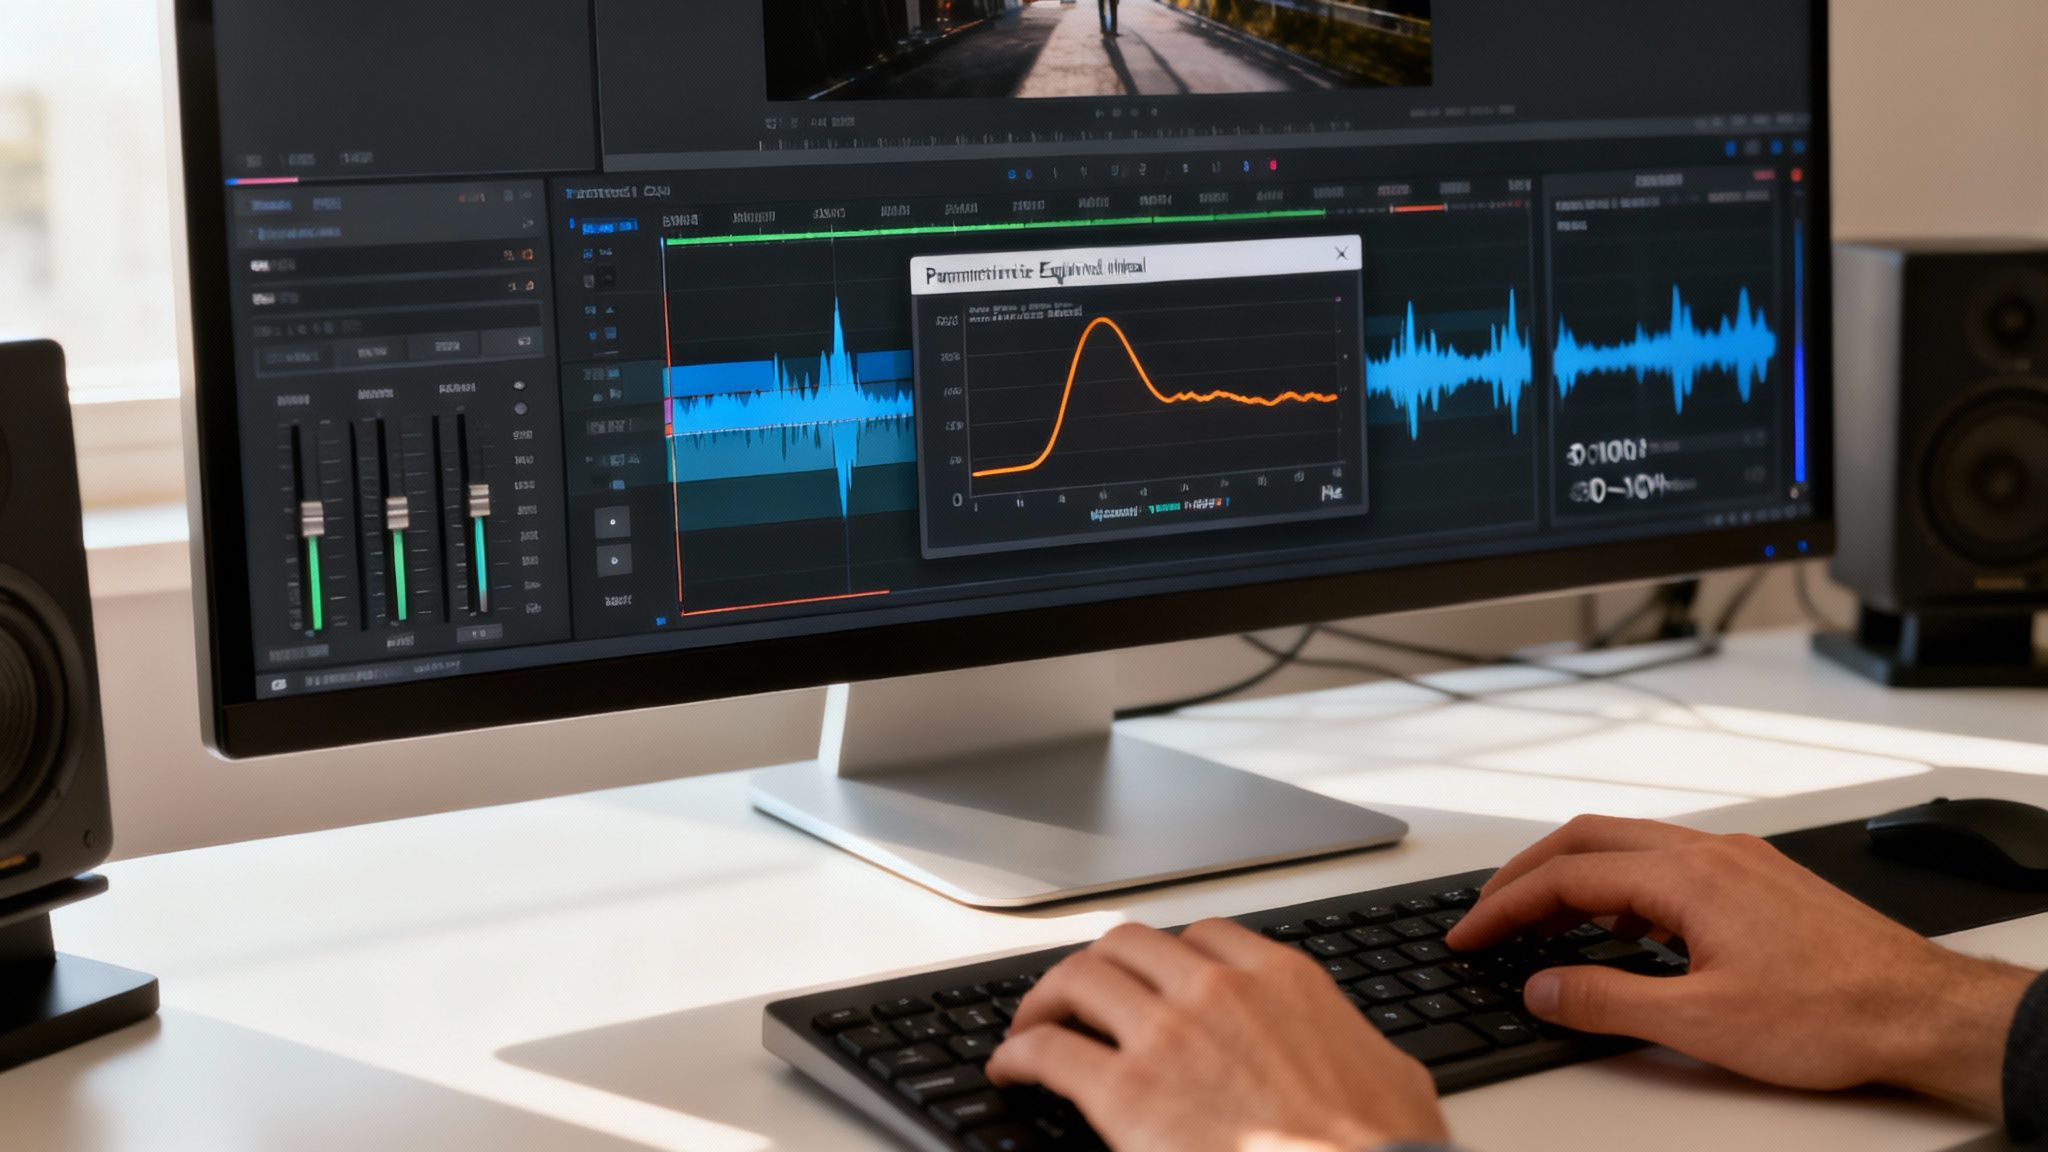
Thankfully, we now have a much smarter way to handle this. Modern AI-powered tools like SimpleClean are built specifically for this problem. They analyze your audio, instantly identify the unique signature of wind noise, and remove it while intelligently preserving the human voice. It’s a game-changer, giving you professional-grade results in minutes, no audio engineering degree required.
To put it in perspective, let's break down the two approaches. While manual editing in a Digital Audio Workstation (DAW) or a video editor like Premiere Pro gives you ultimate control, it comes at the cost of time and complexity. AI tools flip the script, prioritizing speed and ease of use.
AI vs. Manual Wind Noise Removal: A Quick Comparison
| Feature | AI Audio Cleaner (SimpleClean) | Manual Software (Premiere Pro/Audition) |
|---|---|---|
| Speed | Extremely fast (minutes) | Slow and time-consuming (hours) |
| Ease of Use | Beginner-friendly, one-click process | Requires technical skill and experience |
| Learning Curve | Virtually none | Steep; requires understanding EQs, filters, etc. |
| Effectiveness | Highly effective at isolating and removing wind | Can be effective, but risks altering voice quality |
| Consistency | Consistent, reliable results every time | Results vary based on user skill and audio complexity |
| Best For | Creators who need fast, high-quality results | Audio engineers who need granular control |
Ultimately, the choice comes down to your priorities. If you need absolute precision and have the time and expertise, manual methods are still a viable option. But for the vast majority of creators who just want clean, clear audio without the headache, an AI-powered solution is the clear winner.
Removing Wind Noise with AI in Minutes
Picture this: you've just wrapped up a fantastic outdoor shoot. The visuals are stunning, the content is solid, but a relentless wind has turned your audio into a mess of low-frequency rumble. In the past, this meant either ditching the footage or settling in for a long, frustrating editing session. Not anymore. With the right AI tool, you can salvage that audio in just a few minutes.
The real magic of modern AI audio cleaners is their focused simplicity. They’re built to do one job and do it incredibly well: surgically remove distracting noise while keeping the important stuff—the human voice—crystal clear and natural. You don't need to fiddle with complex equalizers or know what a high-pass filter is.
As any creator who has shot outdoors knows, wind is the enemy of good audio. It can completely derail an otherwise perfect take.
This is the exact pain point these new tools are designed to solve, turning what used to be a production-ending problem into a minor post-production fix.
The Simple One-Click Workflow
Let's walk through how this works in practice with a tool like SimpleClean. The entire experience is designed to be dead simple, perfect for creators who need great results without getting lost in a technical rabbit hole.
You start by just heading to the web app. No downloads, no installations. You can get to work right away from any computer. The interface is clean and minimal, focusing you on the one thing you came to do.
You’re basically greeted with a drag-and-drop box. That's it. This intentional design removes all the intimidation that comes with traditional, cluttered audio software.
All you have to do is drag your video file—whether it's an MP4, MOV, or another common format—and drop it right into the browser. The tool instantly gets to work, automatically separating the audio from the video and beginning its analysis. This is where the AI kicks in, scanning the sound to identify the specific signature of the wind noise in your clip and distinguishing it from the vocal frequencies.
My Takeaway: The AI isn't just slapping on a generic filter. It's actually creating a custom noise profile for your specific recording and then surgically removing it. This is why the dialogue stays so natural-sounding, unlike the muffled results you often get from a basic filter.
From Upload to Download: The Entire Process
Once your file is uploaded, the process is almost entirely hands-off. A progress bar shows the AI working its magic, which usually only takes a couple of minutes, even for longer clips. That speed alone is a massive win compared to the hours you could spend trying to fix it manually.
When it’s finished, you get a side-by-side preview. This is the most important part of the process, as it lets you:
- Hear the original "before" track: You get a quick reminder of how bad that wind noise really was.
- Listen to the "after" track: You can instantly hear the cleaned-up version, with the wind gone and the dialogue pushed right to the front.
This A/B comparison is usually all the proof you need. When you’re happy with the result (and for wind noise, it's almost always a dramatic improvement), you can download the clean audio file as an MP3 or WAV. Even better, some tools let you download a brand new video file with the restored audio already synced up and ready to go.
Why This Method is a Game-Changer
AI's arrival in audio post-production is a direct answer to a problem that has plagued creators for decades. In a landmark 2025 survey, Production Expert found that while 90.1% of audio pros still use heavy-duty tools like iZotope RX, newer AI solutions are being adopted at a shocking rate. For example, Accentize dxRevive hit 48.9% adoption in just three years.
Why the rapid shift? The survey also found that 32% of pros said they frequently handle outdoor shoots where wind ruins an average of 55% of their audio takes. With YouTube's 2.7 billion users uploading countless hours of outdoor vlogs, interviews, and films, the need for a fast, effective fix has never been more urgent.
This technology means you no longer need a degree in audio engineering to produce professional-sounding video. If you're interested in the nuts and bolts, you can read more about how software noise cancellation works. To see what other options are out there, check out some of the best AI tools for video editing, as many now include these powerful audio repair features. Ultimately, this accessibility lets you get back to what matters: creating great content.
Getting Hands-On: How to Manually Reduce Wind Noise in Your Editor
While AI tools are fantastic for a quick fix, sometimes you need to get under the hood and take full control. Manually tackling wind noise in your video editor gives you that precise, granular power. It’s definitely a more hands-on approach, but it’s an essential skill for any creator serious about audio quality.
This isn't about finding one magic button. Instead, we're going to layer a couple of key audio effects to surgically remove that low-frequency rumble wind creates, all without mangling the dialogue you want to keep. The tools I’m talking about are built into most professional editors like Adobe Premiere Pro and DaVinci Resolve.
Before you start, grab a good pair of headphones. Trust me, your laptop speakers won't cut it. You need to hear the subtle shifts in the sound as you make adjustments to get this right.
First Line of Defense: The High-Pass Filter
Your first and most powerful weapon is the High-Pass Filter, which you might also see labeled as a "Low-Cut" filter. Think of it as a bouncer at a club—it lets all the high-frequency sounds in but stops the low-frequency troublemakers at the door. Since wind noise is almost entirely that deep, bassy rumble, this filter does the heavy lifting.
Most wind noise lives in the 20Hz to 250Hz frequency range. The important parts of human speech, thankfully, sit a bit higher. A High-Pass Filter lets you draw a line in the sand, slicing away everything below a frequency you choose.
Find the High-Pass Filter in your editor's effects panel and drag it onto your audio clip. The main setting you’ll need to adjust is the Cutoff Frequency.
- Start by setting the cutoff somewhere around 80Hz. This is a great, safe starting point that will kill the worst of the rumble without thinning out most voices.
- Listen back. Still hearing that low thumping? Nudge the frequency up slowly, maybe to 100Hz or even 120Hz.
- Just be careful not to get too aggressive. If you push it too far, you’ll start carving out the natural low-end of the speaker’s voice, making them sound tinny and weak. The goal is to find that sweet spot where the wind disappears but the voice still sounds full and present.
Precision Strikes With a Parametric Equalizer
A High-Pass Filter is a sledgehammer; it gets rid of everything below a certain point. For more surgical work, you need a Parametric Equalizer (EQ). An EQ is like a scalpel, allowing you to find very specific frequencies and cut them out without affecting the sound around them.
Sometimes, wind noise isn't just a general rumble—it's a specific howling tone at a distinct frequency. The Parametric EQ is the tool for hunting down that exact frequency and eliminating it.
Here’s the process for using an EQ to knock out wind noise:
- Apply the Parametric EQ effect to your audio.
- You'll see several adjustable frequency "bands." Pick one and set its "Q" (or "Bandwidth") to be very narrow. This focuses its power on a tiny target.
- Now, temporarily boost the gain on that band way up and slowly "sweep" it across the low frequencies (from about 80Hz up to 300Hz).
- Listen closely. As you sweep, you'll hear a specific wind tone suddenly get much, much louder. That's your problem spot.
- Once you've found it, just do the opposite: drag the gain for that band way down, effectively "notching" out that annoying sound.
Pro Tip: Less is more with EQ. Making too many deep cuts will leave your audio sounding hollow and unnatural. Most of the time, a gentle High-Pass Filter and one or two precise EQ notches are all you need to clean things up beautifully.
Is the Manual Approach Really Worth It?
Let's be honest: cleaning audio manually is a craft that takes time. It requires a decent ear, some basic knowledge of audio, and the patience to tweak settings until they're just right. While it gives you unparalleled control, it's also incredibly easy to overdo it and make your audio sound even worse.
If you're a creator working against a deadline, this manual process can quickly become a major time sink. It’s a fantastic skill to have in your back pocket, but you have to weigh the hours spent against the final result. Learning more about the different techniques involved in noise reduction for video can help you decide which method is right for your project.
Ultimately, choosing between manual repair and an AI tool comes down to the needs of your project and your personal workflow. Mastering these manual techniques will absolutely make you a better editor, but don't forget to consider the most efficient path to getting that clean, professional audio your video deserves.
Proven Techniques to Prevent Wind Noise at the Source
Let's be honest: the best way to deal with wind noise is to stop it from ever reaching your microphone in the first place. Post-production tools are fantastic, but they're a cure, not a prevention. Capturing clean audio from the start saves you hours of frustrating work and always sounds more natural and professional.
I like to think of it this way: trying to edit out heavy wind noise is like trying to un-bake a cake to get the eggs out. You might be able to mask the problem, but you can’t truly remove it without damaging the final product. A proactive, on-location approach ensures your audio is solid from the moment you hit record.
This all comes down to being smart about your gear and your surroundings before you even think about filming.
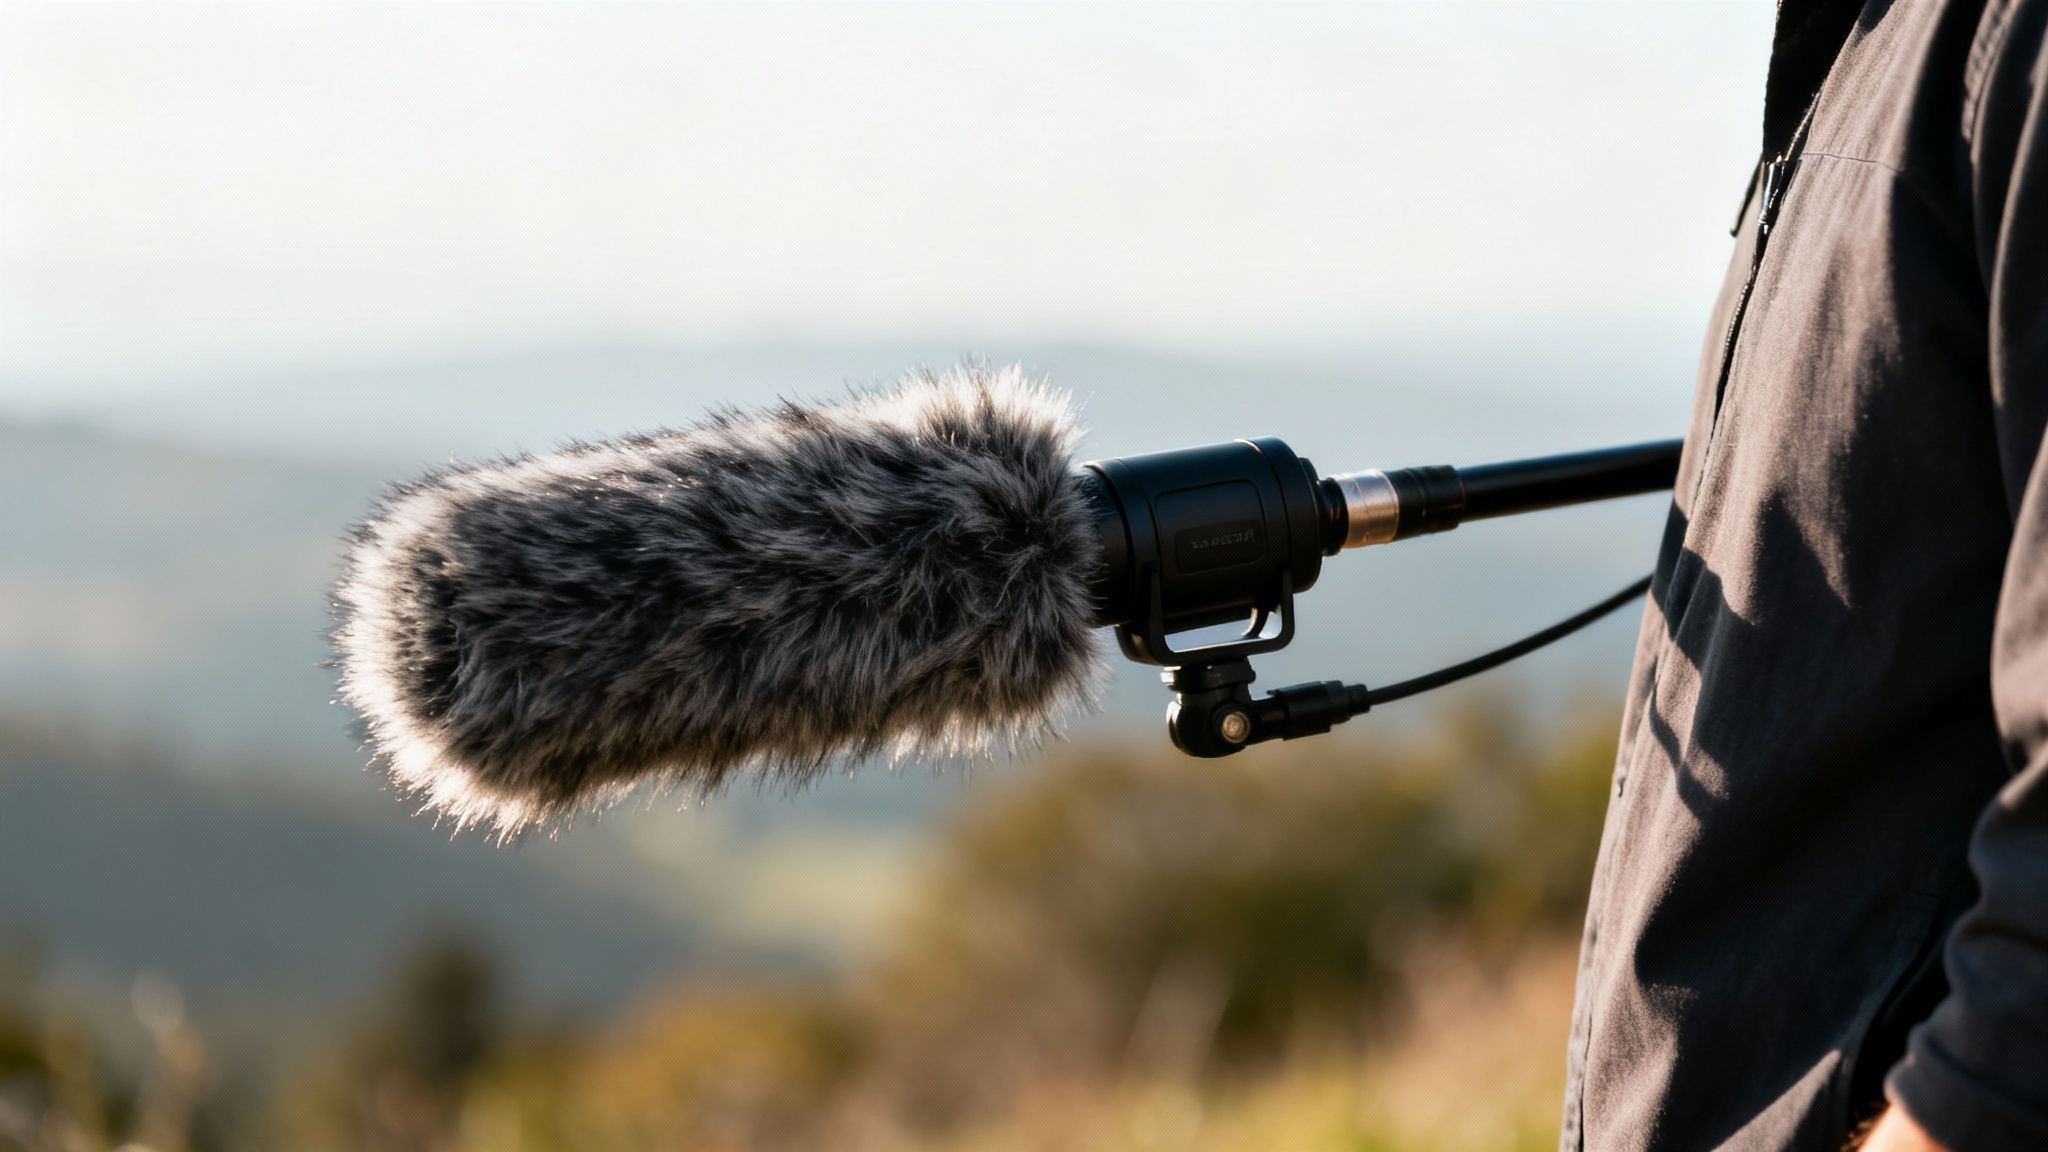
Choose the Right Microphone Protection
Your microphone’s first line of defense is a physical barrier. But here's where a lot of people go wrong—not all windscreens are created equal, and using the wrong one for the conditions is a classic mistake that can leave your audio just as ruined as using nothing at all.
You've basically got two main options for on-camera mic protection:
- Foam Windscreen: This is that simple foam cover your mic probably came with. It's fine for very light breezes or for indoor use where you're mostly just trying to stop plosives (those little puffs of air from someone's mouth). Take it outside in any real wind, though, and it's practically useless.
- "Deadcat" Furry Windscreen: This is the big, fluffy one. For any kind of outdoor recording, this is your go-to. The synthetic fur fibers are specifically designed to break up and slow down the wind before it can slam into the microphone's diaphragm, which is what causes that awful low-frequency rumble. For any outdoor shoot, a deadcat is non-negotiable.
A high-quality deadcat can reduce wind noise by 25dB or more. That's often the difference between getting usable audio and having to scrap the whole take. It’s a small investment that pays off big time.
Be Smart About Microphone Placement
Where you put your microphone can be just as critical as what you put on it. You can often use your environment—and even your talent—as a natural shield against the wind.
Start thinking like a seasoned sound professional. If you're shooting an interview, can you position your subject so their body blocks the wind from hitting their lavalier mic? If you’re capturing landscape b-roll, can you tuck the mic behind a large rock, a building, or a thicket of trees? This kind of strategic placement costs nothing and can make a massive difference in your raw audio.
If you want to dive deeper into audio cleanup, our guide on how to reduce background noise offers some great additional tips.
Directional Mics Are Your Best Friend
The type of microphone you're using plays a huge role, too. Mics have different "pickup patterns," which just means they're built to hear sound best from certain directions.
- Omnidirectional Mics: These mics hear everything, from every direction, all at once. While they're great for capturing ambient soundscapes, they are absolutely terrible in windy conditions because they'll pick up that gusty noise from everywhere.
- Directional (Shotgun) Mics: These are highly focused. They're designed to capture sound primarily from whatever they're pointed at, while rejecting sound coming from the sides and rear. This makes them perfect for isolating a person's voice outdoors and minimizing off-axis wind noise.
When you point a shotgun mic directly at your subject, you're telling it to focus on their voice and ignore as much of the surrounding chaos as possible. The combination of a good directional mic and a quality deadcat is the ultimate one-two punch for conquering windy shoots and capturing clean, crisp dialogue.
Fixing Common Audio Issues After Wind Removal
Getting the wind noise out of your video is a massive victory, but you might notice the cleanup process left behind a few new quirks. Maybe the speaker's voice sounds a little hollow, or a few strong gusts are still punching through. Don't sweat it—these are totally normal side effects, and a few final tweaks are usually all you need.
Think of it this way: the initial wind removal was the heavy demolition work. Now it's time for the detailed finishing touches to bring back warmth and clarity. We're moving from a sledgehammer to a scalpel.
When Your Voice Sounds Thin or Tinny
This is probably the most common thing you'll run into after applying aggressive filters. When you surgically remove the low-frequency rumble of wind, it's really easy to accidentally cut out the natural bass and body from a person's voice. The result? It sounds weak, tinny, and just plain unnatural. This is a classic side effect of using a manual High-Pass Filter and setting the cutoff frequency a bit too high.
Thankfully, the fix is pretty simple. You can reintroduce that missing warmth with a Parametric Equalizer.
- Find the Core Frequencies: The fundamental warmth and body of most human voices live somewhere between 100Hz and 250Hz.
- Give it a Gentle Lift: Using your EQ, apply a broad, gentle boost of about 2-3dB right in that sweet spot.
- Trust Your Ears: The goal isn't to make the voice boomy, just to restore its natural fullness. A subtle adjustment is often all it takes to make a world of difference.
Modern AI tools are getting much better at sidestepping this issue by isolating vocal frequencies, but if you're doing things by hand, a little EQ polish is your best friend.
Dealing with Intermittent Wind Gusts
Sometimes, your main filter does a great job on the constant, low rumble, but those sharp, sudden gusts of wind still sneak through. These spikes are a different beast because they aren't a consistent noise. Instead of trying to filter the whole track again, it's often better to tackle them one by one.
My go-to technique here is to manually dip the volume for just that split second. In your editor’s timeline, you can use volume keyframes (often called "automation") to create a super-fast volume drop that lines up perfectly with the gust. This "ducking" is usually so quick that no one will ever hear the volume change—they'll just notice the annoying gust is gone.
A Quick Fix for Pesky Gusts: Don't hesitate to zoom way in on your audio timeline. A wind gust usually looks like a big, chaotic spike in the waveform. If it happens during a natural pause in speech, just find it, slice it out, and delete it. It’s a surprisingly clean and effective trick.
What to Do When Dialogue Is Still Muffled
It’s incredibly frustrating when you remove the wind, but the dialogue still sounds like it's coming from under a blanket. This usually means the original recording was pretty compromised, with the wind noise so loud that it was literally overlapping the same frequencies as the voice. In those really tough cases, a perfect restoration might not be on the cards.
Still, you can almost always improve the clarity. The key is to boost the high-end frequencies where consonants and sibilance ("s" and "t" sounds) live. Try using your EQ to apply a gentle "shelf" boost starting around 3kHz to 5kHz. This can bring back some of the crispness and intelligibility that got buried, making the speech much easier to follow.
Once you’ve tackled the wind, you might want to explore broader audio quality improvement techniques to get that truly professional sound.
Common Questions on Taming Wind Noise
Even after you've got the tools and the know-how, a few questions always pop up when dealing with wind. Let's tackle some of the most common ones I hear from other creators so you can get the best possible results on your own projects.
Can a Video with Awful Wind Noise Actually Be Saved?
This is the big one, isn't it? The honest answer is a firm "maybe." It really boils down to one thing: is there any audible dialogue buried under that roar?
If the wind is so loud that it completely obliterates the speech, then you're probably out of luck. AI tools are amazing, but they aren't magic—they can't rebuild audio that simply wasn't captured.
However, if you can make out even a faint trace of the dialogue, there's a fantastic chance you can rescue it. Modern AI cleaners are remarkably good at isolating vocal frequencies. You'd be shocked at how much clarity can be pulled from a track you were ready to toss in the bin.
A Quick Reality Check: When dealing with severely damaged audio, the goal is clarity, not perfection. You're aiming to make the speech understandable, even if it doesn't sound like it was recorded in a silent studio.
Does AI Noise Reduction Make Voices Sound Weird?
That’s a totally fair question. Anyone who has wrestled with older noise reduction plugins knows that "watery," robotic sound. Those tools often used a brute-force approach, like a sledgehammer, stripping out the wind but also taking a lot of the voice's natural warmth with it.
Thankfully, we've come a long way. Instead of just blanketing the track with a filter, today's AI tools are far more surgical. They analyze the audio, create a specific profile of the unwanted wind, and then carefully remove only that sound signature. The process is designed to identify and preserve the human voice, keeping its original tone and richness intact.
Is It Better to Prevent Wind Noise or Just Fix It Later?
Let me be blunt: prevention is always, always better. No exceptions. While our post-production tools are more powerful than ever, nothing beats getting clean audio right from the start. A recording that was captured well will always sound better than one that had to be heavily repaired.
Think of it like this:
- Prevention is your first line of defense. This means using a "deadcat" windscreen, thinking about your mic placement, or choosing a more directional mic for the job.
- Correction is your safety net. This is when you turn to AI tools or manual EQ because prevention wasn't possible or just wasn't enough.
A little bit of planning on location will save you a massive headache in the editing suite and lead to a far more professional result. Always try to get it right at the source.
What’s the Best Audio File Format to Work With?
If you have a choice, always go with an uncompressed format like WAV. Compressed files, like an MP3, achieve their smaller size by throwing away some of the audio data. When you're performing a delicate operation like wind removal, you want all the original information you can get your hands on.
Now, if your audio is already baked into a video file (like an MP4 or MOV), your software will just work with what's there. But if you have the chance to export the audio separately for cleaning, choosing WAV gives your noise reduction tool the highest-quality source material to work with. This almost always leads to a cleaner result with fewer weird-sounding artifacts.
Ready to stop wrestling with wind noise? SimpleClean uses specialized AI to instantly scrub wind, traffic, and other background sounds from your videos, leaving you with nothing but crisp, clear dialogue. See what it can do for your audio.