How to Remove Background Noise in Final Cut Pro for iPad: Voice Isolation, Noise Removal, and When to Clean the Exported File Online
Quick Answer
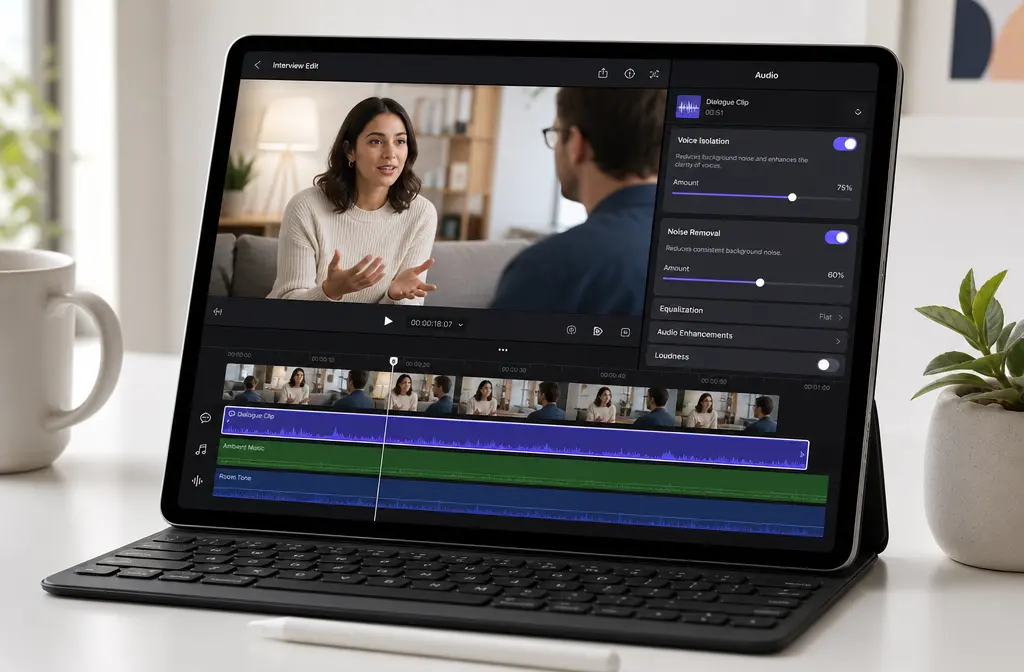
Yes, you can remove background noise in Final Cut Pro for iPad to a point. Apple includes Voice Isolation and Noise Removal in the Audio inspector under Enhancements, and those tools work best on spoken-word clips with light to moderate steady noise such as hiss, mild hum, light buzz, or general room noise around a voice. The fastest iPad workflow is usually:
- Select the clip.
- Open Inspect > Audio > Enhancements.
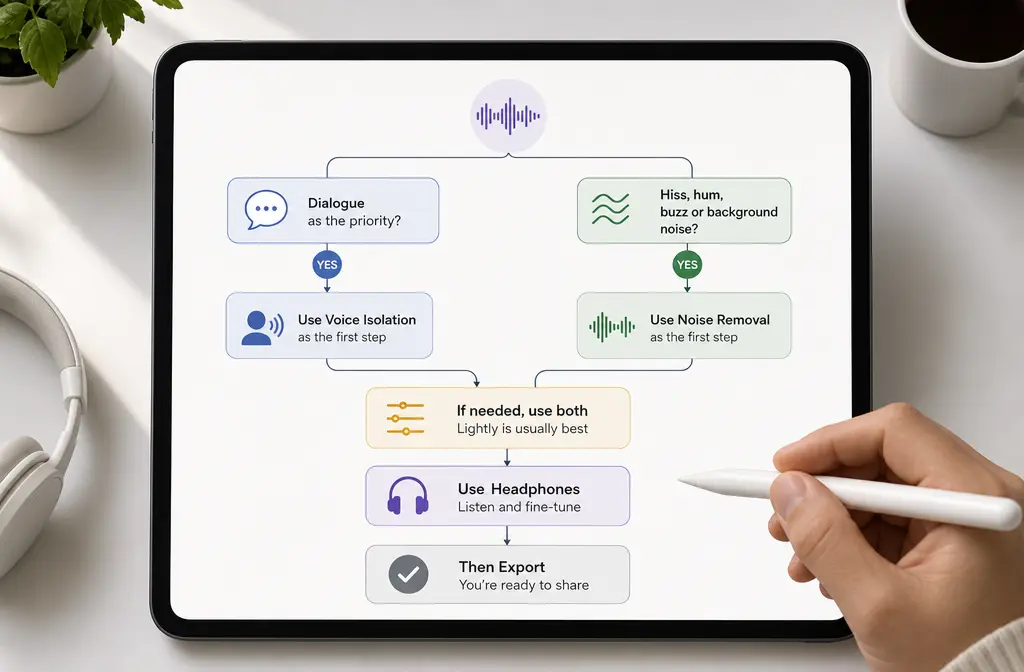
- Try Voice Isolation first if speech clarity is the main goal.
- Try Noise Removal first if the problem is steady hiss, buzz, or hum.
- Use both lightly only if needed.
- Stop if the voice starts sounding metallic, watery, or robotic.
If your clip has heavy wind, strong room echo, clipping, overlapping voices, or chaotic street noise, Final Cut Pro for iPad often will not clean it enough on its own. In those cases, it is usually faster to export the MP4 or audio file and clean the exported audio online with SimpleClean instead of pushing the iPad sliders too hard.
Apple documents the location of these controls in the Audio inspector and confirms Voice Isolation, Noise Removal, and Loudness enhancements on iPad. Apple also supports moving projects from iPad to Mac Final Cut Pro if you outgrow the mobile cleanup workflow.
Where the noise reduction tools are in Final Cut Pro for iPad
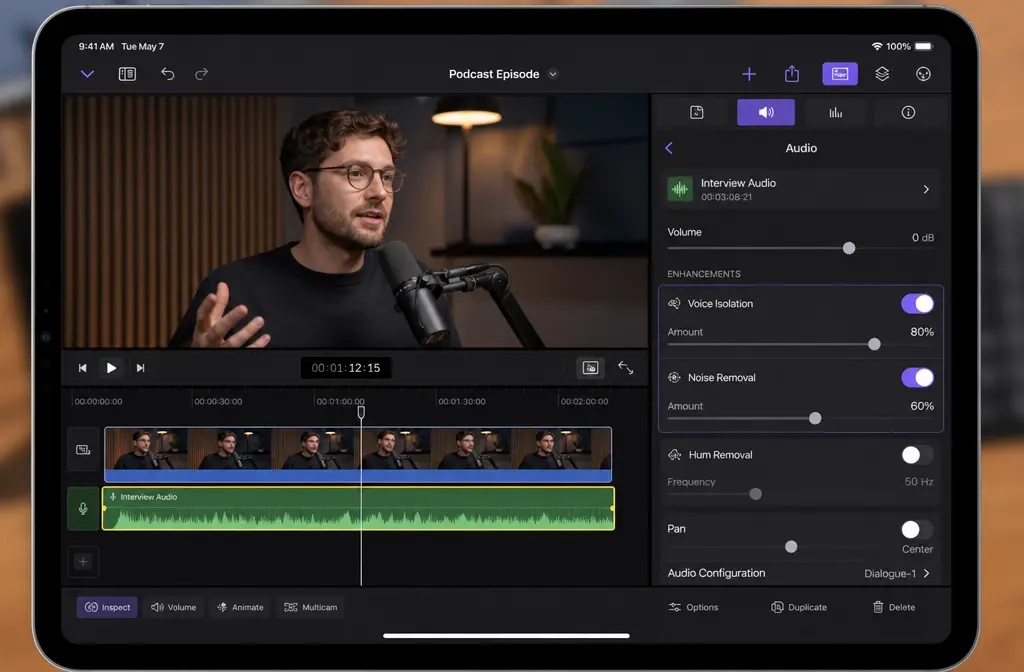
In Final Cut Pro for iPad, Apple places speech cleanup controls inside the clip inspector rather than as a complicated desktop-style audio chain. According to Apple Support, the path is:
Select clip > Inspect > Audio tab > Enhancements
That is where you will find:
- Voice Isolation
- Noise Removal
- Loudness
This matters because many broad Final Cut Pro tutorials mention audio cleanup without clearly showing the exact iPad path. If you are editing on an iPad and searching for noise reduction, the Audio inspector is the place to start.
Voice Isolation vs Noise Removal in Final Cut Pro for iPad
The biggest practical question is not whether both tools exist. It is which one should you touch first.
| Tool | Best first choice for | Usually works well on | Usually struggles with |
|---|---|---|---|
| Voice Isolation | Dialogue-first cleanup | Speech mixed with general room or background sound | Strong wind, heavy echo, clipped voice, overlapping speakers |
| Noise Removal | Steady noise reduction | Hiss, light buzz, mild hum, constant low-level noise | Changing noise, traffic bursts, room reflections, distorted audio |
| Both together, lightly | Clips that need a small extra push | Moderate spoken-word cleanup after careful listening | Overprocessing that makes speech sound watery or metallic |
Use Voice Isolation first when speech is the priority
If your recording is a talking-head clip, interview, podcast video, or voiceover where the voice matters more than the environment, Voice Isolation is usually the better first move. Apple positions Final Cut Pro for iPad as having built-in voice isolation and background-noise reduction, and Apple’s podcast creator guidance also points to voice-focused cleanup for video podcasts.
In plain terms: if the noise is wrapped around the voice and you mainly want the person to sound clearer, start here.
Use Noise Removal first for hiss, buzz, or hum
If the problem sounds more like a steady layer sitting under the whole clip, Noise Removal is usually the better first move. Think:
- light microphone hiss
- constant room tone
- mild electrical buzz
- low-level fan or HVAC noise
That kind of sound is often easier to reduce than random outdoor bursts or hard reflections.
Best-for recommendations
- Best for podcast video on iPad: Voice Isolation first, then a small amount of Loudness if needed.
- Best for voiceovers with mild hiss: Noise Removal first, then stop early if consonants lose clarity.
- Best for social clips recorded indoors: Light Voice Isolation and headphone checking before export.
- Best for outdoor interviews with stubborn noise: Do a light in-app pass, then export and remove outdoor background noise after export.
- Best for projects that need deeper repair: Transfer the project from iPad to Mac Final Cut Pro for more advanced work.
Recommended speech-cleanup order on iPad
The safest workflow is to start light and avoid stacking aggressive processing. That is the missing step most quick tutorials skip.
- Listen to the raw clip first. Decide whether the main problem is speech masking, steady noise, echo, or distortion.
- Apply one tool first. Start with Voice Isolation for dialogue-heavy clips or Noise Removal for steady noise.
- Make a small adjustment. Do not jump straight to a heavy setting.
- Compare on and off. If the voice gets thinner or watery, back off.
- Add the second tool only if needed. Use a small amount rather than trying to force a full repair in-app.
- Check Loudness last. Loudness helps level perception, but it does not remove noise.
- Listen on headphones before export. Speaker playback on an iPad can hide artifacts.
If you hear swishing, metallic edges, or unnatural pumping, that is your sign to reduce the amount. We cover those artifacts in more detail in our guide on how to fix metallic voice after noise reduction.
Step by step: how to remove background noise in Final Cut Pro for iPad
1) Select the clip you want to clean
Tap the spoken-word clip in your timeline so the clip inspector applies to the right piece of media.
2) Open the Audio inspector
Tap Inspect, then open the Audio tab. Apple’s support documentation places enhancement controls here.
3) Open Enhancements
Inside Audio, find Enhancements. This is where Apple includes Voice Isolation, Noise Removal, and Loudness.
4) Decide whether the clip needs Voice Isolation or Noise Removal first
- Use Voice Isolation first for interviews, podcast video, voiceovers, and selfie clips where speech should come forward.
- Use Noise Removal first when the noise is steady and continuous.
5) Increase gently and monitor clarity
Bring the control up a little, then replay a section with sibilants and consonants. Those parts reveal damage fastest. If the voice loses detail, back off.
6) Use the second enhancement only if the first is not enough
You can combine the two, but lightly. Final Cut Pro for iPad is great for practical cleanup, not miracle restoration.
7) Listen between phrases
Noise may still be audible in pauses even after speech sounds better. That does not always mean the cleanup failed; it may mean the clip needs a separate exported-file cleanup workflow.
8) Export when the voice sounds natural, not when the noise is mathematically gone
For speech, natural voice quality matters more than forcing every trace of background sound out of the file.
How Detach Audio helps on iPad
Detach Audio is one of the most useful newer workflow additions for Final Cut Pro for iPad because it gives you more control over what you are fixing. Apple’s “What’s new” documentation confirms this capability.
Why it helps:
- You can clean only the soundtrack without changing the visual edit.
- You can replace noisy camera audio with a cleaner recording.
- You can export or swap audio-focused assets more easily.
- You can treat dialogue cleanup as its own step instead of fighting the video clip as one locked item.
Use Detach Audio when:
- the camera audio needs cleanup but the cut is already locked
- you want to replace bad on-camera sound with a lav or external recording
- you plan to export audio for separate treatment, then re-import it
If your goal is speech cleanup only, detaching the audio can make the workflow feel much less cramped on iPad.
What Final Cut Pro for iPad handles well
Based on Apple’s built-in enhancement positioning and the practical limits of in-app speech cleanup, Final Cut Pro for iPad is a good fit for:
- steady hiss
- light buzz
- mild hum
- moderate room noise around speech
- general indoor background sound in voice clips
That makes it useful for:
- video podcasts
- social videos
- creator voiceovers
- interviews recorded in acceptable but imperfect rooms
- mobile edits where speed matters more than forensic audio repair
If you also want to package the cleaned video for more channels afterward, you can add subtitles with Best AI Captions, localize it with Translate Dub, and schedule posts or team distribution through Mallary.ai.
What it handles poorly
This is where many search results are too vague. Final Cut Pro for iPad can help, but it has limits. It usually struggles when the recording problem is more than simple background noise.
- Heavy wind blasts: wind is irregular and often damages speech itself.
- Strong room echo: reflections are baked into the voice, not just sitting behind it.
- Clipping or distortion: once the voice is distorted, denoise will not truly restore it.
- Overlapping voices: if two speakers are talking at once, neither tool can cleanly separate them.
- Chaotic street noise: honks, sudden engines, and crowd bursts change too much moment to moment.
In those cases, it is often smarter to stop early and clean the exported MP4 or WAV in SimpleClean rather than overprocess the timeline audio.
When to export and clean the file separately
A good rule is this: if a light pass improves the clip but a stronger pass hurts the voice, switch workflows.
That is the point where separate cleanup often wins, especially for:
- outdoor interviews
- social clips recorded in noisy spaces
- podcast videos with persistent room noise
- voiceovers with stubborn background sound
Instead of forcing everything inside the iPad timeline, export the file and run cleanup on the finished media. You can do that with the full video file or with exported audio, depending on how you want to finish the project.
SimpleClean is the natural next step when Final Cut Pro for iPad gets you partway there but not all the way. It is especially useful when the exported file still has background noise between phrases or when in-app denoise starts making speech sound artificial.
Can you move a Final Cut Pro for iPad project to Mac?
Yes. Apple provides a workflow to import into Final Cut Pro for Mac from Final Cut Pro for iPad. That gives you a handoff path when the mobile edit is fine but the audio work needs a desktop environment.
This is the best option when:
- the project is already built on iPad
- you want to keep editing structure intact
- the audio cleanup needs to go beyond quick inspector enhancements
If your main goal is simply to fix the final audio fast, exporting the file for separate cleanup may still be quicker than moving the entire project.
Supported formats relevant to cleanup workflows
Apple maintains a supported media formats page for Final Cut Pro for iPad. Because supported formats can change over time, the safest approach is to check Apple’s current list before import-heavy workflows. For this topic, the important takeaway is that Apple documents supported audio and video media formats for Final Cut Pro for iPad, which matters if you want to:
- import source media for editing
- detach and swap audio
- export a file for cleanup elsewhere
- move projects between iPad and Mac workflows
For stubborn noise cases, creators commonly think in terms of exporting an MP4 video file or an audio-only file such as WAV for cleanup, then bringing the result back into the edit if needed.
Troubleshooting
The voice sounds metallic, watery, or robotic
You have probably pushed Voice Isolation, Noise Removal, or both too far. Reduce the amount and re-check the clip on headphones. More is not better once speech texture starts breaking.
The slider seems to hurt clarity
That usually means the noise is too tangled with the voice for aggressive in-app cleanup. Try the other enhancement first, or keep the setting lighter and use a separate exported-file cleanup workflow.
Noise is still audible between phrases
This is common. Voice-focused cleanup often improves intelligibility more than it erases every bit of room sound. If the gaps still bother you in the finished edit, export the file and clean it separately.
The result is uneven across clips
Different recordings need different amounts. Do not copy one heavy setting to every clip. Treat each source based on its own noise profile.
Is Final Cut Pro for iPad good enough for podcast video audio?
Often, yes, for reasonably recorded spoken-word content. Apple’s podcast creator materials specifically position Final Cut Pro as relevant to video podcasts, including built-in voice isolation and background-noise reduction. But if the room is very echoey or the raw audio is rough, you may still need a stronger cleanup step after export.
Final verdict
Final Cut Pro for iPad is genuinely useful for fast speech cleanup on iPad. Its built-in Voice Isolation and Noise Removal controls are easy to find and effective on many everyday creator problems, especially moderate background noise around dialogue. The best workflow is to start with the right first tool, use light settings, avoid overstacking, and listen on headphones before you export.
But it is not a miracle fixer. If you are dealing with wind, echo, clipping, competing voices, or noisy outdoor recordings, do a light pass in-app, then clean the exported file online rather than forcing the iPad tools too far.
Once your audio is clean, you can add captions with Best AI Captions, create multilingual versions with Translate Dub, and publish across channels with Mallary.ai if you are turning one cleaned edit into a broader content workflow.
Sources and further reading
- Enhance audio in Final Cut Pro for iPad – Apple Support - Primary source for where Audio inspector enhancements live and confirmation of Voice Isolation, Noise Removal, and Loudness controls.
- Final Cut Pro for video podcasts – Apple Podcasts for Creators - Supports podcast/video-podcast relevance and confirms built-in voice isolation and background-noise reduction context.
- Final Cut Pro Comes to iPad – App Store story - Supports Apple’s positioning of Voice Isolation on iPad and the iPad-to-Mac handoff context.
- What’s new in Final Cut Pro for iPad – Apple Support - Used to support the mention of Detach Audio as a newer workflow capability on iPad.
- Import into Final Cut Pro for Mac from Final Cut Pro for iPad – Apple Support - Supports the project transfer section for users who need deeper audio work on Mac.
- Media formats supported in Final Cut Pro for iPad – Apple Support - Primary source for supported media formats relevant to import/export cleanup workflows.